

How to Control Cord Clutter
Somewhere in your house, there’s probably a drawer, bin, or box filled with mystery cords. You don’t know what half of them go to, but you also don’t want to throw any of them away because you’re worried that the second you do, you’ll discover you needed one!
If you want to finally organize your cord clutter, you might think the first step is finding the perfect container. That’s actually the mistake a lot of people make. Before we even think about storage, we need to figure out what those cords are, what they’re used for, which ones you actually need, and which ones you can safely get rid of.

Once you do that, organizing them becomes so much easier! Instead of having a beautifully organized box of mystery cords, you’ll have a collection of cords you actually use, and you’ll know exactly what to grab when you need one. Keep reading, or watch the video here to see how to finally get those cords organized!
First, Learn What Your Cords Actually Are
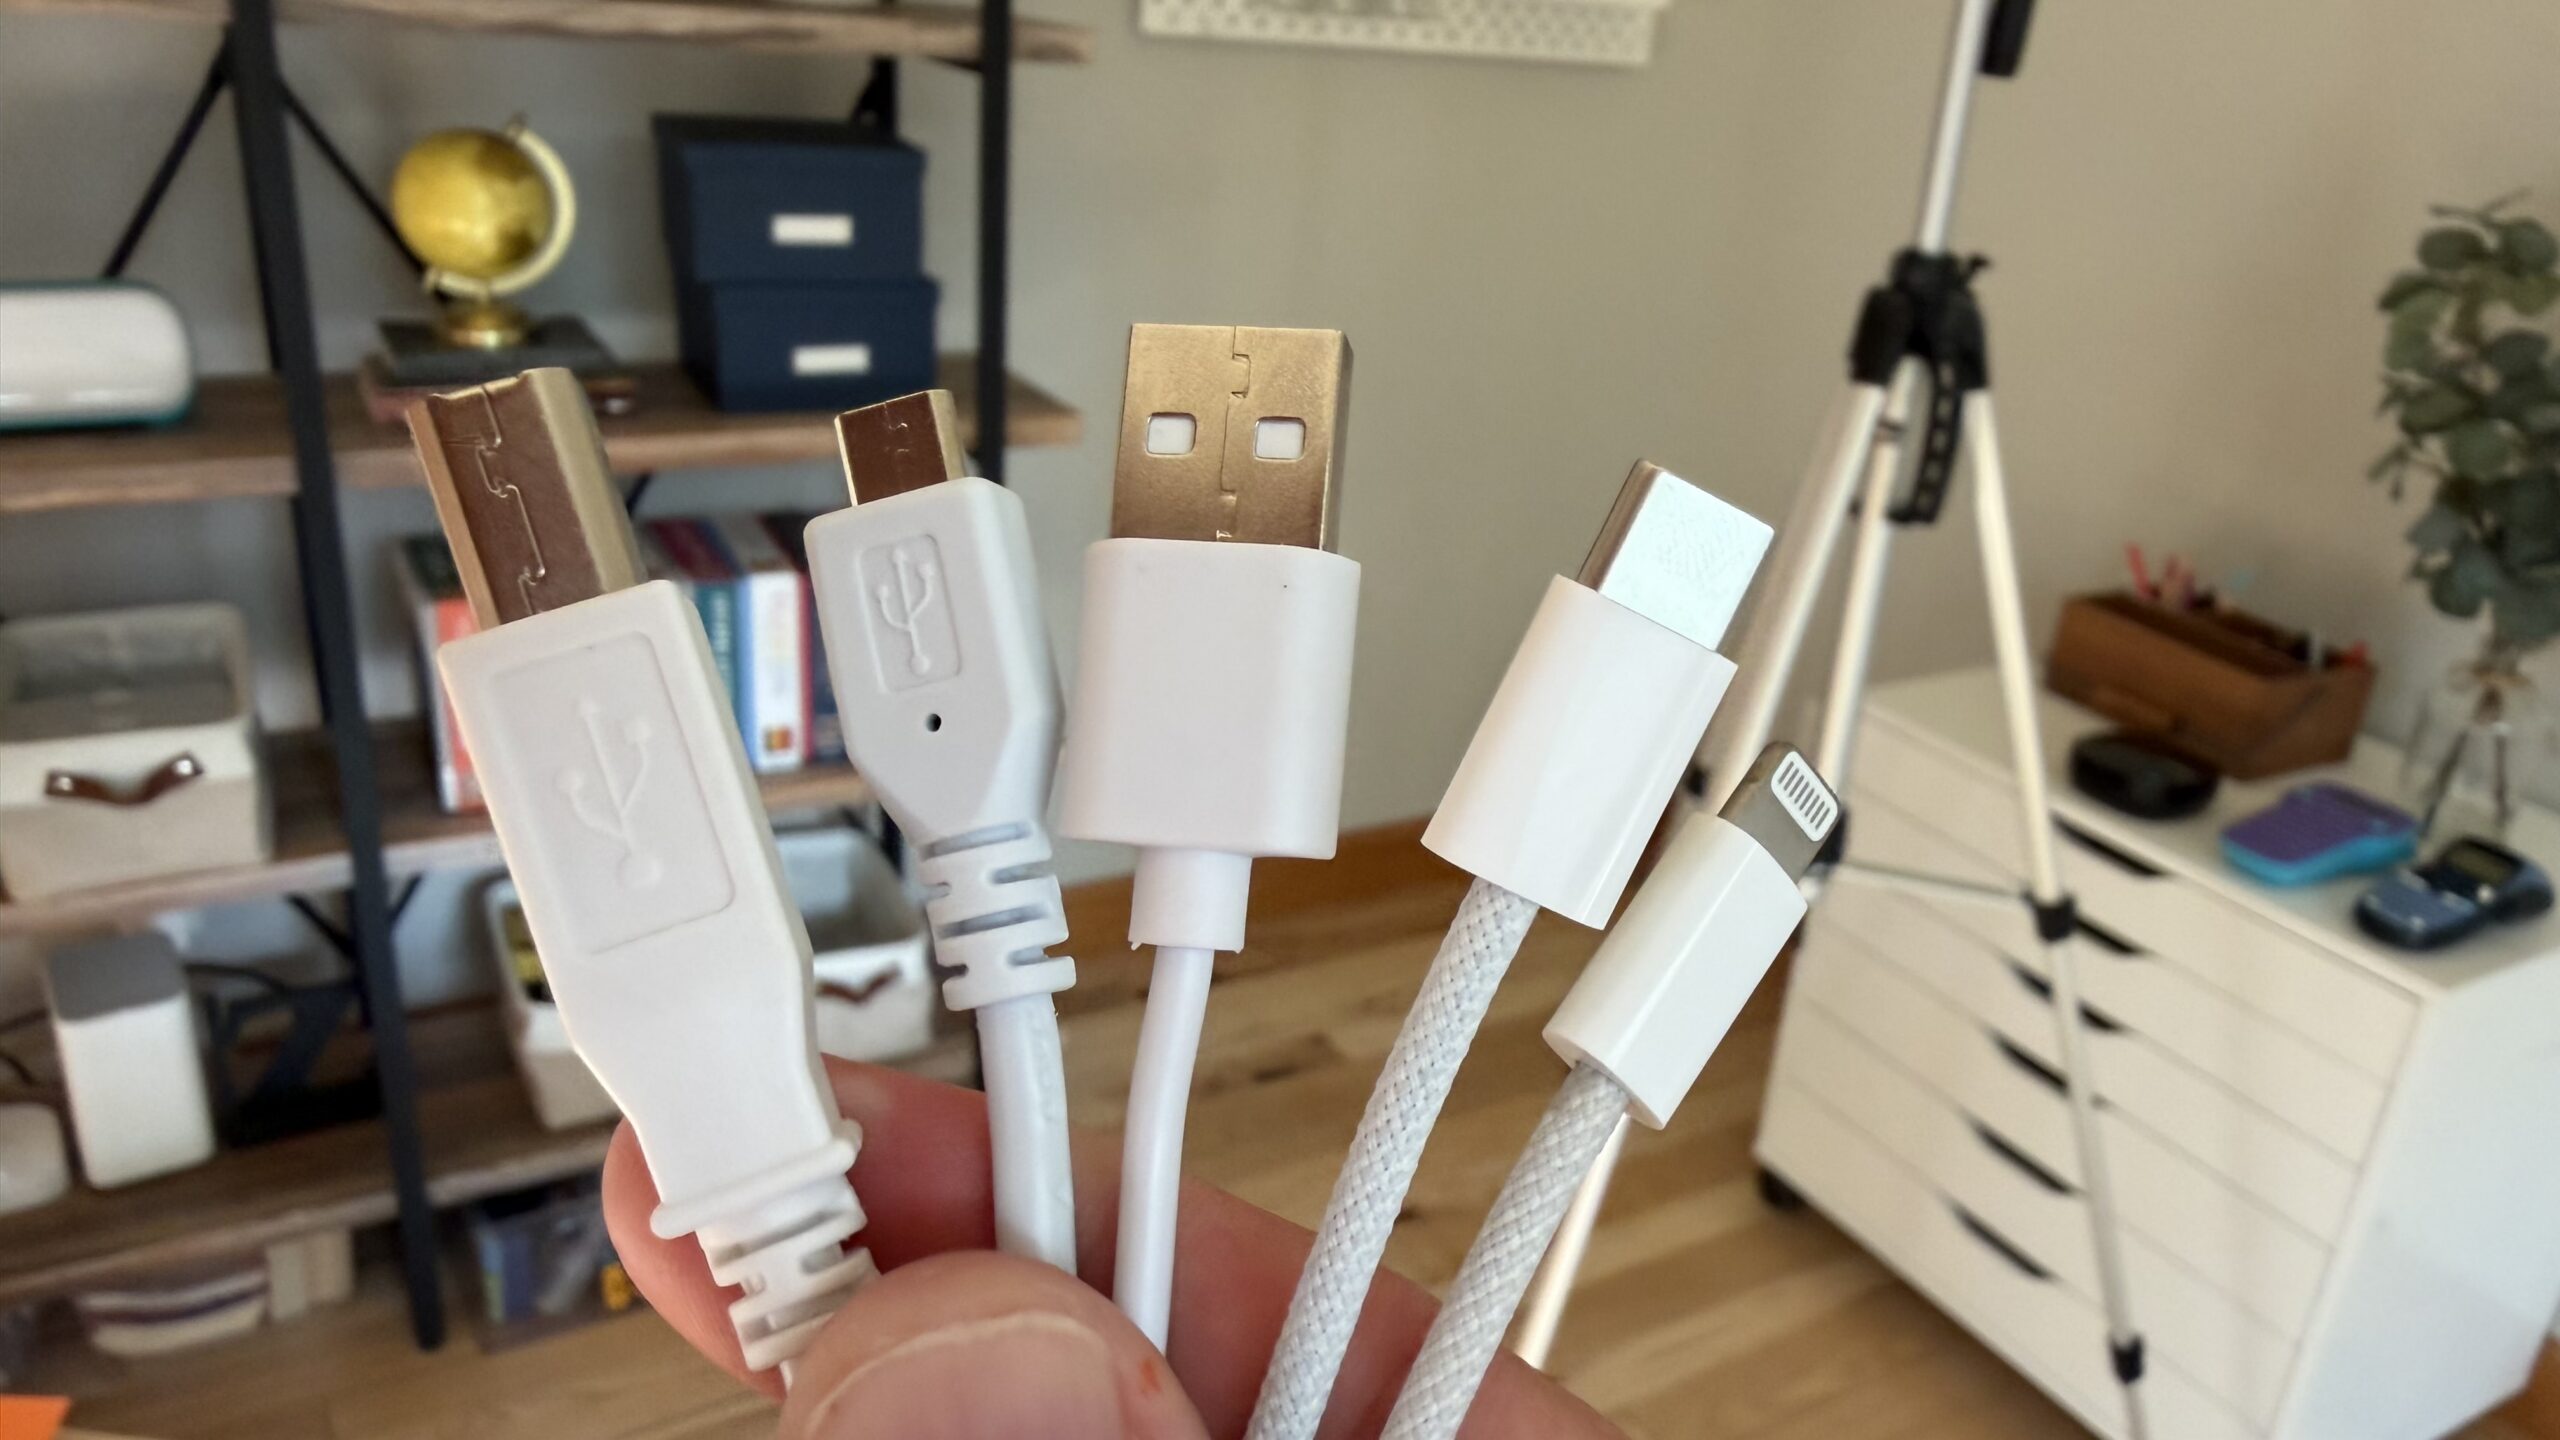
If you already know the difference between USB-A and USB-C and can immediately recognize a Lightning cable, you can probably skip this part. But if those names sound like another language, learning just a few basic cord types will make decluttering your collection so much easier.
I’ve also created a free Cord Identification Cheat Sheet with pictures of the different cord types, their names, and what they’re typically used for. You definitely don’t need to memorize all of this. Print out the cheat sheet, keep it beside you while you’re sorting, and use it to identify what you have.
Let’s start with the most common types you’re likely to find.
Power Bricks or Wall Chargers
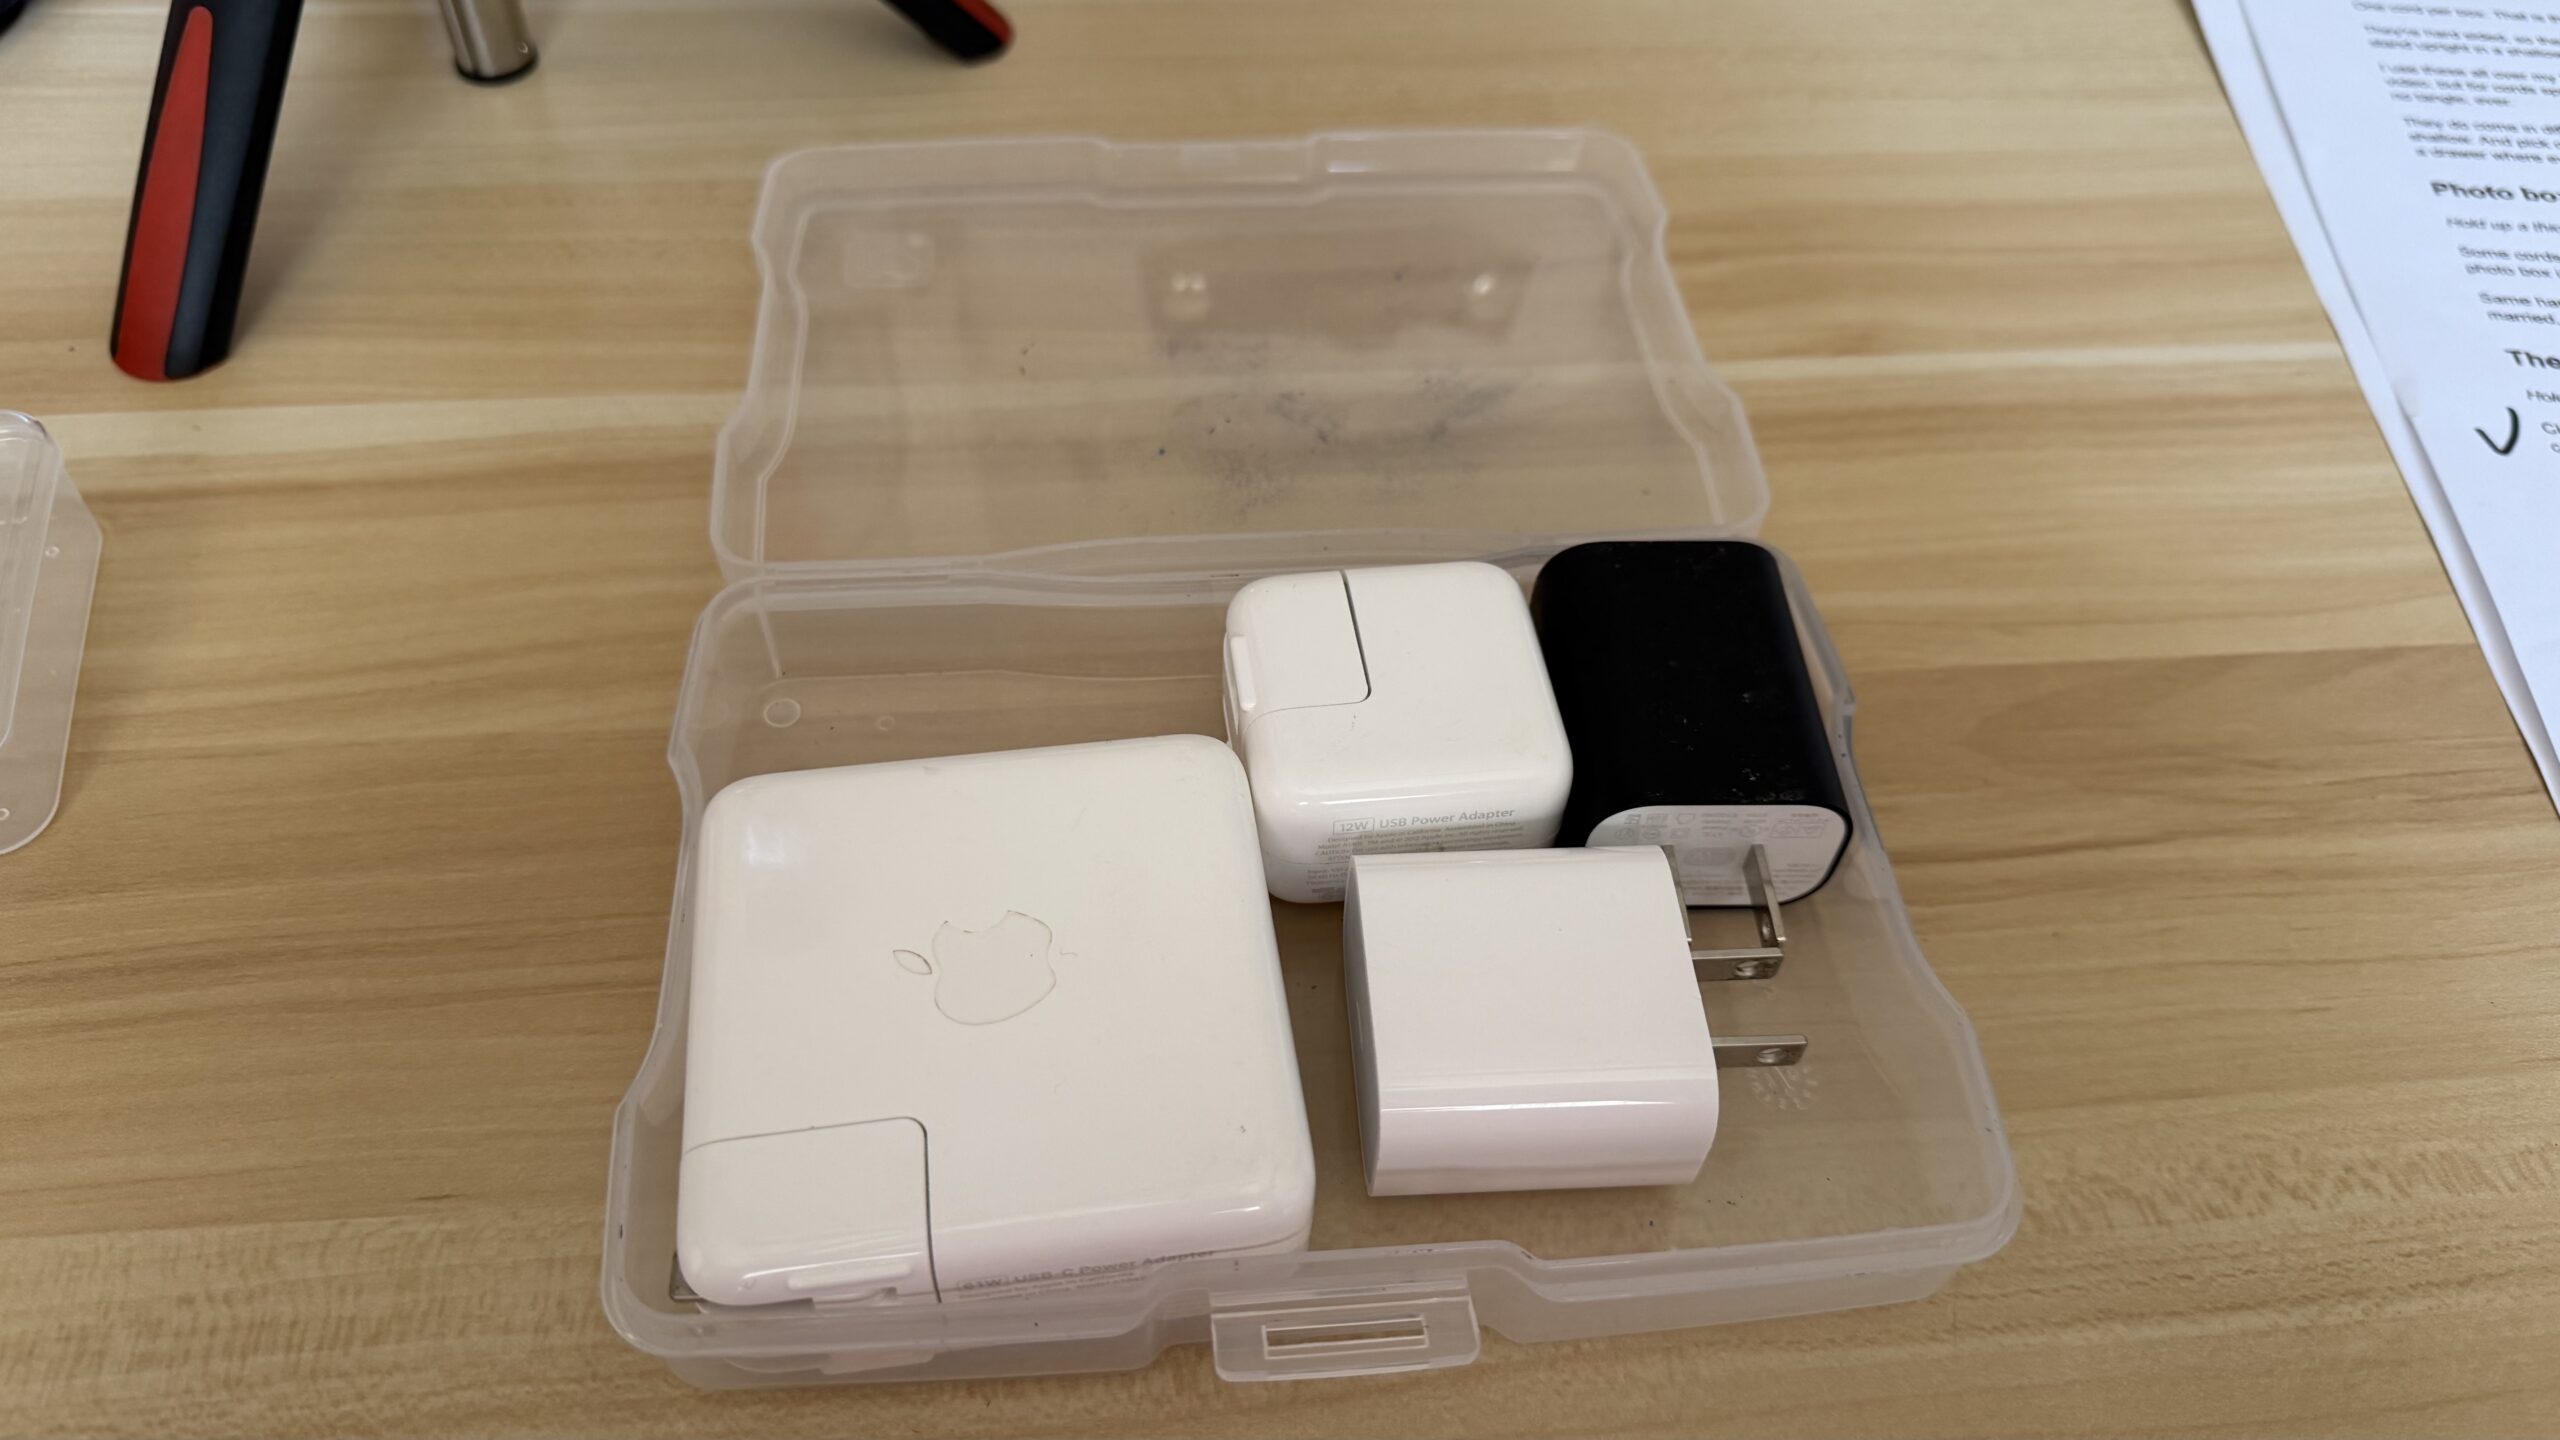
Before we get to the actual cords, you’ll probably have some power bricks, also called wall chargers. These plug directly into the wall, and then your charging cable plugs into the other side.
The two most common types you’ll see have either a USB-A or USB-C port. This is important because when you’re deciding which cords and chargers to keep, you want to make sure the ends of the cords you own actually work with the power bricks you have.
USB-A
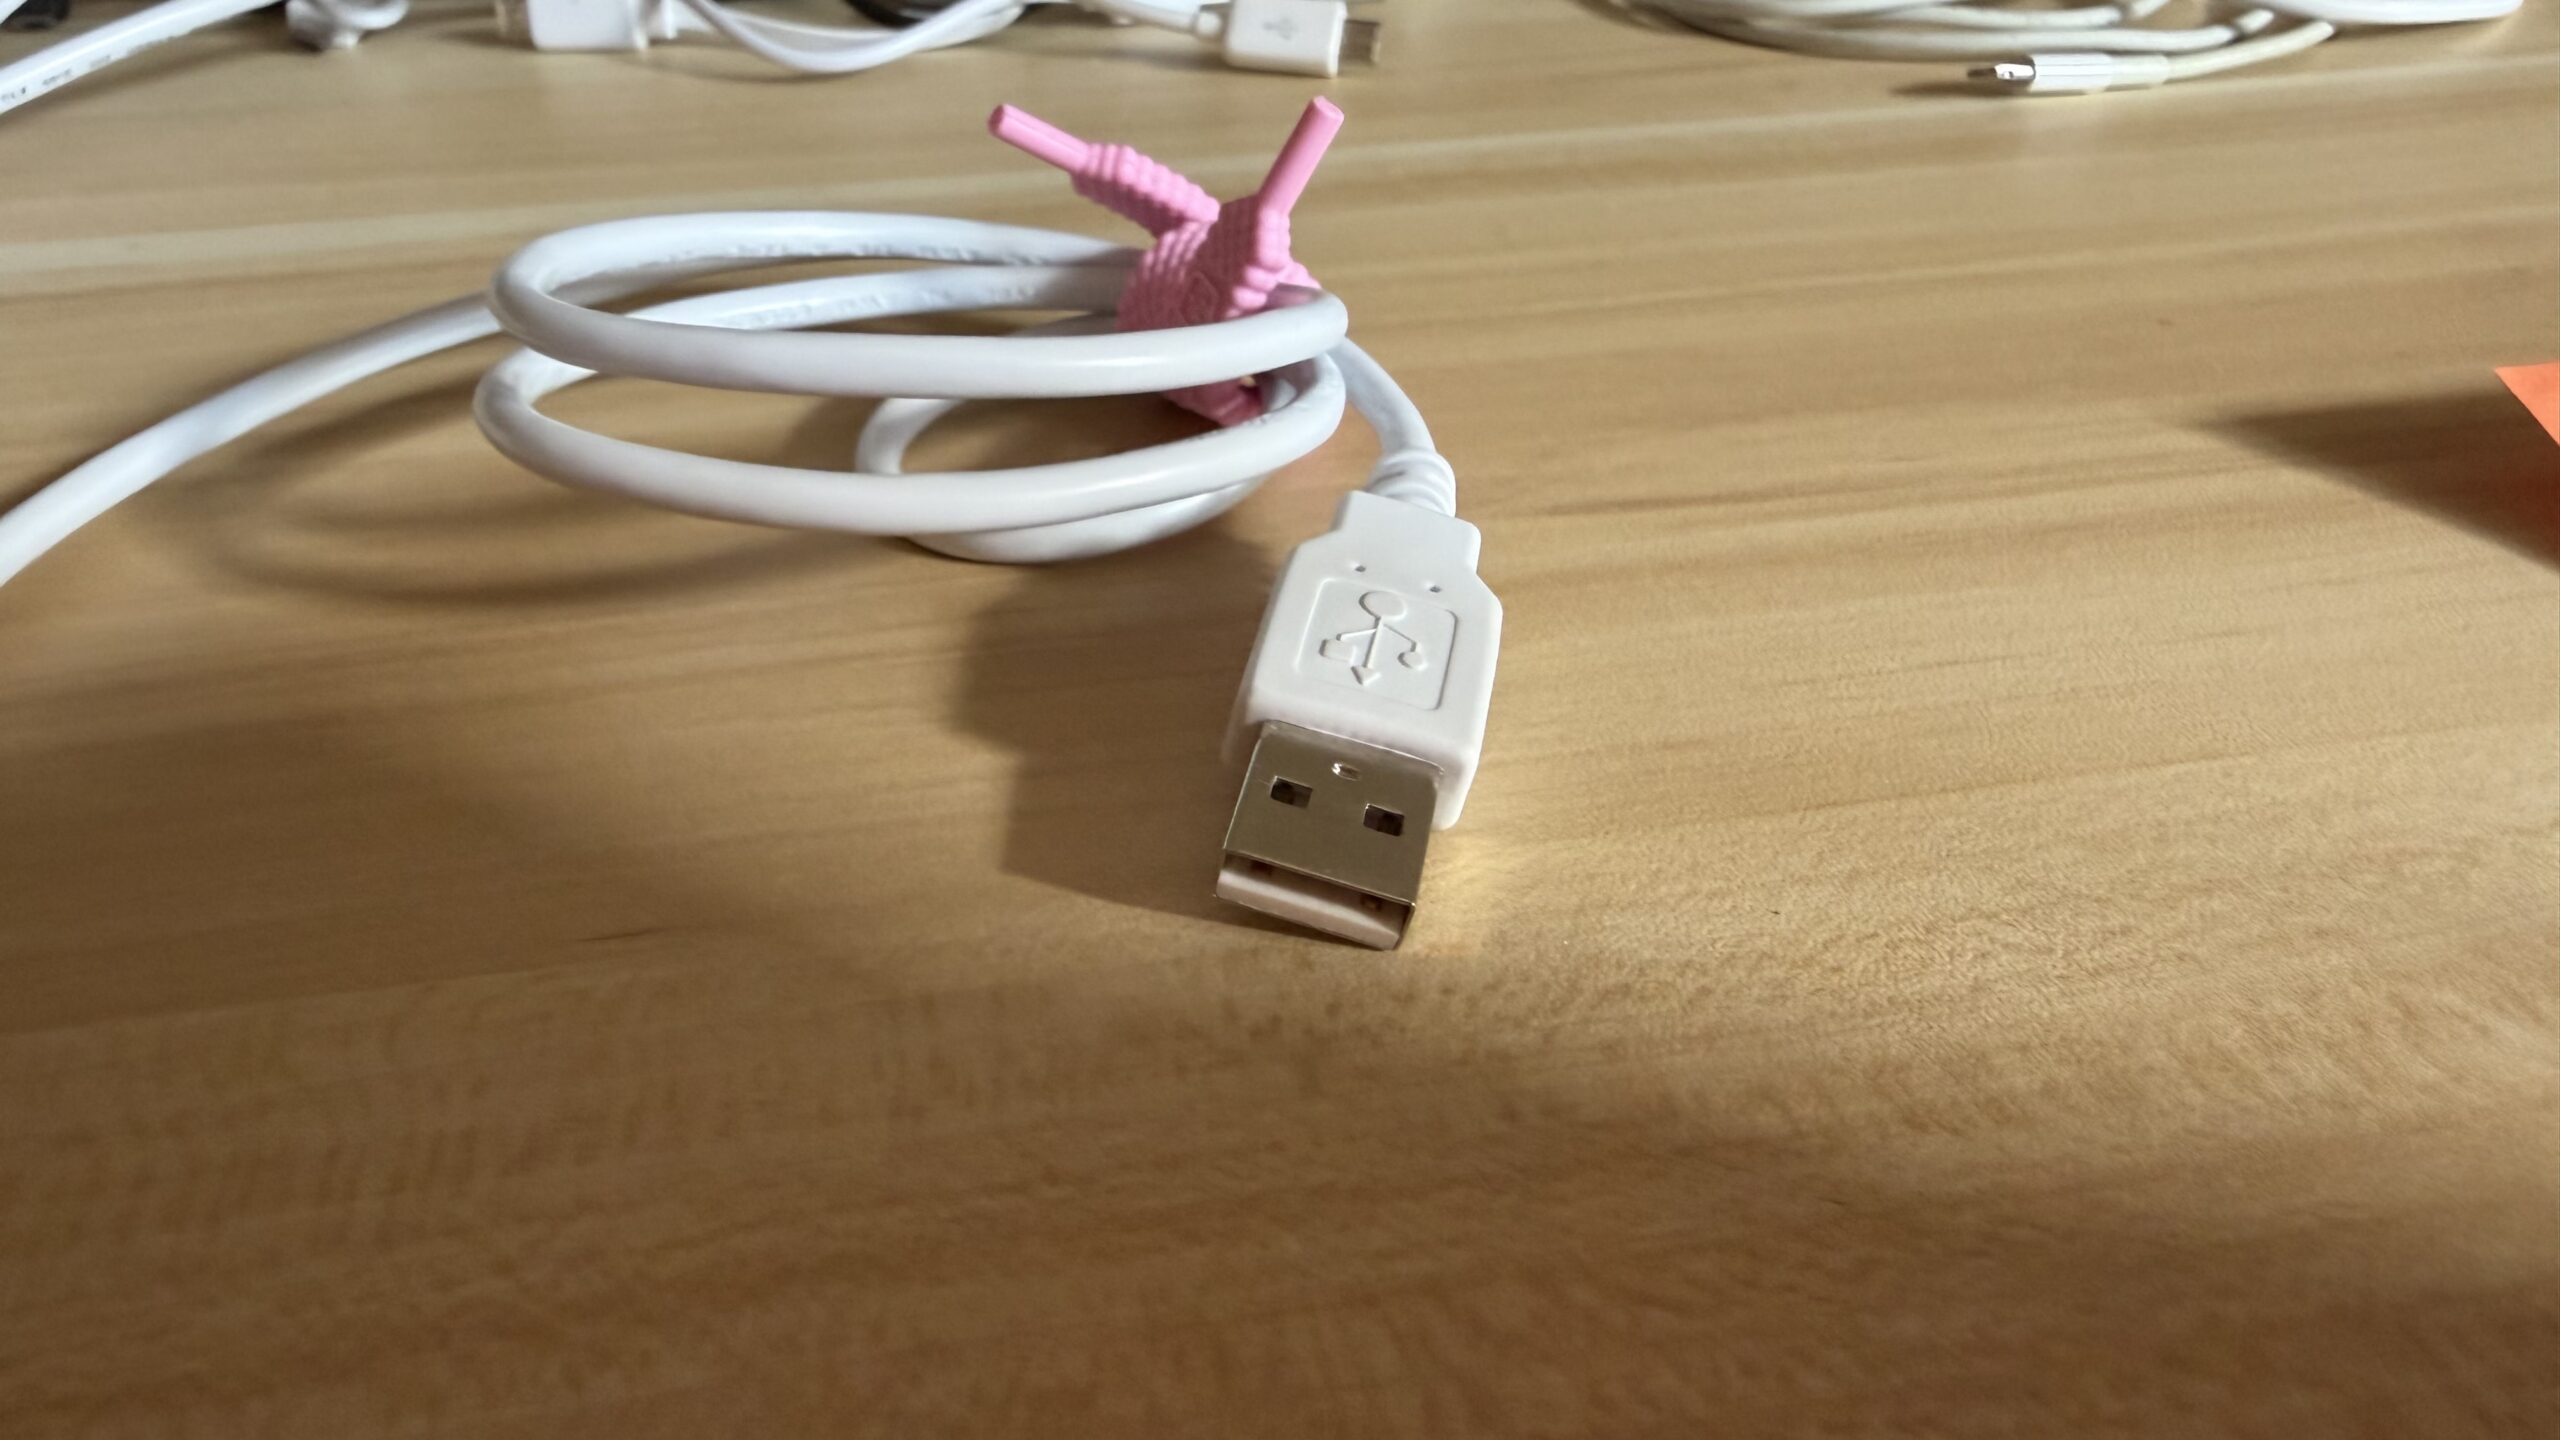
USB-A has been around for years and is probably the cord connection you’ll recognize most easily. It’s a small rectangle, and unlike some newer connectors, it only plugs in one direction. If you’ve ever tried three times to plug something into the back of your computer before finally getting it right, there’s a good chance it was USB-A.
You’ll still find USB-A ports on computers, TVs, wall chargers, cars, hotel outlets, and all sorts of other places. Even if many of your newer devices have moved to USB-C, you probably still have plenty of USB-A connections around your house.
USB-C
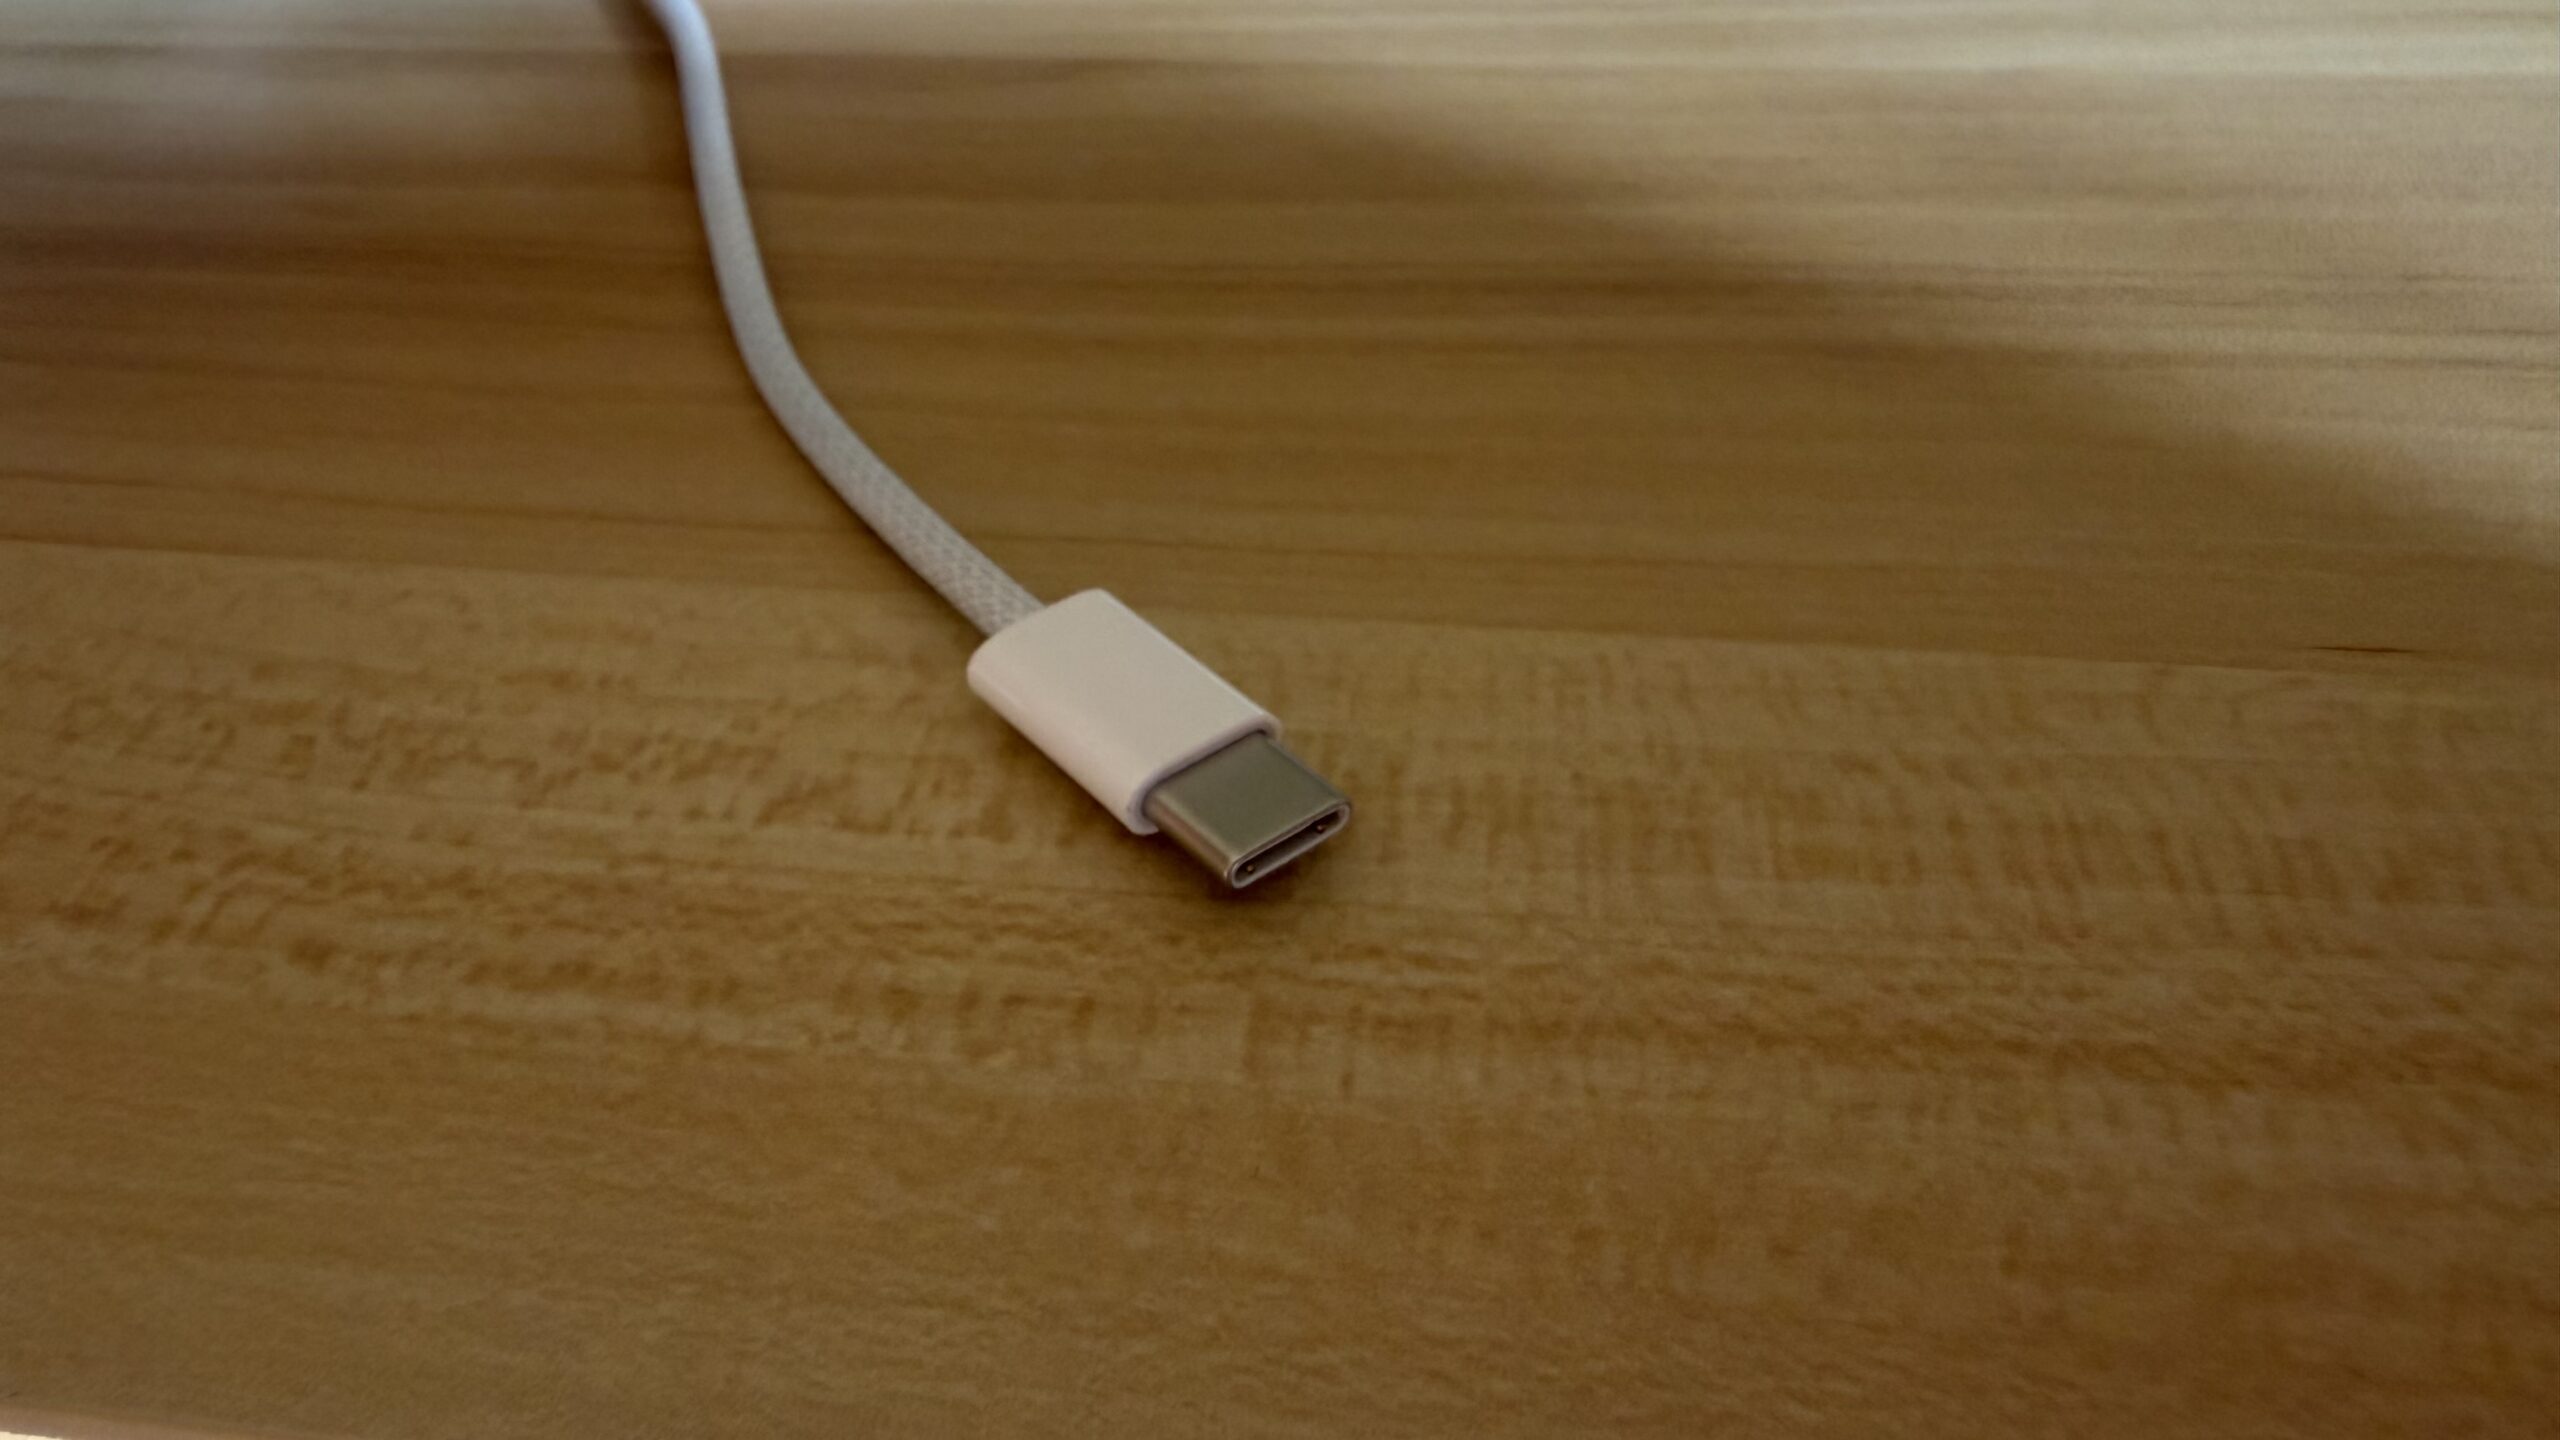
USB-C has become incredibly common on newer electronics. Unlike USB-A, it’s reversible, which means you can plug it in either direction. No more flipping the cord over three times before somehow plugging it in exactly the way you tried the first time.
USB-C is used on modern phones, tablets, headphones, rechargeable electronics, and all sorts of small devices. I even have a rechargeable sound machine and a kitchen scale that use USB-C. If you buy a small rechargeable electronic device today, there’s a good chance this is how you’ll charge it.
One thing that can make cord identification a little confusing is that a cord can have two different ends. You might have USB-A on one end and USB-C on the other, or USB-C on both ends. That’s why I recommend identifying and labeling cords by both ends instead of simply calling something a “USB-C cord.”
Lightning
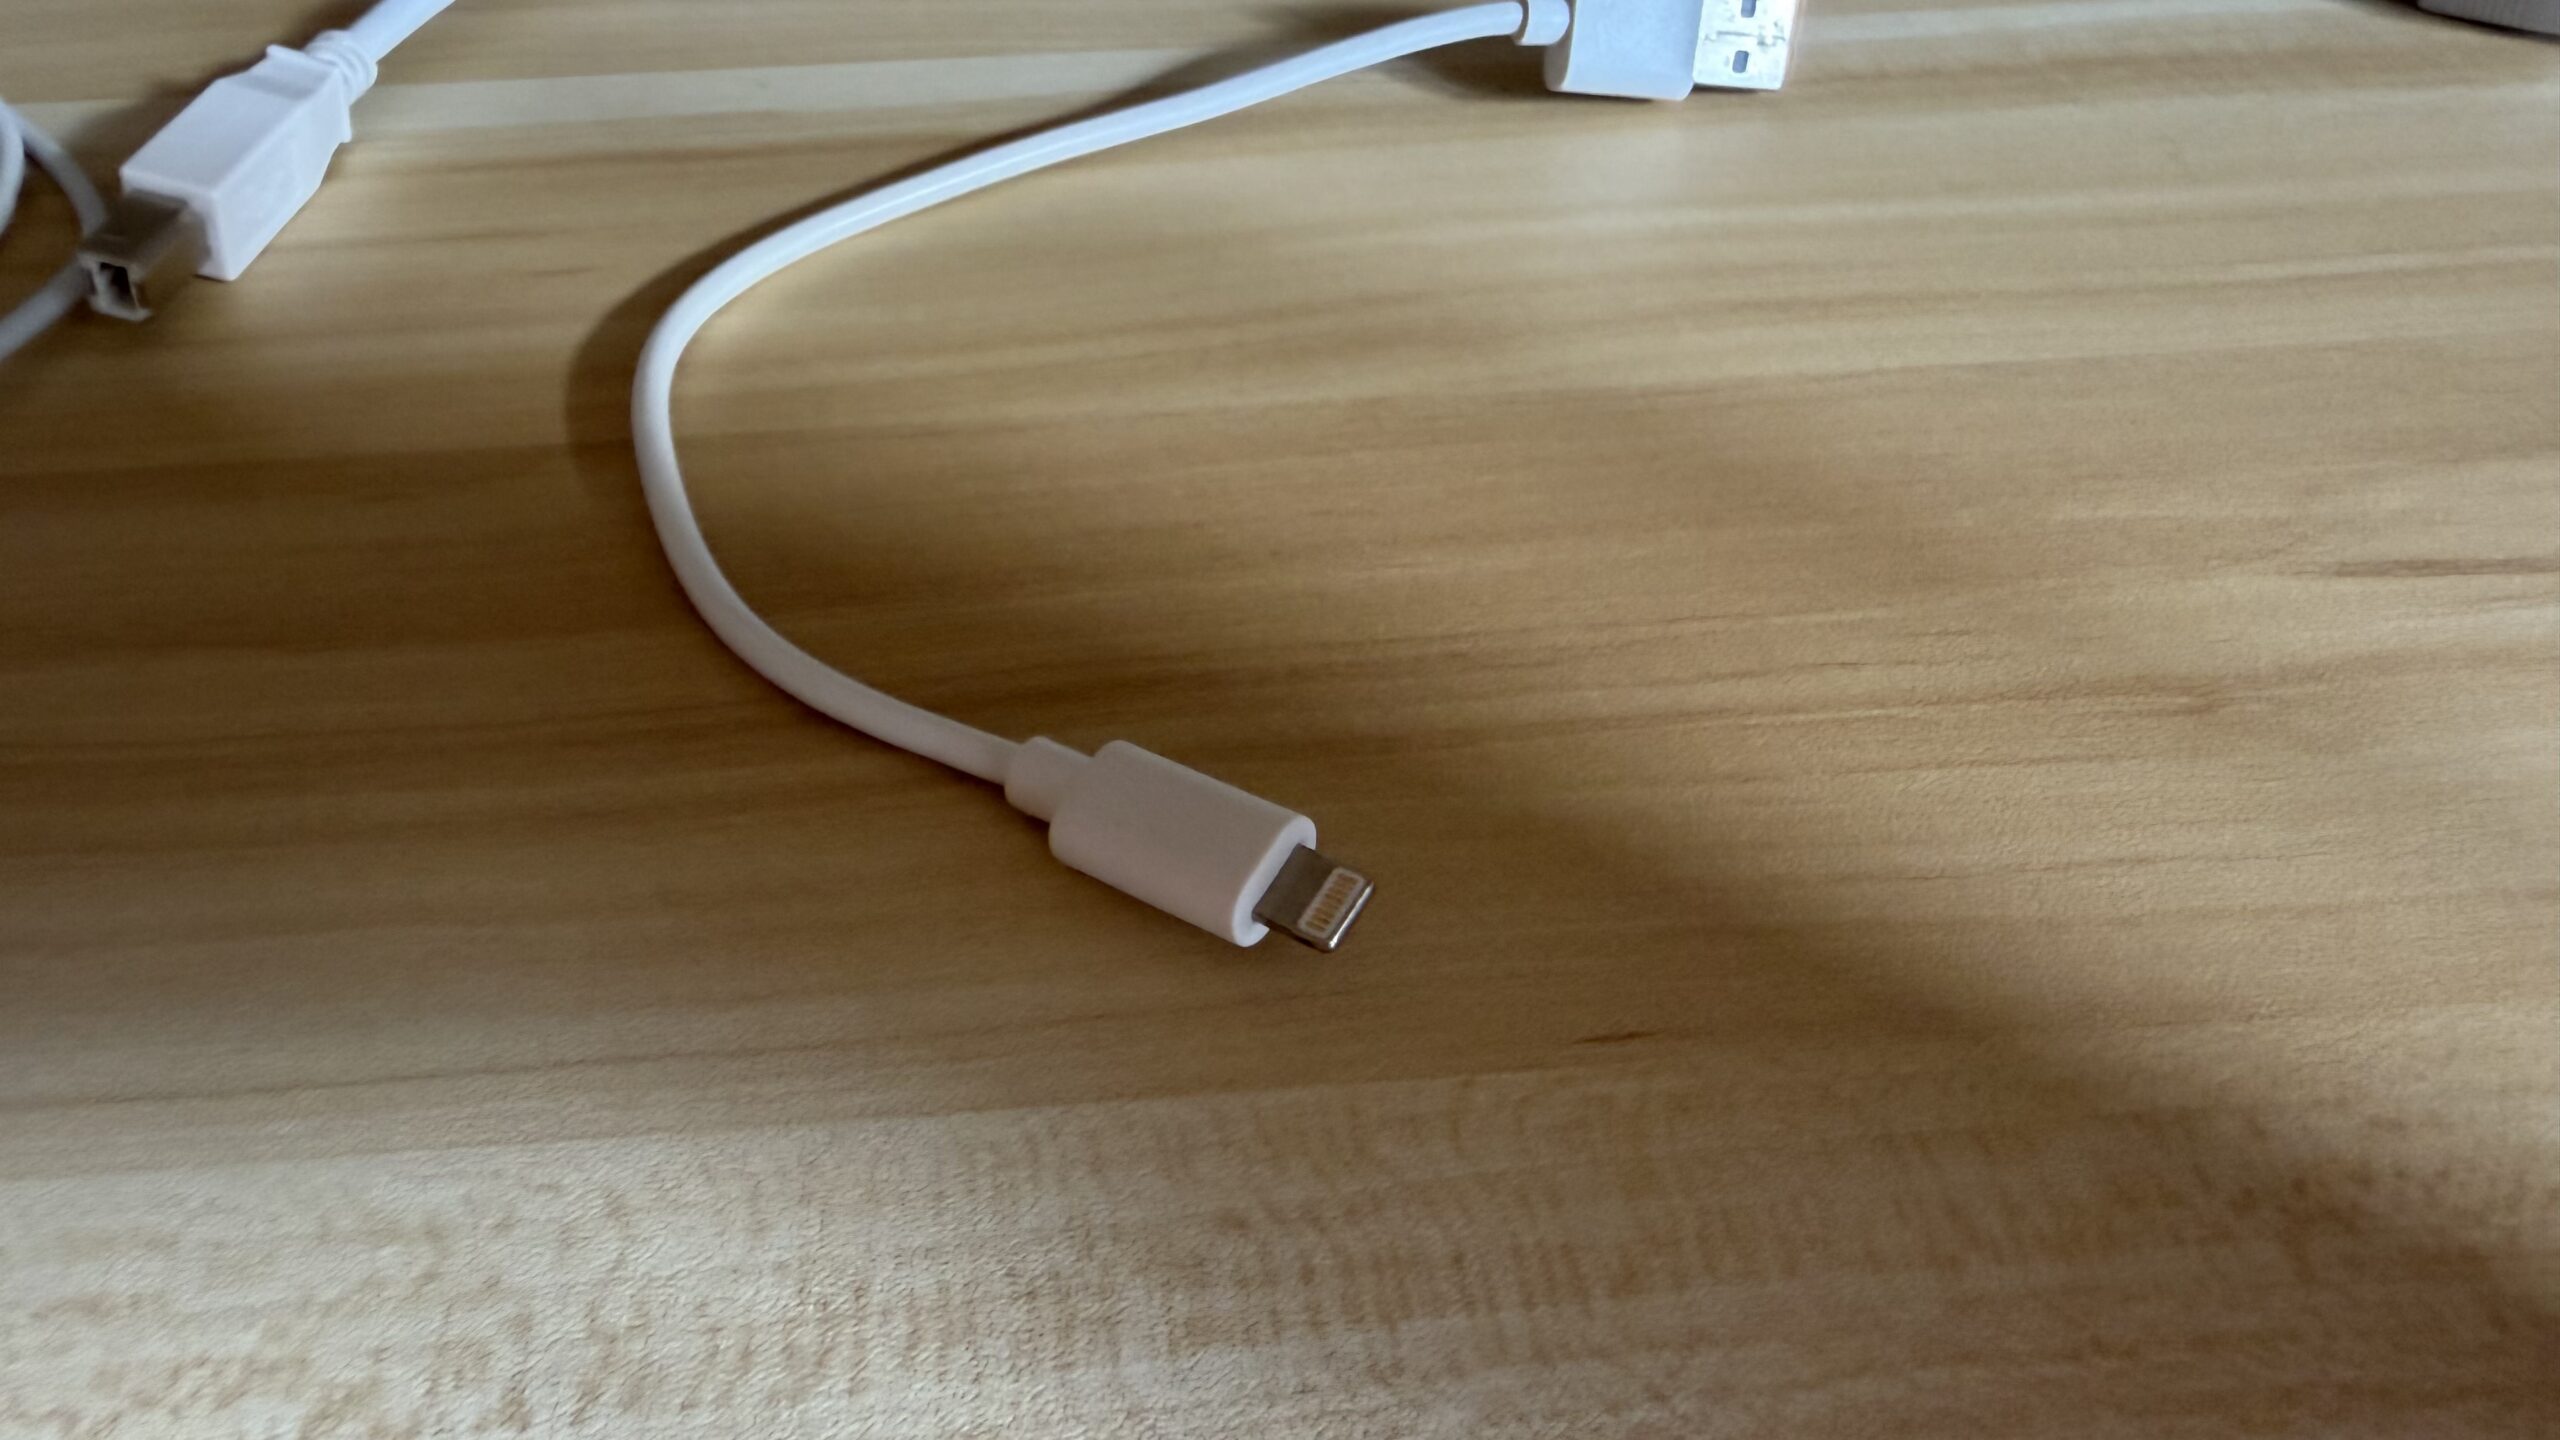
Lightning cables are Apple’s proprietary connector that you’ll find on older iPhones and other Apple products. They look somewhat similar to USB-C, but they’re flatter and narrower, and you can see the small pins on the connector.
Newer Apple devices have largely moved toward USB-C, but plenty of Lightning devices are still in use. In my house, I still need Lightning cables for things like my Magic Mouse and keyboard. Until those devices are replaced, the cords need to stay.
Micro USB
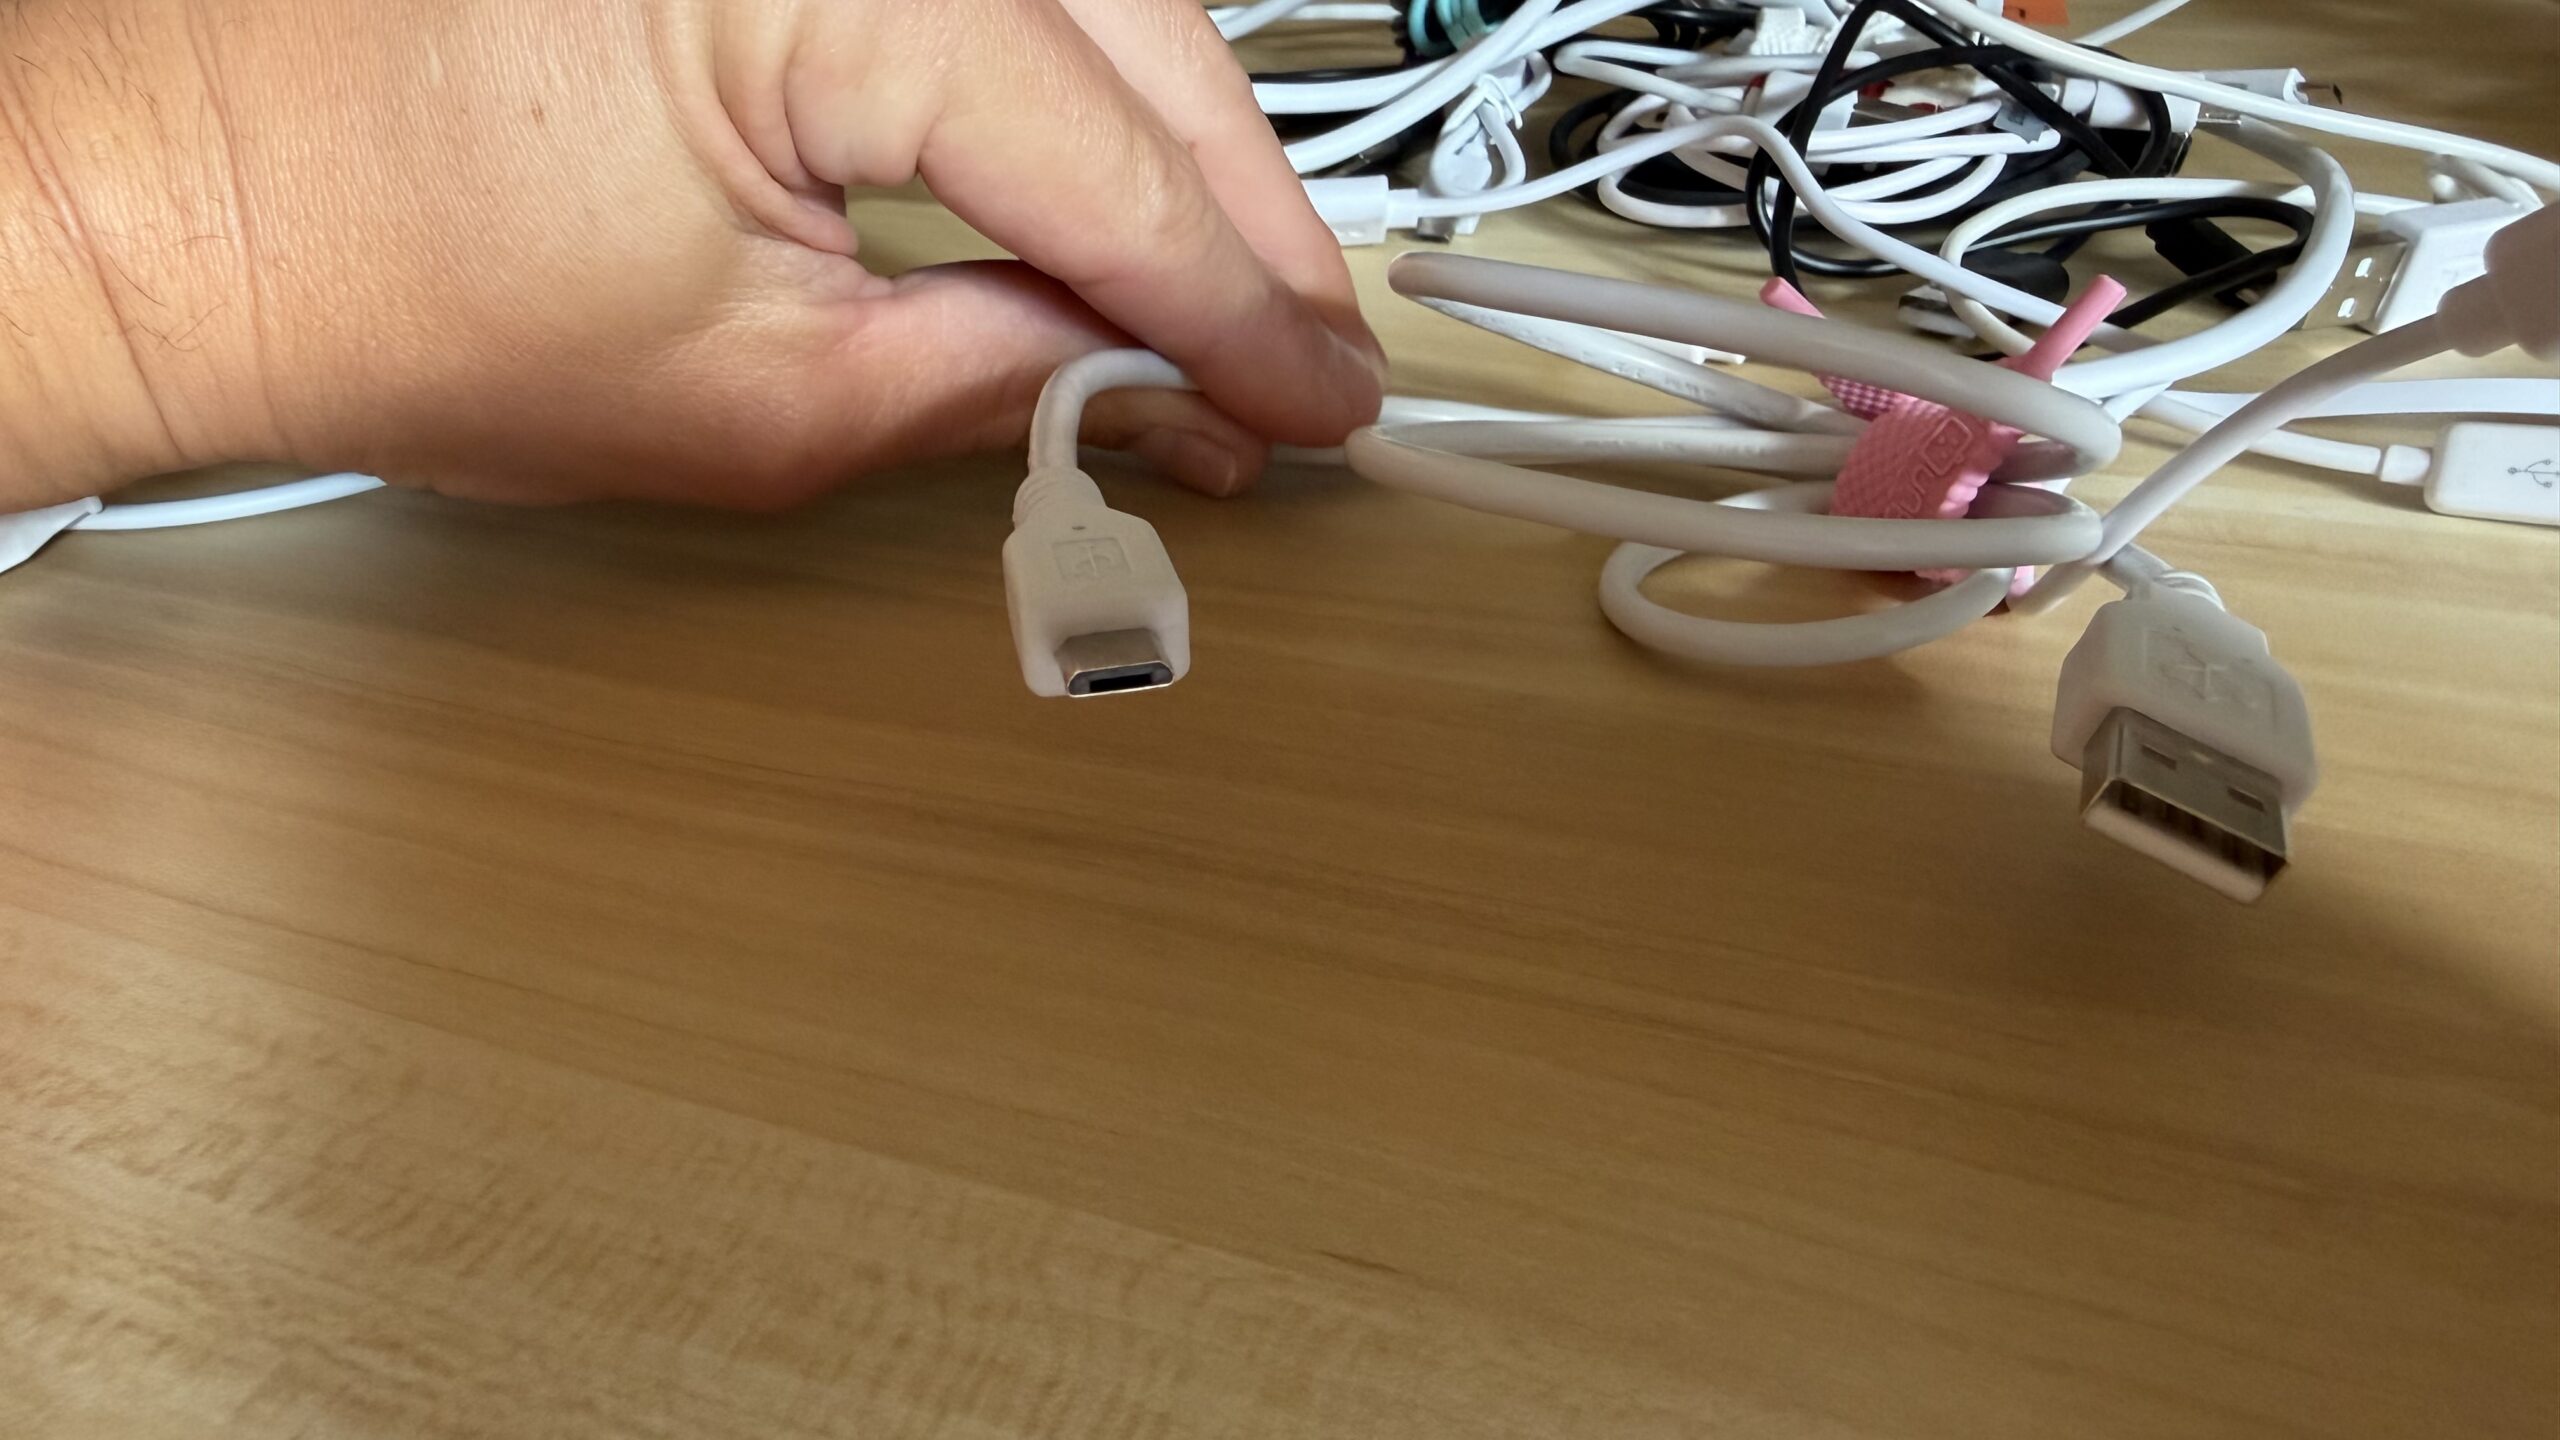
Micro USB can be a little trickier to identify because it looks somewhat similar to USB-C. If you put them side by side, however, Micro USB is narrower and has more of a trapezoid shape rather than the symmetrical shape of USB-C.
This connection was extremely common for years, and you may still have devices that use it. My older Kindle uses Micro USB, and you’ll also find it on older Android devices, Bluetooth speakers, and other electronics.
USB-B
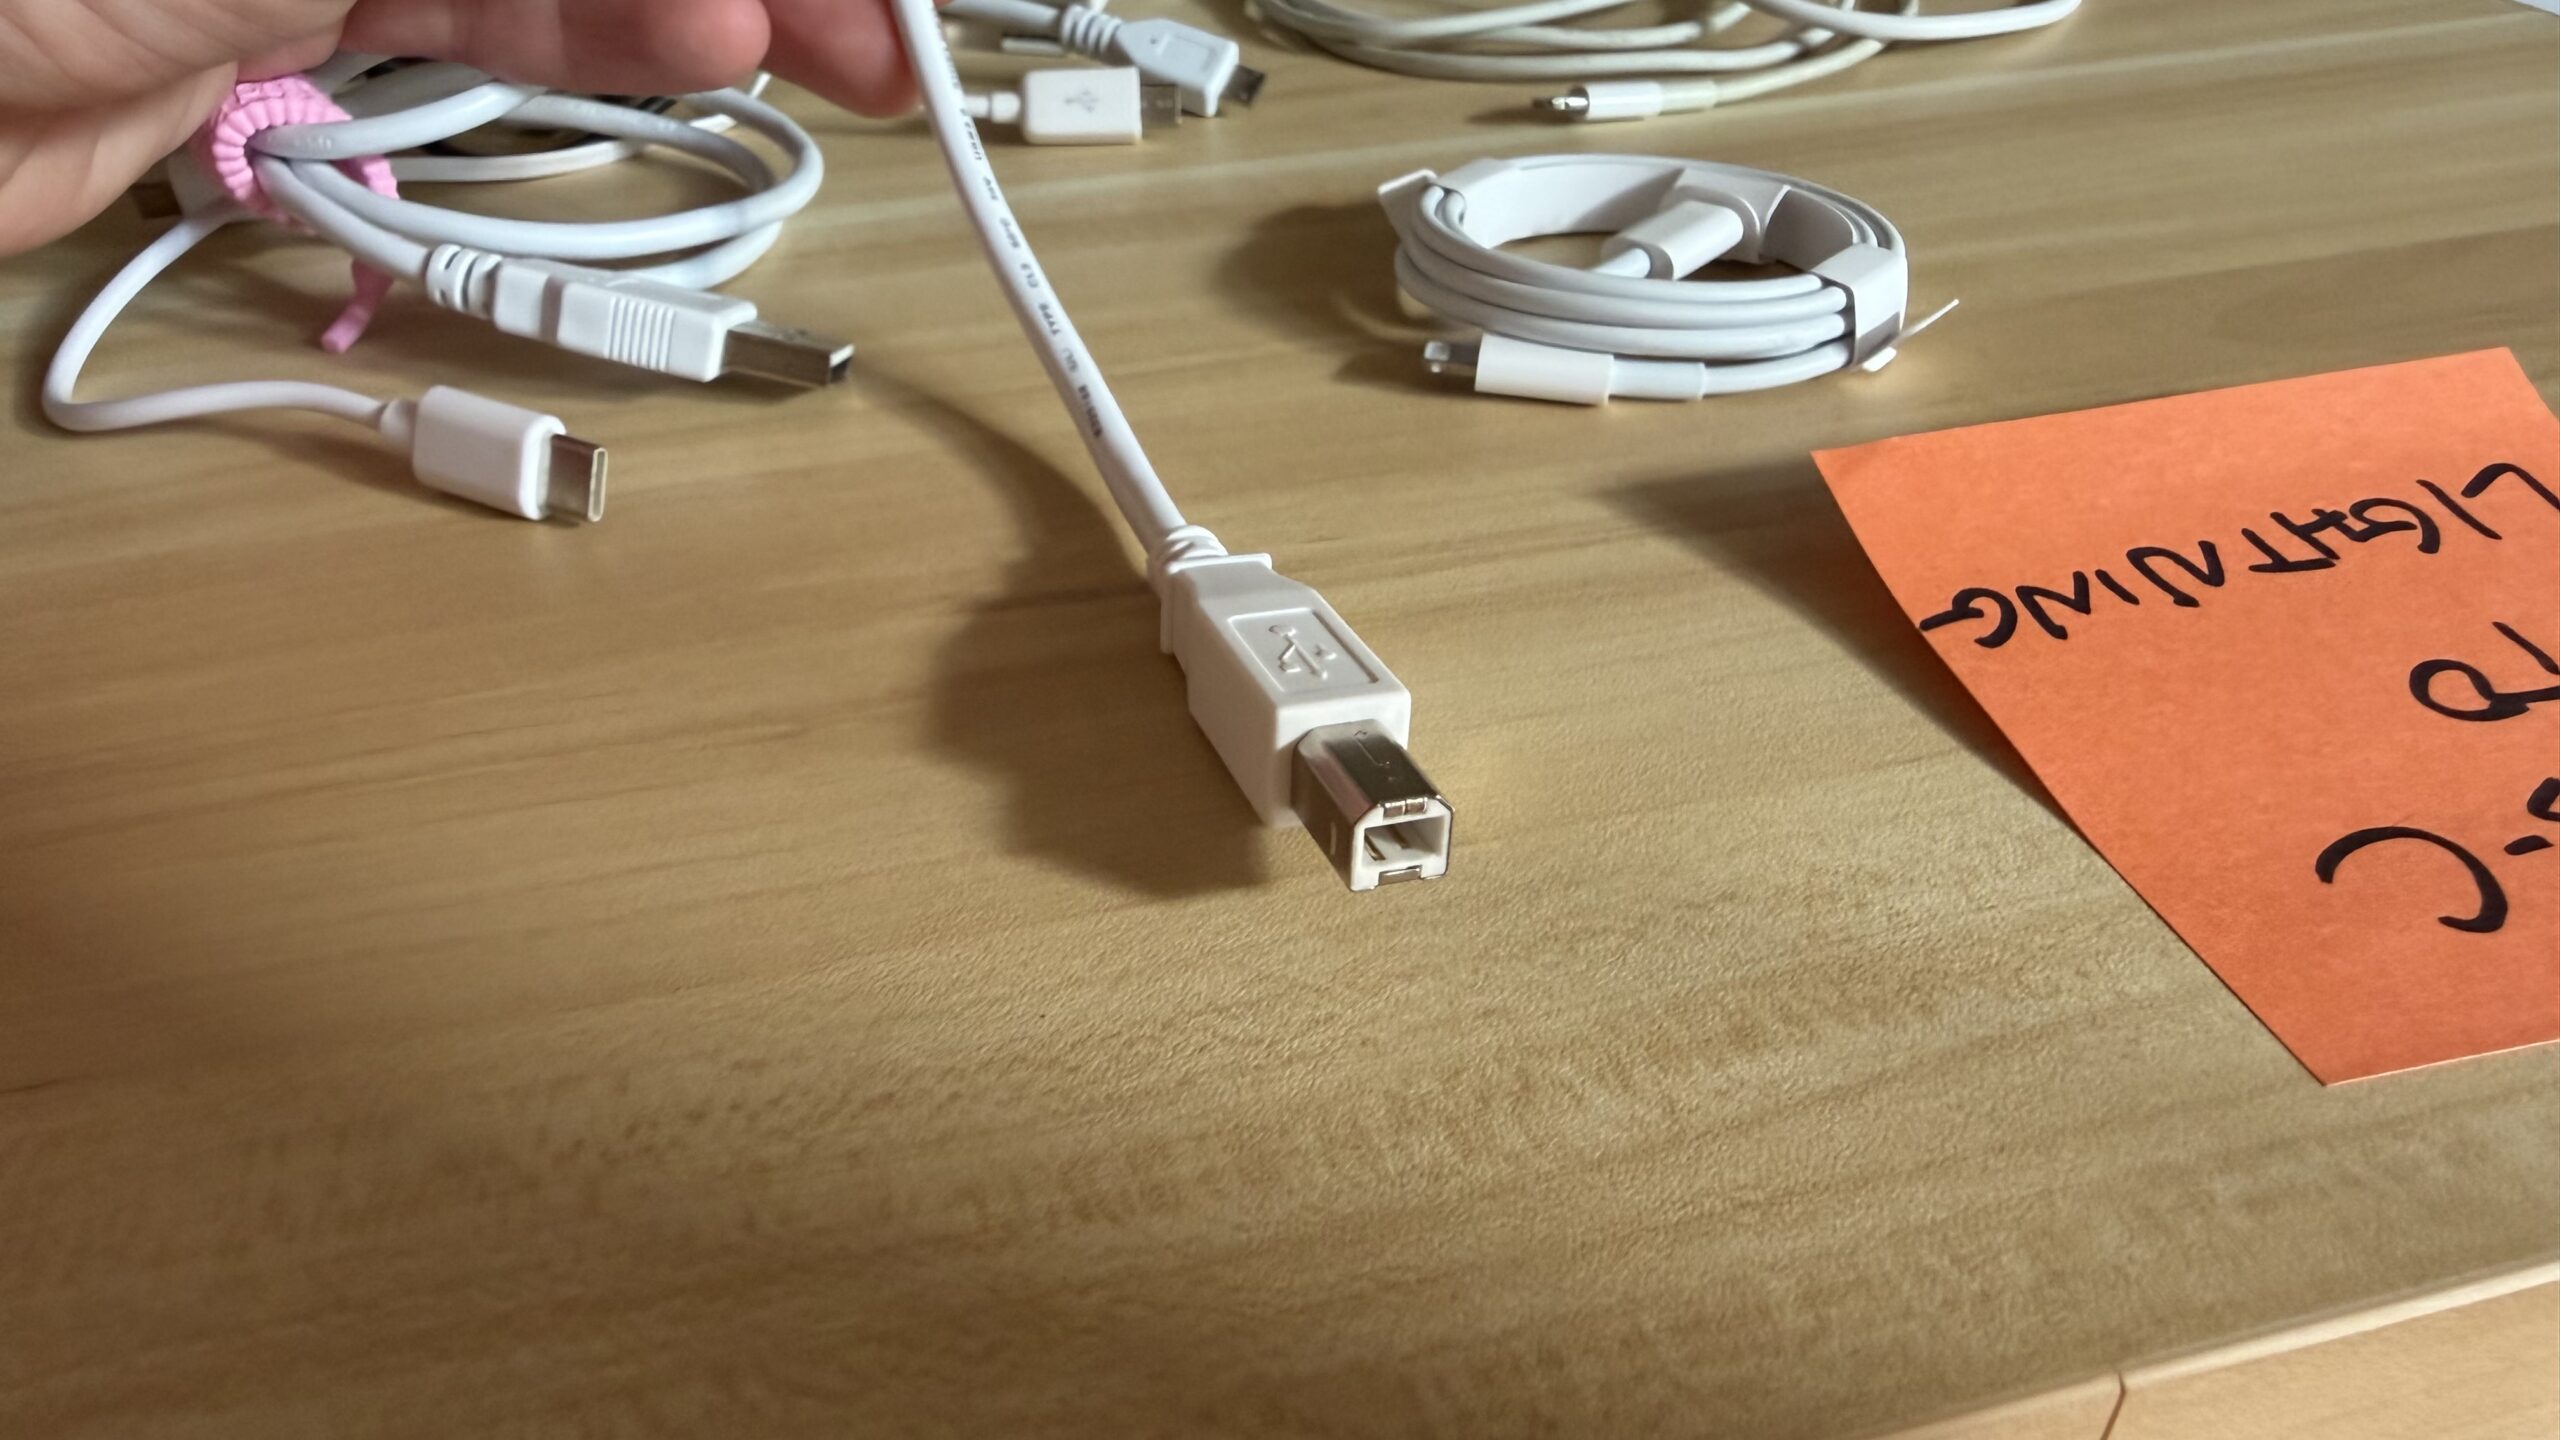
If you find a cord with an almost square-shaped end and have absolutely no idea what it does, there’s a good chance it’s USB-B.
This is your printer cable. One end connects to the printer, while the other end is typically USB-A and connects to your computer. Unless you have multiple printers that each need their own cable, you probably don’t need a collection of these.
Older and Specialty Cords
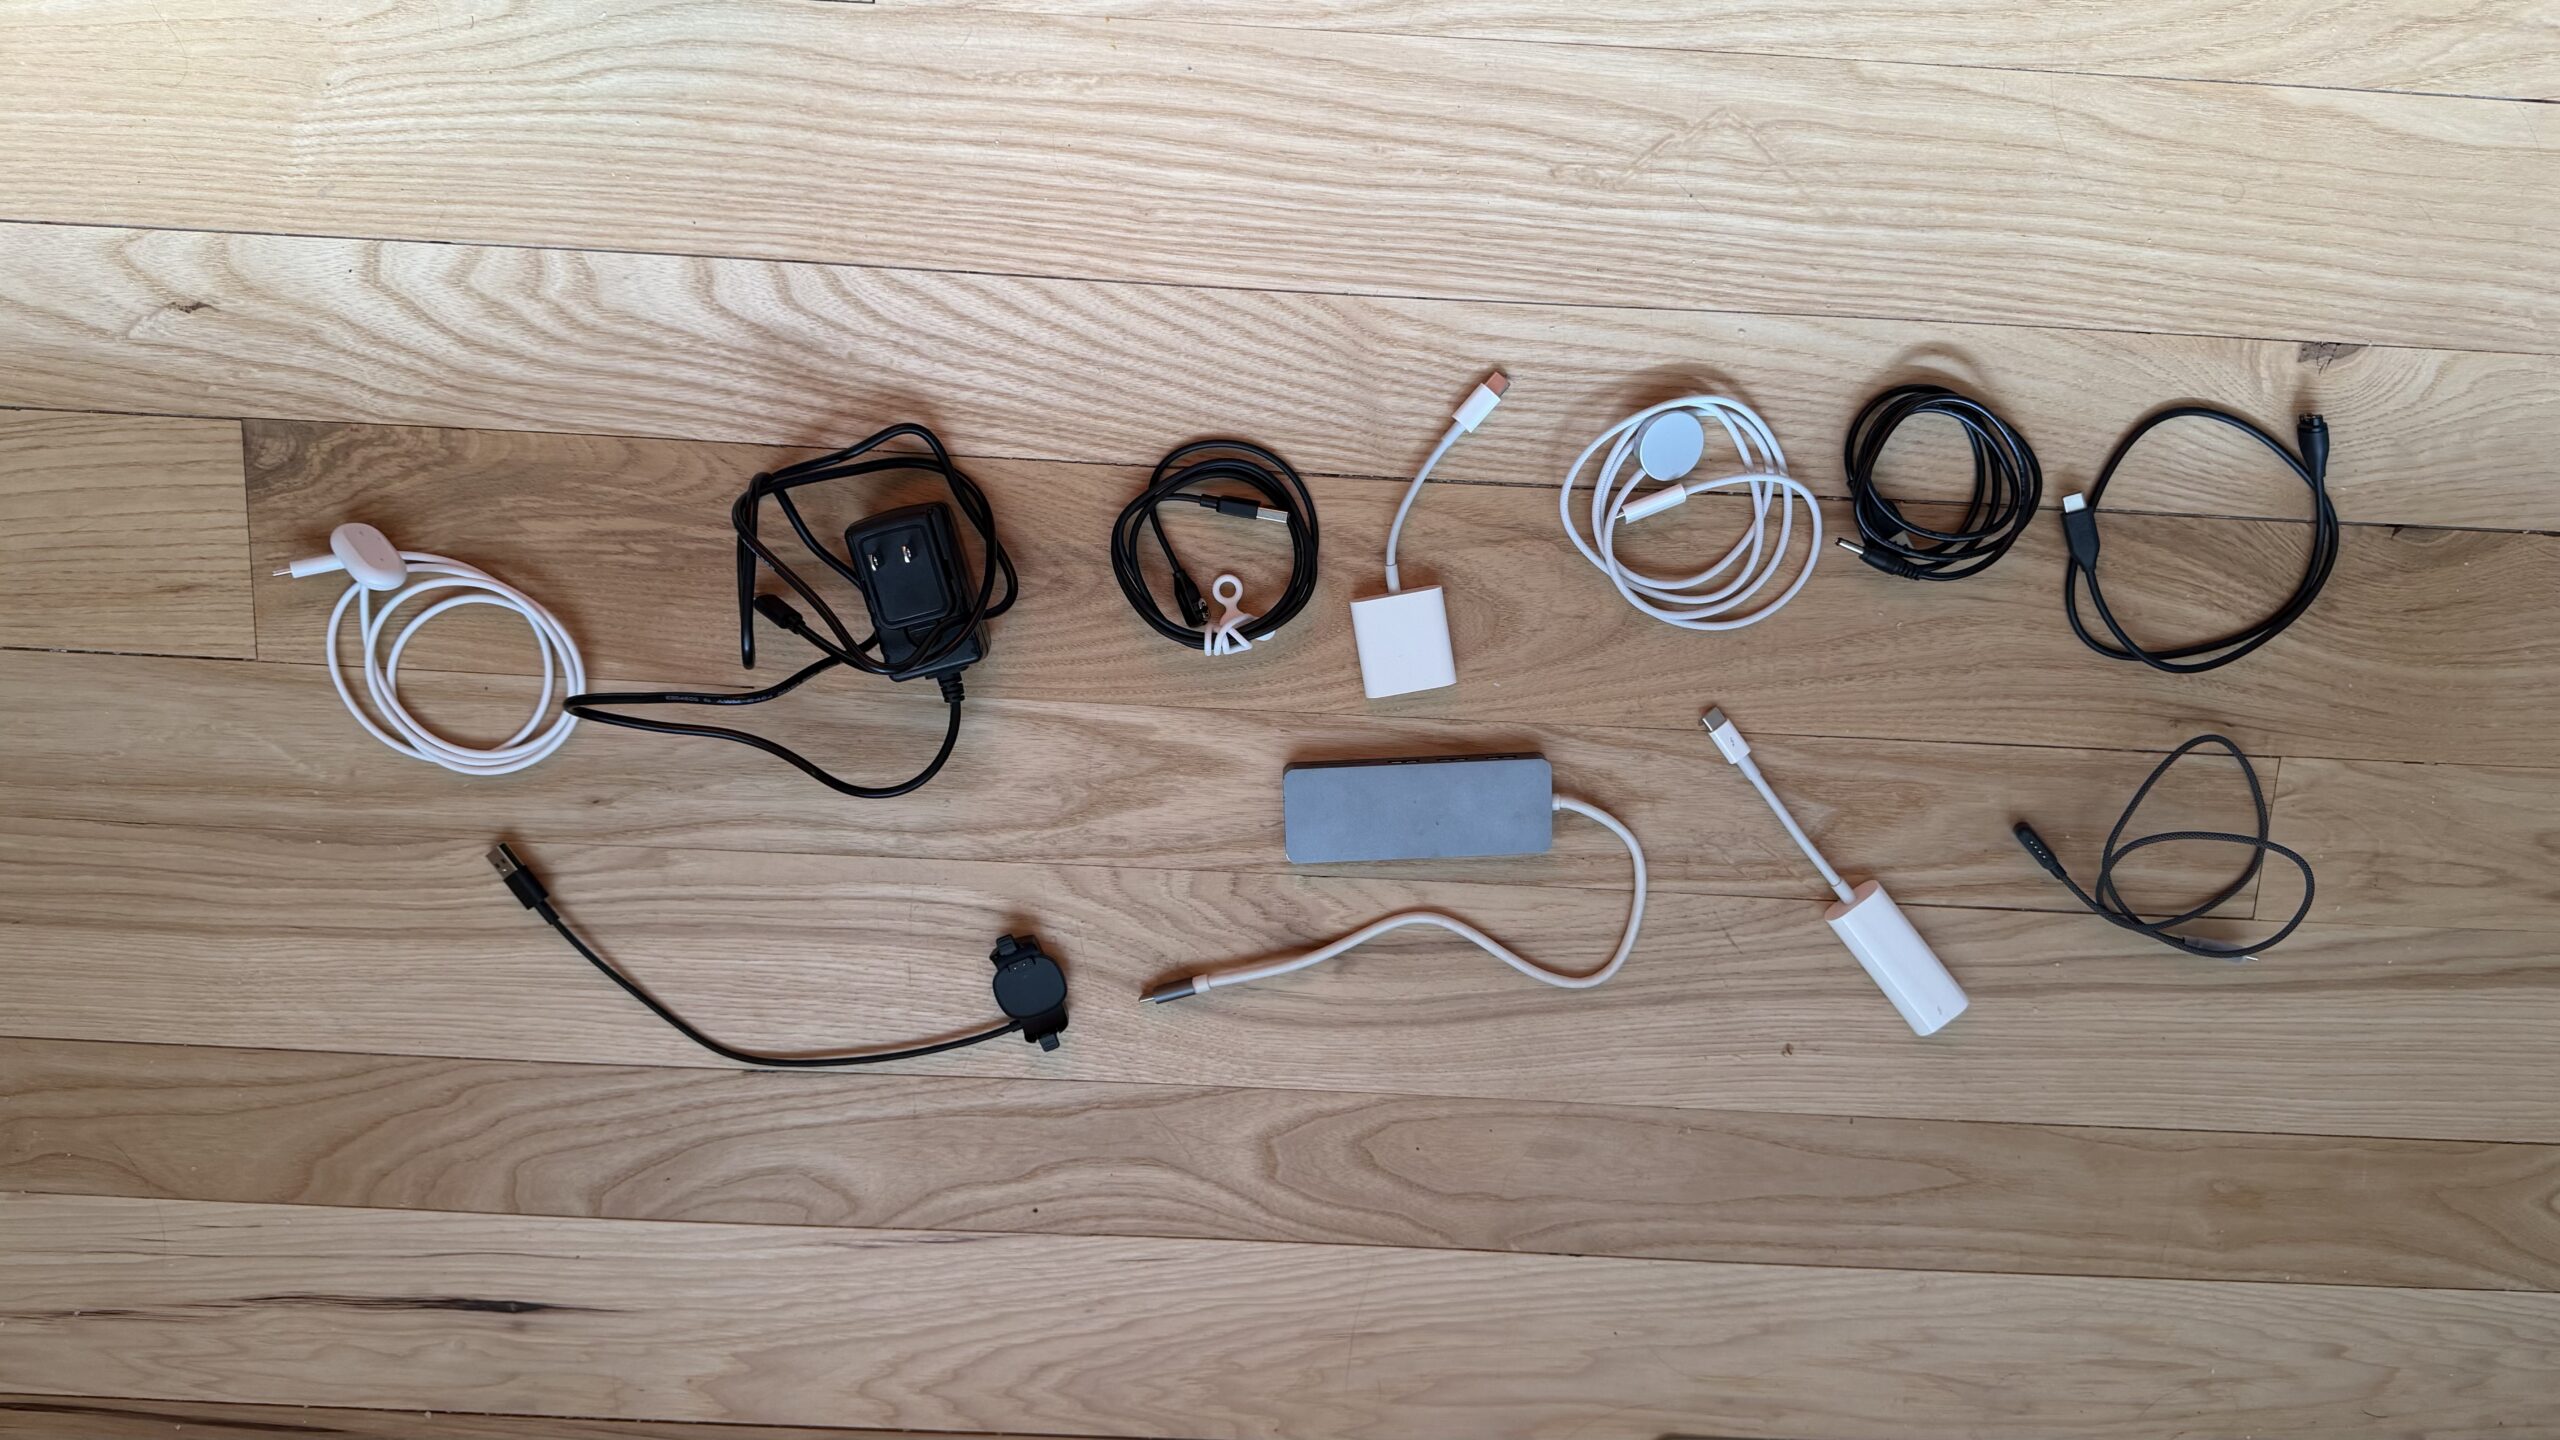
You’ll probably uncover some other connections too, especially if you’ve been saving cords for years. Mini USB was commonly used with older digital cameras and GPS units. Apple’s old 30-pin connector was used before Lightning on devices like older iPods. You may also have specialty charging cables that work with exactly one device, such as a rechargeable vacuum battery.
These specialty cords are where labeling becomes especially important. A standard USB-C cable is easy and inexpensive to replace. The weird little cord that only charges your vacuum cleaner may not be.
Step 1: Gather Every Cord in One Place
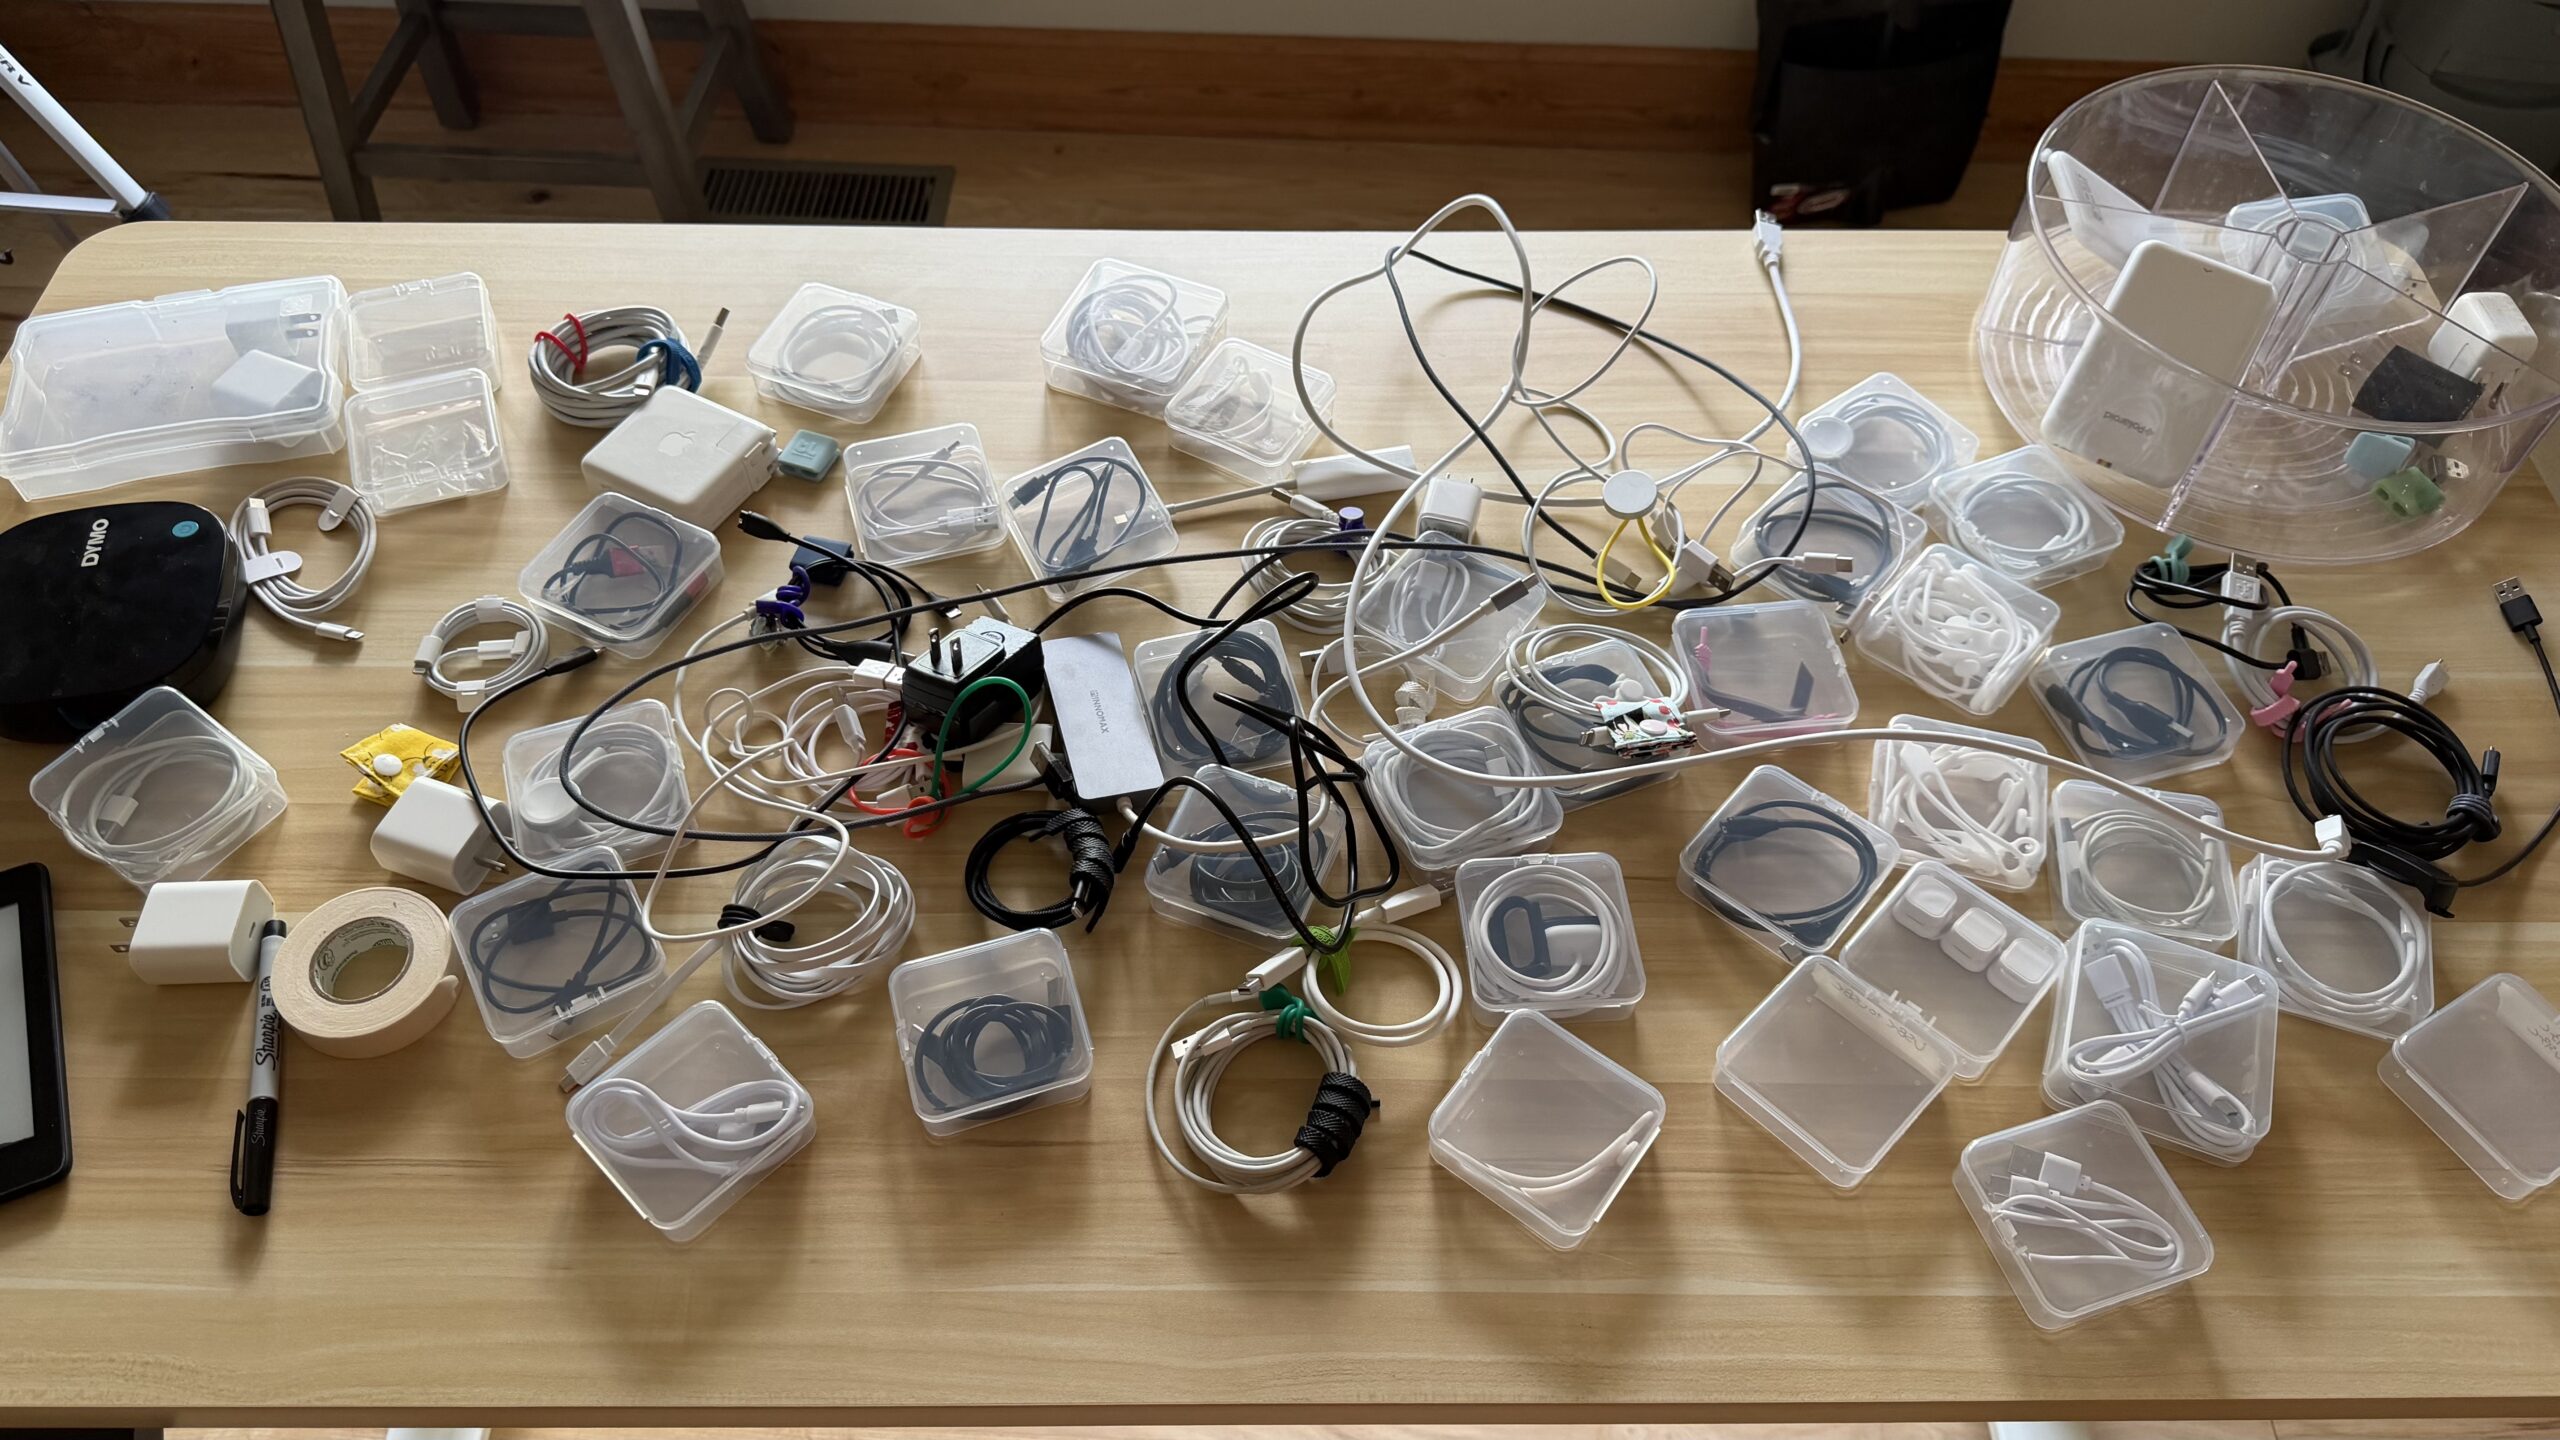
Now that you know what you’re looking at, it’s time to tackle the actual cord clutter. Start by gathering up all of your extra cords and bringing them to one place.
I like to do this at a table where I can sit comfortably and take my time. Check your junk drawers, office, closets, electronics bins, bedside tables, and anywhere else cords tend to accumulate. You want to see the entire collection before you start deciding what stays.
Step 2: Sort Like with Like
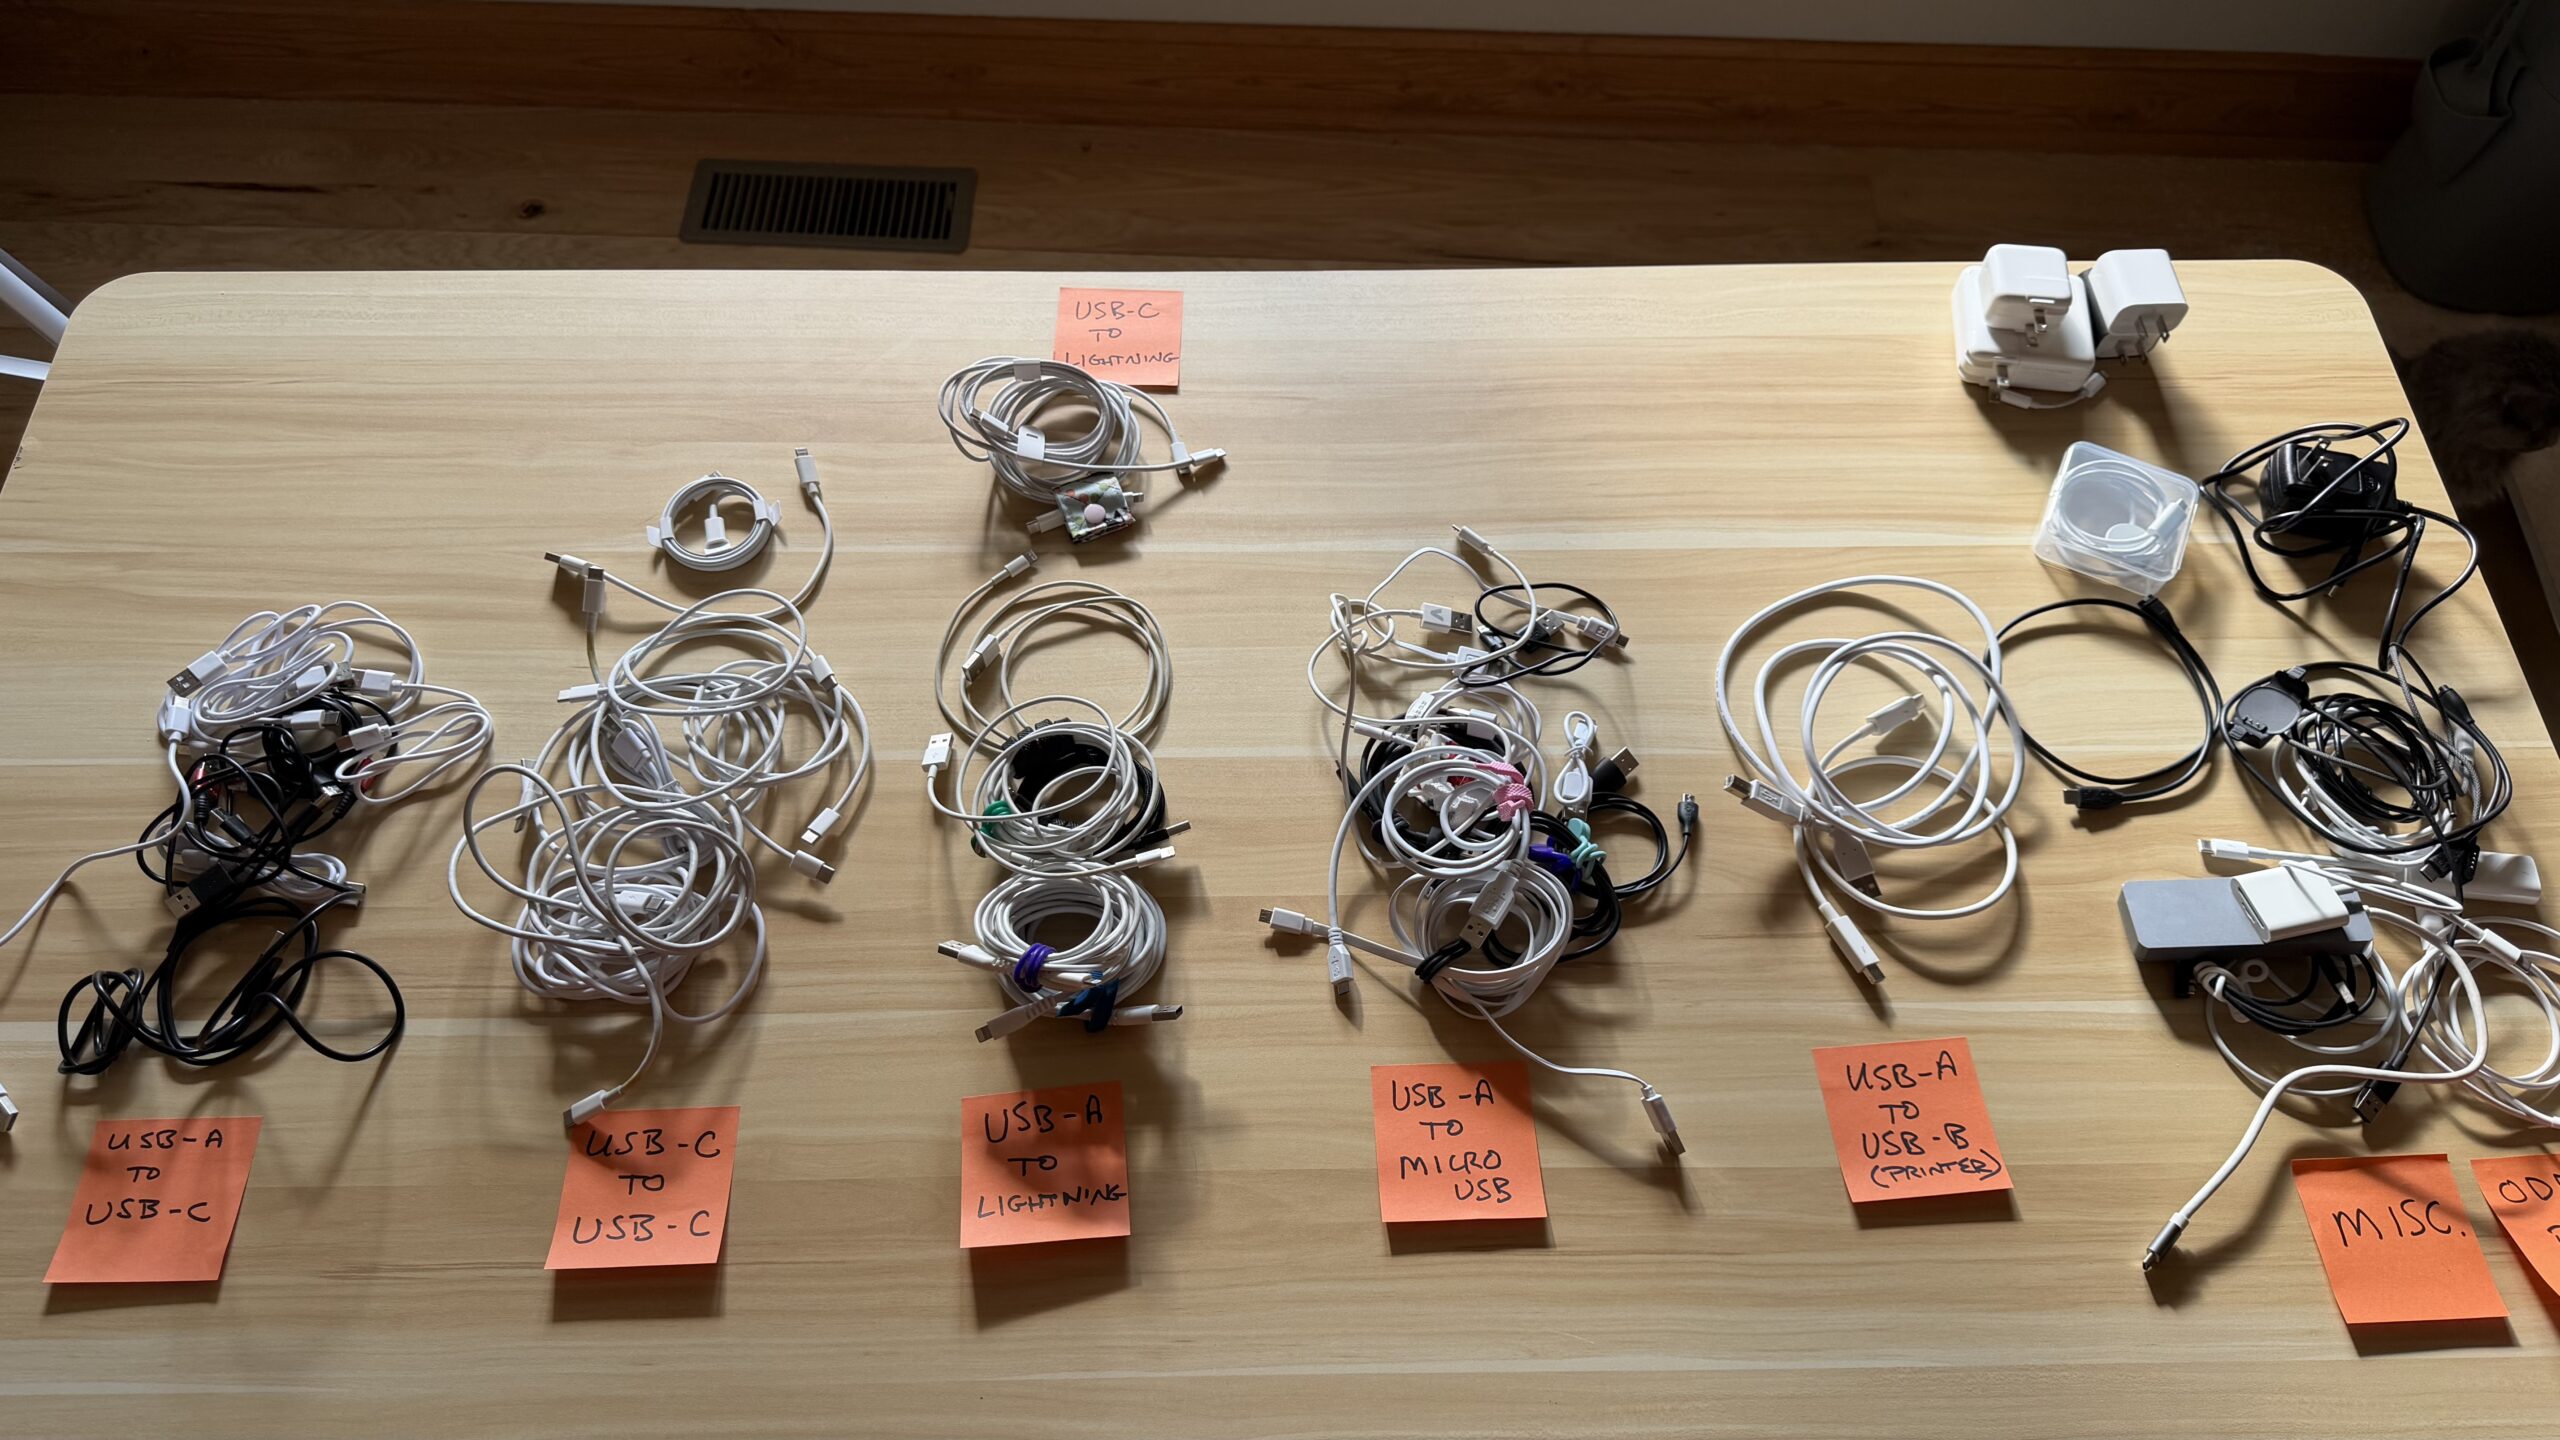
Next, start sorting the cords into categories. Remember that you’re identifying them by both ends of the cable.
Some of your most common piles will probably be:
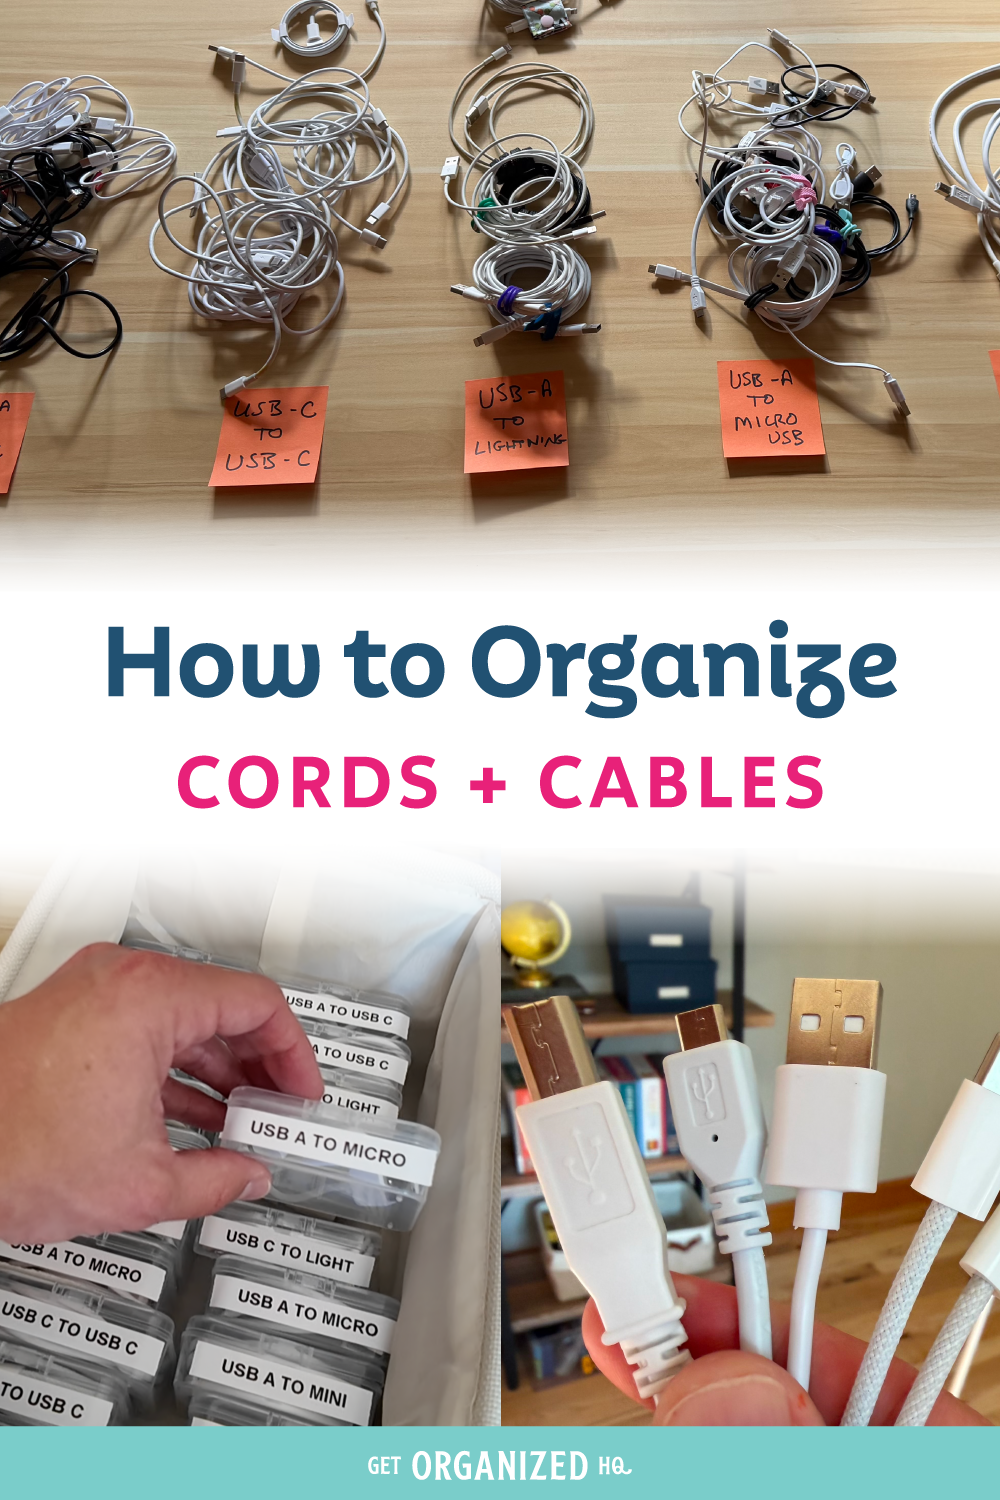
- USB-A to USB-C
- USB-C to USB-C
- USB-A to Lightning
- USB-A to Micro USB
- USB-A to USB-B
- Specialty or device-specific cords
Once you have everything grouped together, you might be surprised by just how many duplicates you own. It’s hard to realize you have 17 of the same cable when they’re scattered in five different rooms.
Step 3: Decide What You Actually Need
Now comes the decluttering.
Start with cords that belong to devices you no longer own. If you don’t have anything that uses an old connector anymore, you probably don’t need to keep the cord either.
The standard cables are especially easy to let go of because they’re generally inexpensive and easy to replace. If you accidentally get rid of a Lightning cable and six months later discover one little device that still needs it, you can buy another one. You don’t have to keep 12 extras forever just to prevent that possibility.
Next, look at your duplicates. The right number to keep will depend on your household and how you charge your devices, but one cord per device plus one or two extras is probably plenty for most situations. You may need even fewer if several devices use the same type of charger and aren’t charged at the same time.
What to Do with the Mystery Cords
But what about the cords you’re just not sure about?
Instead of letting that uncertainty stop the entire decluttering process, create a temporary holding area. Put those questionable cords into a Ziploc bag, group them by type if necessary, label the bag, and store it somewhere out of the way.
Then do one very important thing: set a reminder on your phone for one year from now.
Be incredibly specific in the reminder. Don’t write, “Check old cords.” Write something like, “Check the bag of old cords on the top shelf of the office closet.”
You think you’ll remember where you put them. You won’t.
When that reminder pops up a year later, go check the bag. If all of those cords are still sitting exactly where you left them and you haven’t needed a single one, you can feel much more confident getting rid of them.
Step 4: Contain the Cords You’re Keeping
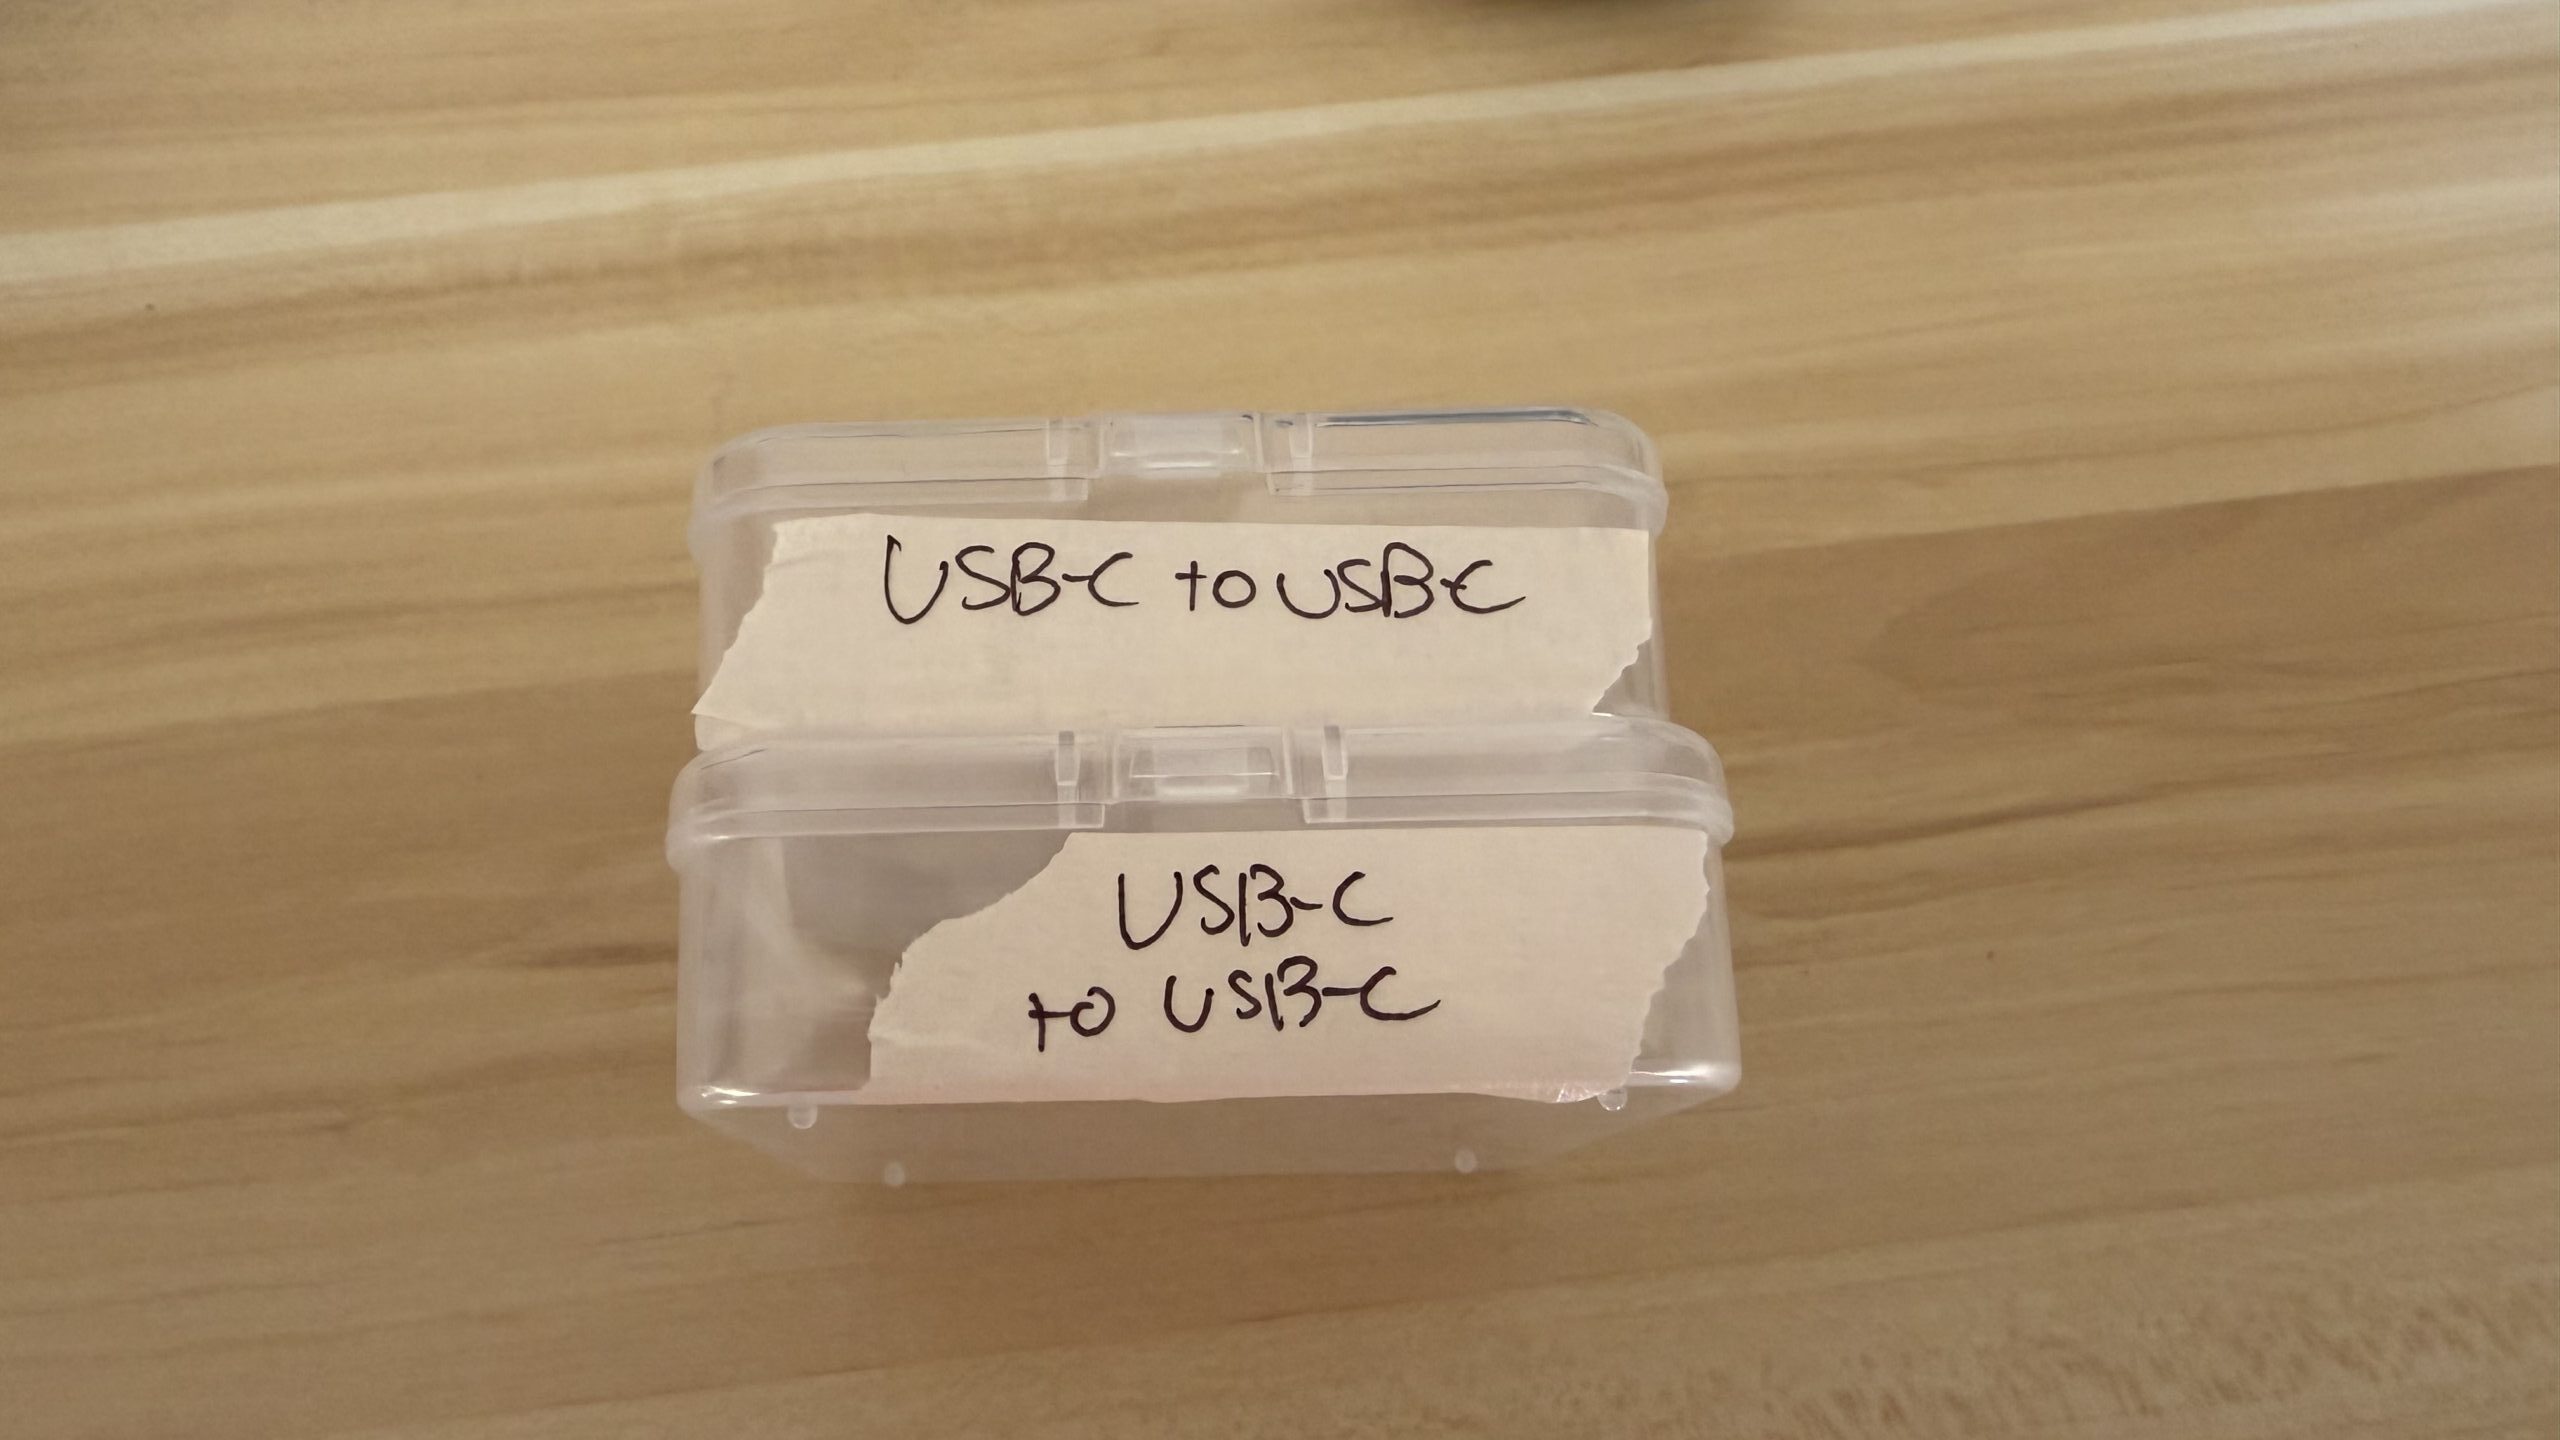
Once you’ve sorted and decluttered, now you can finally think about containers.
One option is to neatly wrap each cord and place similar cords together inside a larger divided bin. The important thing is that you don’t throw every cord back into one giant container and recreate the exact problem you just solved.
My personal favorite is using small bead boxes. These little hinged boxes are inexpensive, easy to open, and perfect for smaller cords. I specifically chose a size that fits upright in my drawer so I can line them up, label the tops, and immediately see what I have.
Another option is a 4×6 photo storage box. These are larger than the bead boxes, so they’re great for bigger cords and most power bricks. You can even store a power brick and its corresponding cord together if that makes sense for how you use them.
If you’re storing several cords together in one container, make sure you wrap each cord first so they don’t immediately become a tangled mess again.
Keep Your Cords from Tangling
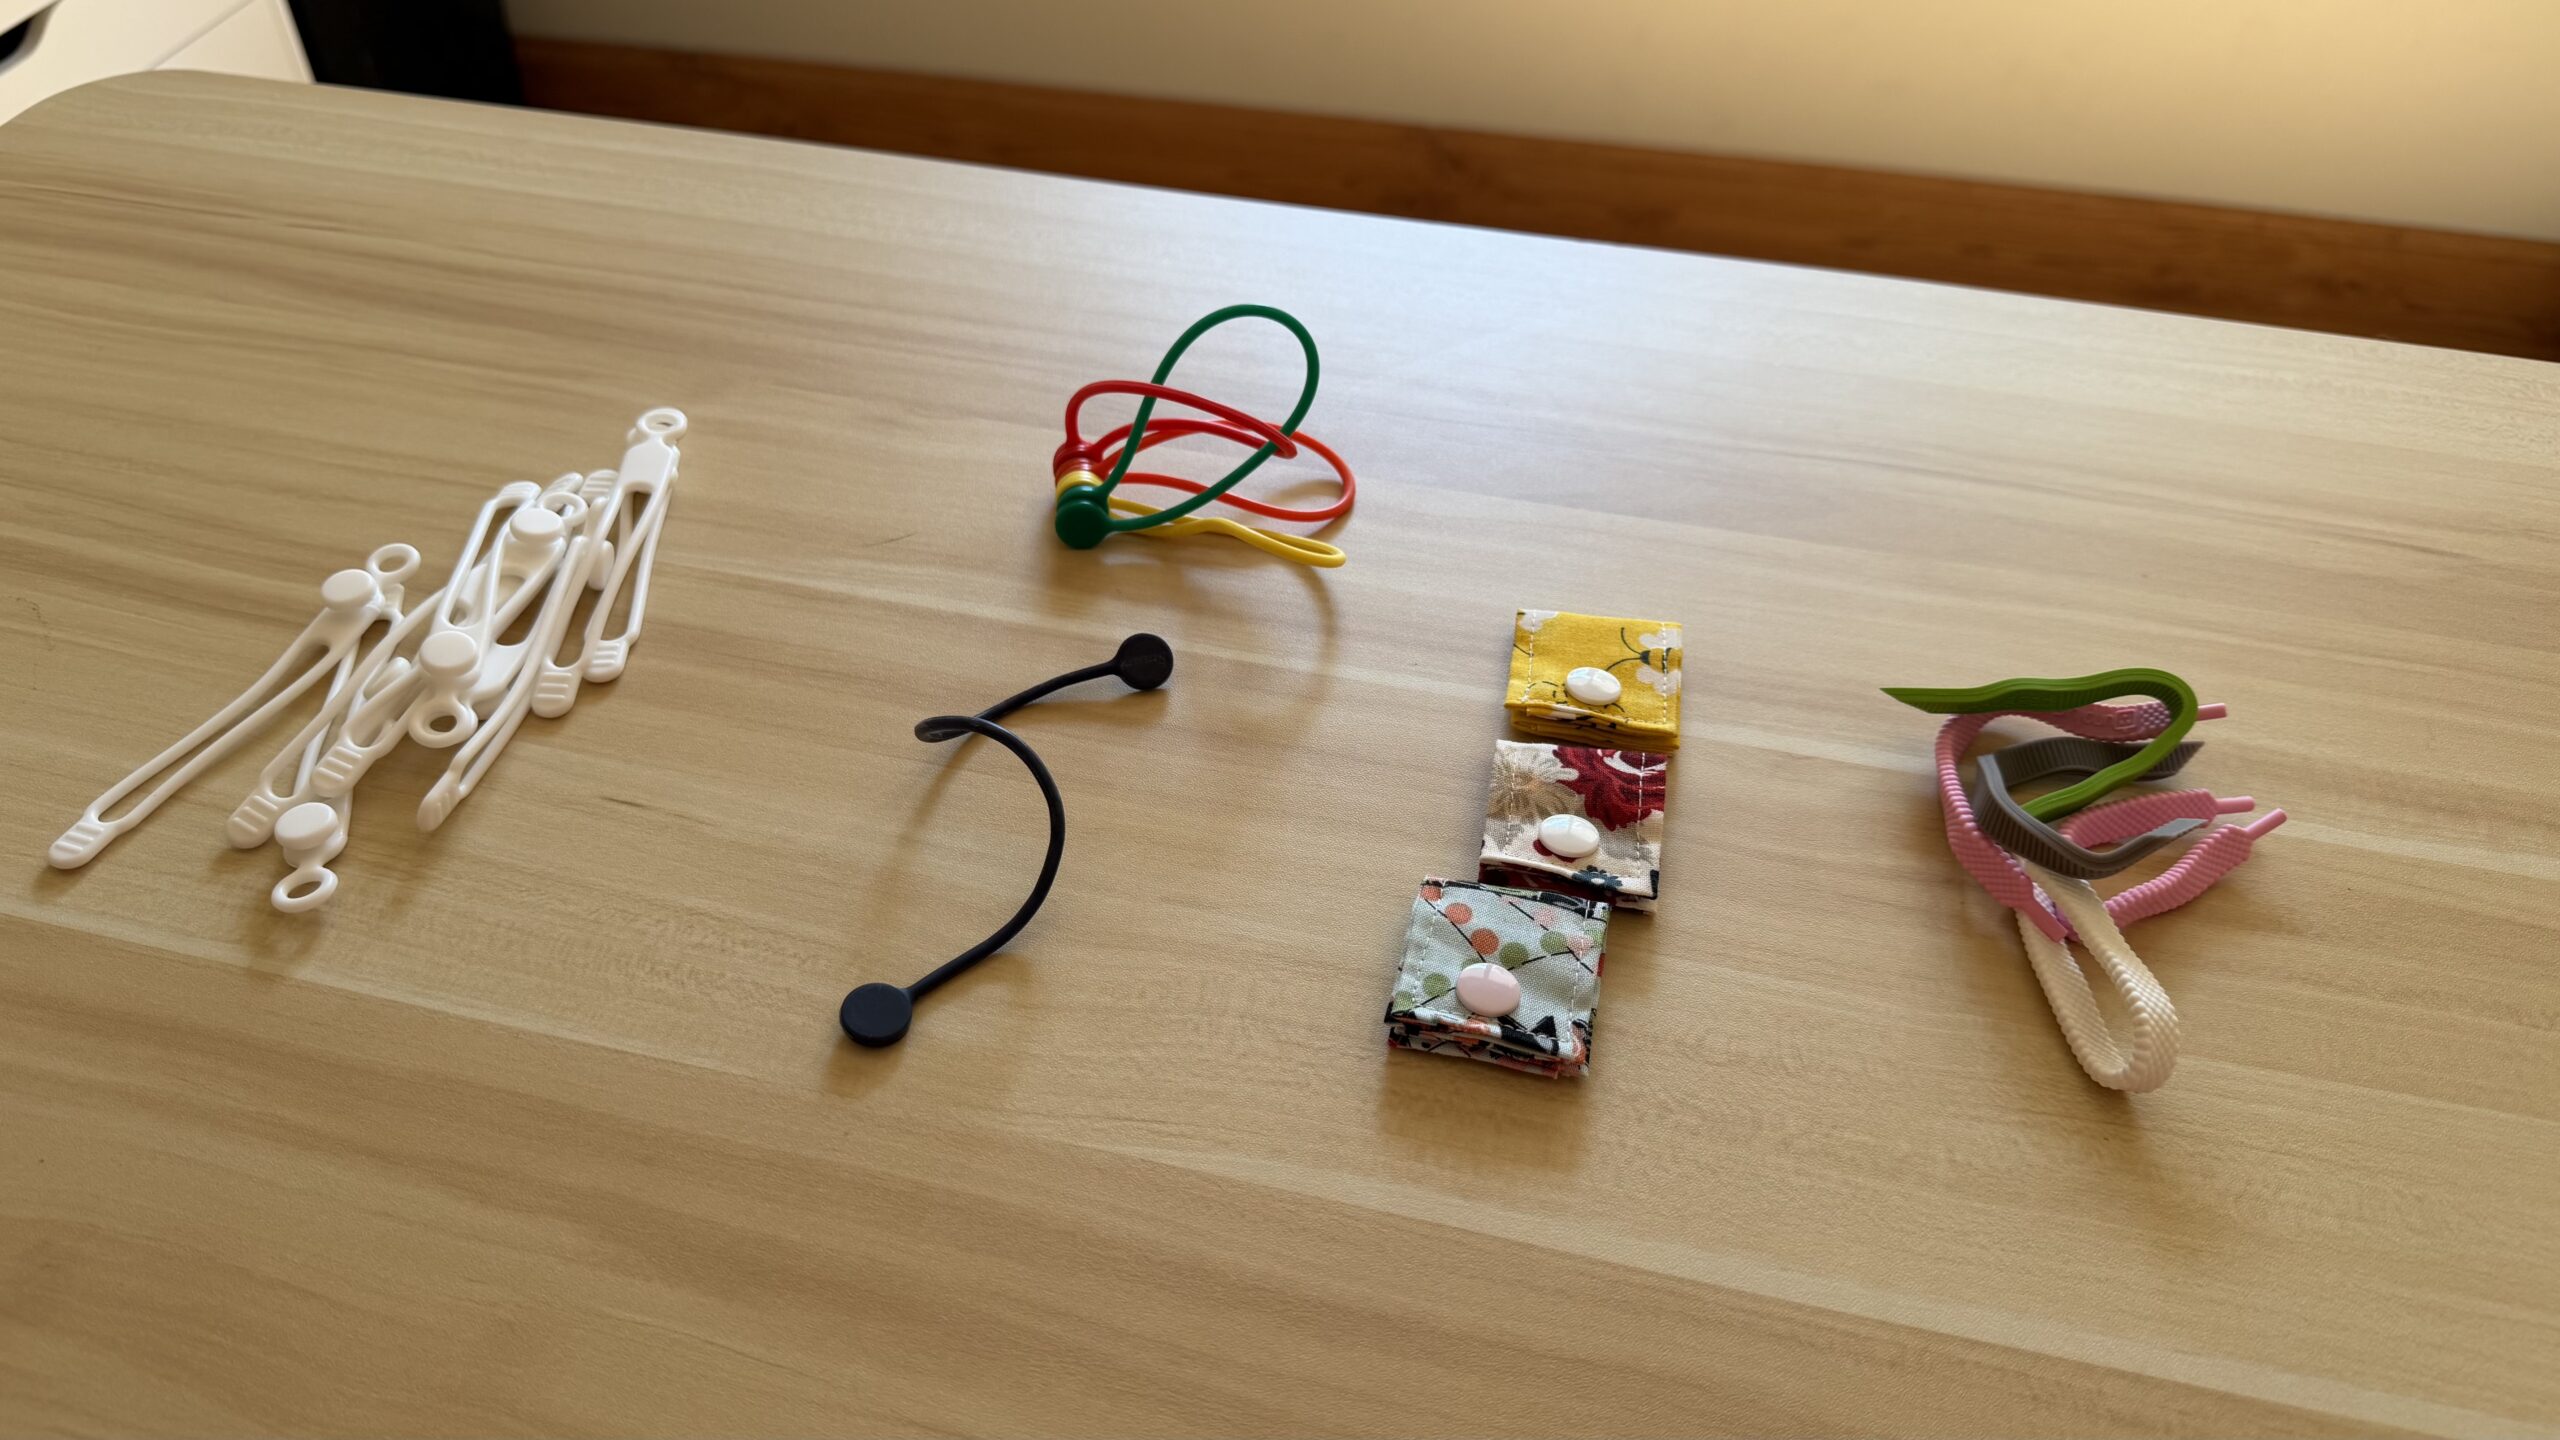
I’ve tried several products for keeping cords neatly wrapped. My longtime favorite was a strong silicone tie from The Container Store that worked almost like a moldable shoestring. Unfortunately, I haven’t been able to find those for years.
The best replacement I’ve found is a small stretchy silicone tie with magnets on the ends. You simply wrap it around the cord and let the magnetic ends connect. They’re inexpensive, reusable, and easy to store right alongside your cords.
You certainly don’t have to buy special cord wraps, but whatever method you use, the goal is simple. Keep each cord individually contained so you aren’t digging through a giant knot every time you need one.
Another Easy Cord Storage Option
If you’d rather keep your cords in a cabinet or on a shelf, a divided Lazy Susan works really well. I used one for years that had five separate sections, which allowed me to keep different cord types, power bricks, adapters, and battery chargers separated.
The beauty of this setup is that it’s still very simple. Label each section, toss the appropriate cords into it, and spin the Lazy Susan when you need something. You don’t need a complicated organizing system to make this work.
One other little product I love is an adhesive cord clip. These stick to furniture or walls and hold a charging cord in place so it doesn’t constantly fall behind your nightstand or desk. I keep a few with my extra cord supplies because they’re incredibly handy whenever I notice a cord that’s driving me crazy.
Step 5: Label Everything
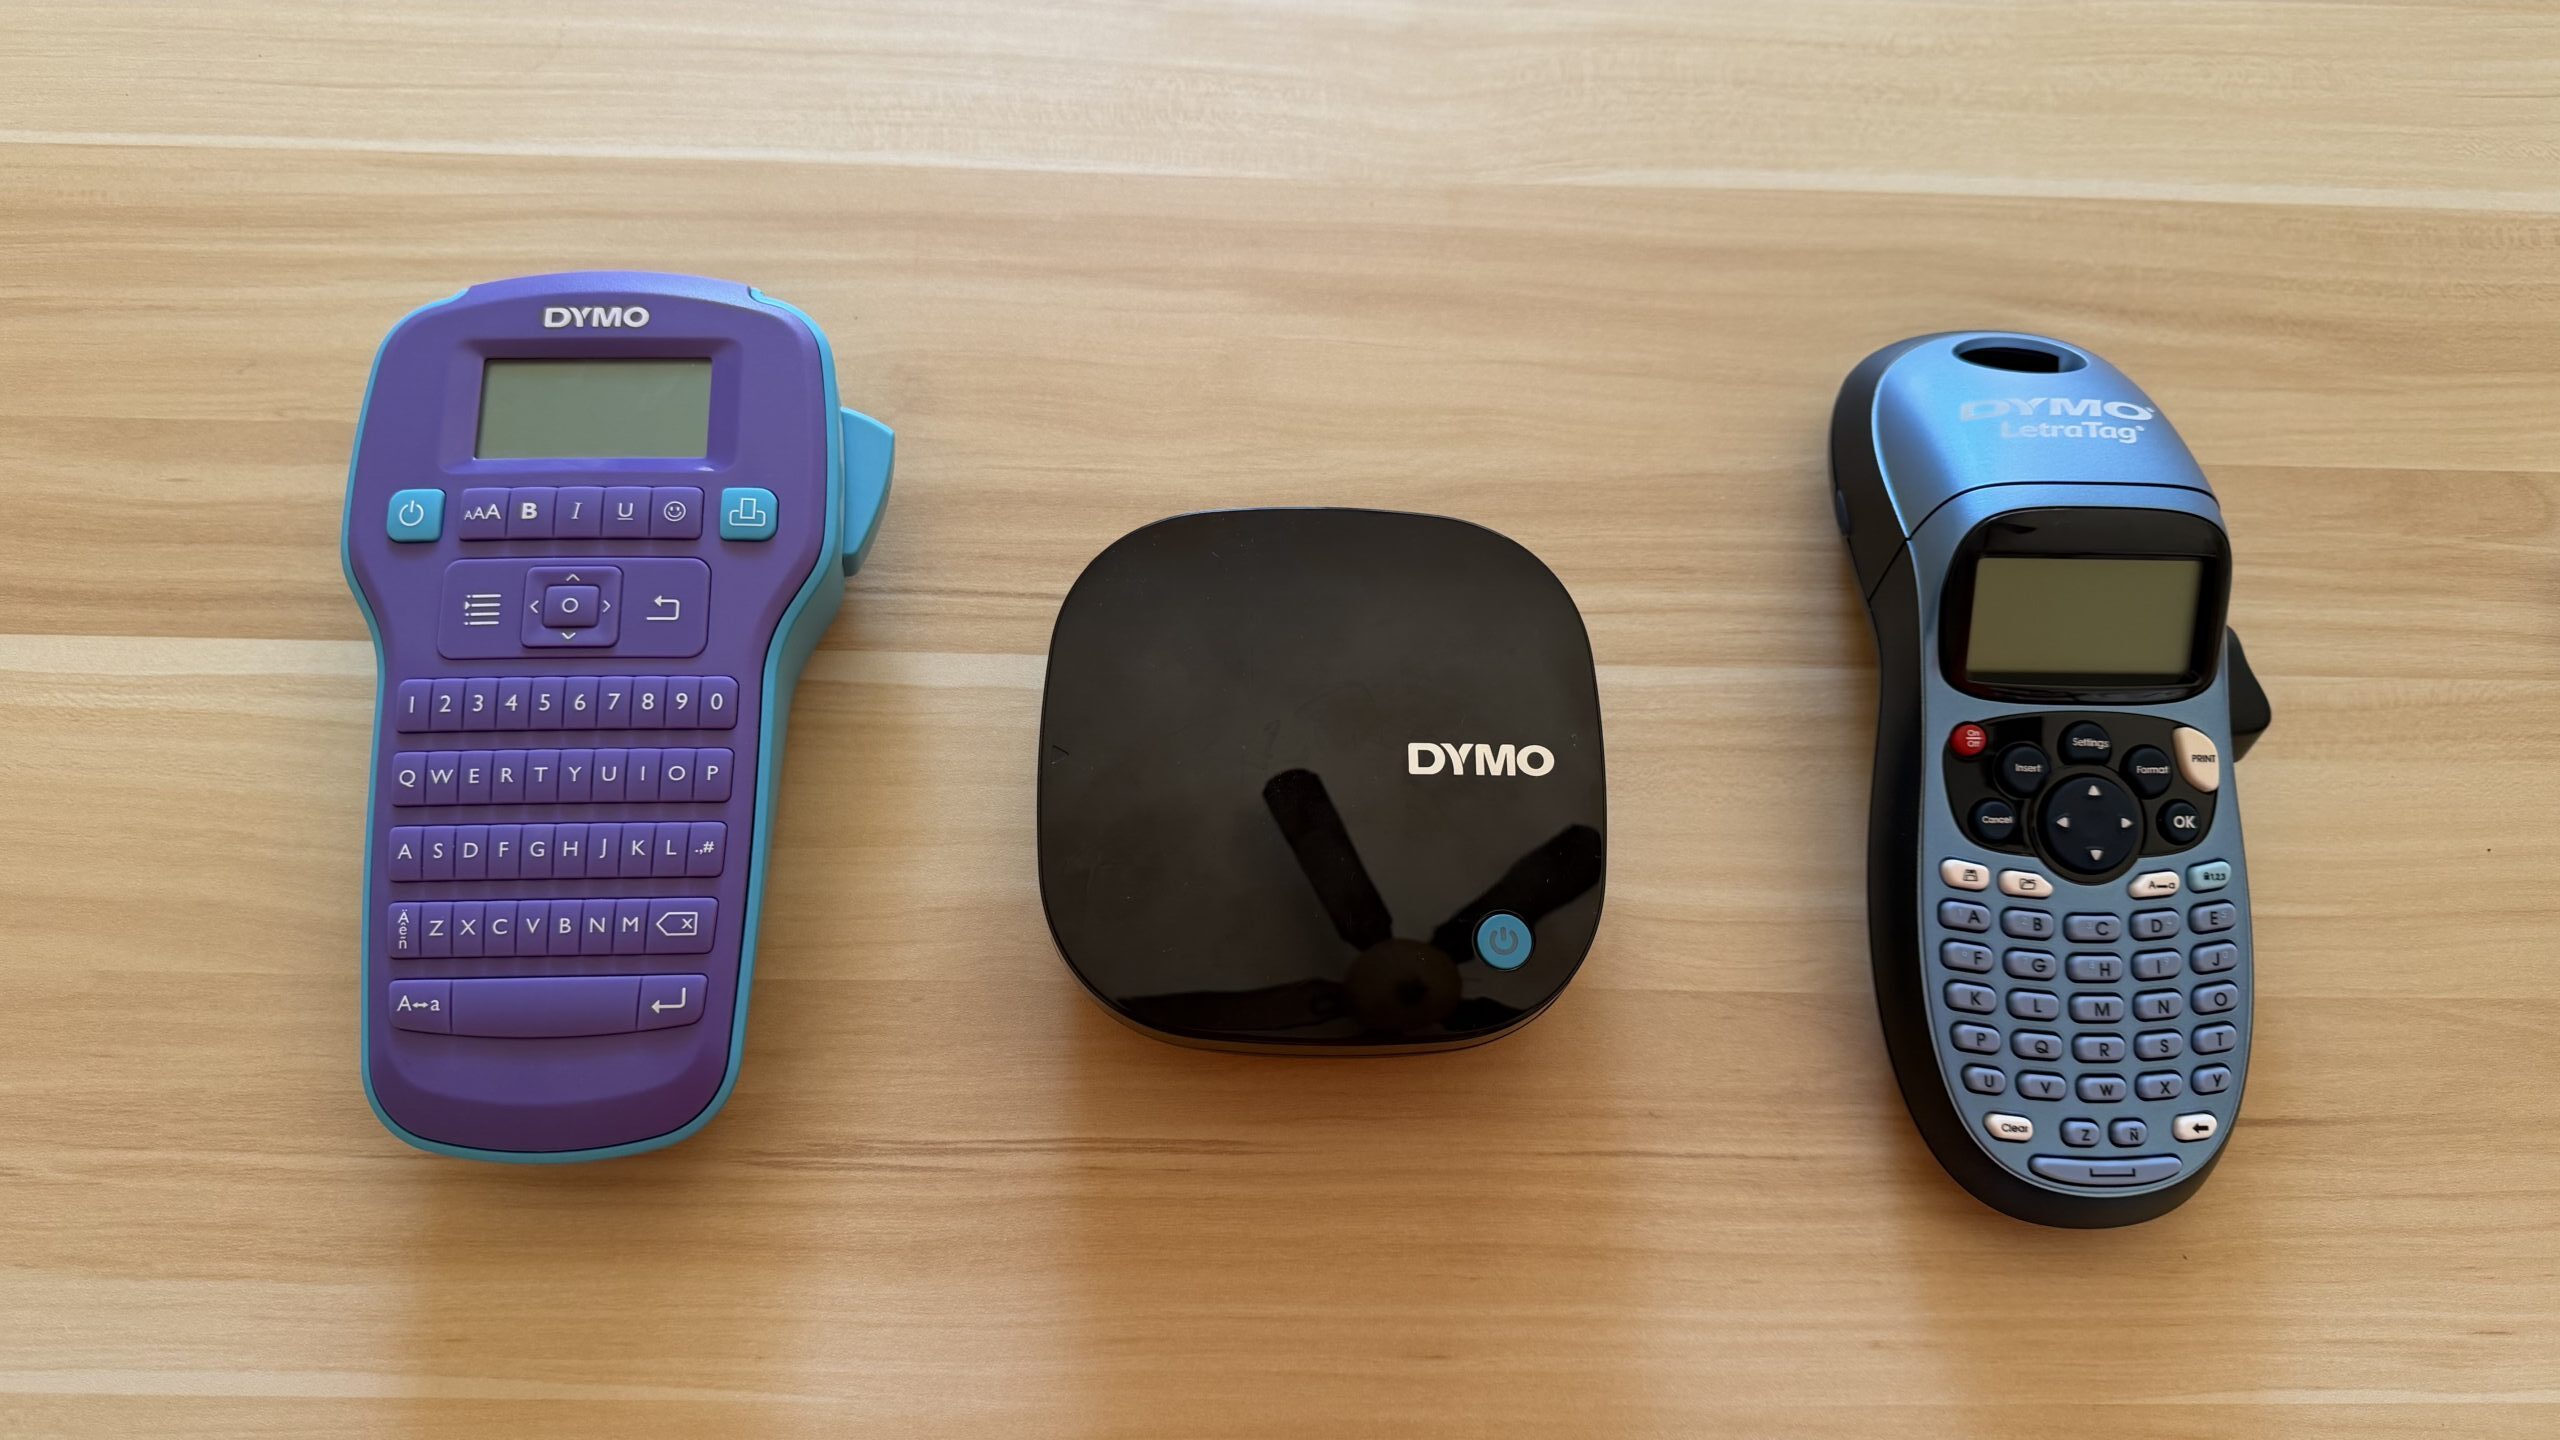
Please don’t do all this work and then skip the labels.
I once had my little bead boxes beautifully lined up in a drawer, but I hadn’t labeled them. Every time I needed a cord, I had to pull out multiple boxes and open them to figure out which one contained the cable I wanted. Technically everything was organized, but the system wasn’t actually making my life easier.
You can use a traditional label maker, but lately I’ve been keeping things incredibly simple with freezer tape or masking tape and a Sharpie. I tear off a small piece, write exactly what’s inside, and stick it on the container.
It doesn’t have to look perfect. A label that says “USB-C to USB-C” in Sharpie is far more useful than a beautiful unlabeled container.
You Don’t Need to Be Afraid of Your Cord Drawer
Cord clutter feels especially difficult because most of us don’t actually know what we’re looking at. When every cable seems like a mysterious black cord that might be vitally important someday, of course we’re afraid to get rid of anything.
But once you learn to recognize the basic types, the whole process becomes much easier. Gather everything together, sort by type, get rid of cords you don’t use, reduce the duplicates, temporarily quarantine anything you’re unsure about, and then organize what’s left.
Most importantly, label what you’re keeping.
The next time you need to charge a device or connect something to your computer, you won’t have to dump out a box of 47 mystery cords and start trying them one at a time. You’ll know exactly what you have, exactly where it is, and exactly what it’s for.
And don’t forget to grab the free Cord Identification Cheat Sheet. You can keep it beside you while you’re sorting so you don’t have to memorize the difference between USB-A, USB-C, Lightning, Micro USB, and all the other cords hiding around your house. It’s time to get those cords wrangled up and organized for good!




 Copyright 2026, Get Organized HQ.
Sandi Says
Thanks for this article. It is well-written and very helpful. I do worry that I’ll throw away a rarely used but necessary charging cord but this has given me confidence.