A Fail Proof Method to Organize Digital Photos
It's been a while since I've talked about how to organize photos, so it's time to tackle that subject. Let's start with how to organize digital photos. It is easy to put off organizing photos on a computer because they don't create big piles all over our office, so it's out of sight, out of mind. However, even though it’s less visible, it’s no less frustrating to search for hours for a file or a photo that we need! Besides that, what good are photos if they simply sit on a hard drive and can never be enjoyed?
Before I explain how I organize my digital photos, I want to talk for a minute about taking photographs. I don't know about you, but one of the thoughts that creeps into my mind frequently is, “Why couldn’t I capture that moment in time perfectly?” My daughter's first smile and laugh. Her expression of joy when she sees Daddy walk in the door. All those special moments.I want to remember those times, but am often frustrated that I failed to capture the moment. I get ridiculously snap-happy at a moment’s notice, but when I look at those photos on the computer, I'm often disappointed. If you can relate, I have good news for you! My friends Ryan and Steph at Ultimate Bundles have put together something amazing to help with your photography woes.
It’s called The Ultimate Digital Photography Bundle (Beginner’s Edition), and it contains ebooks and video training guides to help you become a better photographer. Everything is put together by excellent photographers who are experts in teaching others – even complete beginners. You definitely don't need to switch up to a more expensive camera to make full use of the bundle (even if you just use your iPhone for photographs), and you don’t need to neglect your family for weeks upon weeks of training! You can learn everything in little chunks – whenever you have a spare moment. Click here to see the full range of ebooks and training courses included in The Ultimate Photography Bundle (Beginner’s Edition). (It's only available this week, so go ahead and check it out if you're interested.)
True confession: The other reason that I've chosen to start with digital photos is that I have absolutely no wisdom to offer when it comes to organizing physical photos. All of my prints from the pre-digital era are currently in one box in our storage room with no type of order within the box. They're all mixed up. Some have doubles and some don't. Some are 3×5 and some are 4×6. There's a bunch of negatives inside the box but I have no idea what they go with. My goal is to someday tackle that box and get those photos out where they can be enjoyed, but who knows when that will happen.
When it comes to organizing digital photos, I’m certainly not an expert, but I have learned a few things. I do finally have a system that is working for me! I really believe the simpler and more straightforward the better. I’ve tried more advanced, complicated systems, and, trust me, they just fall apart. Here are the steps for getting your digital photos in order.
Step 1: Start from This Point Forward
Don't skip this step! It's a critical part of the no fail system. If your digital photos on your computer are a total mess and you really don’t have a system to organize them, or if your current system isn’t working for you, I do NOT recommend that you start by trying to reorganize all your previous digital photos. That can be a very daunting task that is likely to take quite a while. Also, you’re more likely to put off starting an organizing system if you think you’ll have to start by spending hours and hours reorganizing your older files. I highly suggest you just start TODAY organizing your files with your new system. Any photos you take from this point forward will fit into the new system. Don’t worry so much about prior photos. You might get to them someday, and even if you never do, it will be so much better to have everything from this point forward all organized.
Step 2: The Delete Key is Your Friend!
No matter what system you choose, the delete key will always be your friend. Don’t be afraid to use it. Sometimes we think that because our files aren’t taking up literal physical space that it’s okay to keep everything. It’s still clutter, though. If you keep every digital photo, your hard drive will fill up quickly plus it will be a lot harder to find what you need. If you see a photo that is blurry or unusable, just delete it. If you take 12 shots of the exact same thing, delete 11 of them and only keep your favorite. I don’t overthink this or spend hours deciding what to delete. I’ve formed the habit of always deleting blurry or way too dark photos. That only takes a second. Then if I am choosing certain photos out of a group, I go ahead and delete the ones I didn’t choose.
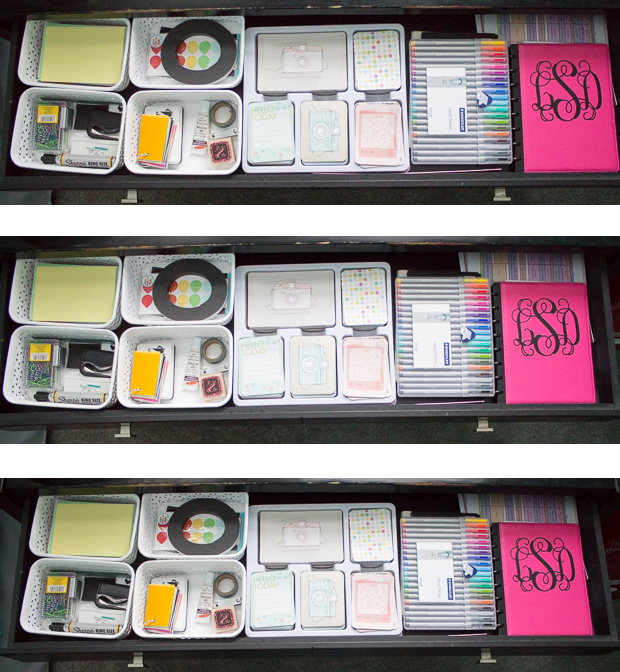
For example, in this post about organizing my desk drawer, I had 3 pictures of the top view of the inside. Believe it or not, all three of these were different pictures! I applied the same adjustments to them, then cropped, and chose my favorite. I deleted the other two permanently from my computer. I used to feel like I needed to save them all, but that quickly gets out of hand, and it just makes life harder. These three pictures look identical, don’t they? In no way do I need to sift through all three when I want one.
Step 3: Choose a Very Simple File Structure
I know this from personal experience, but a very simple file structure for your photos will likely work long term. I wouldn’t suggest some fancy way of naming, categorizing, and tagging everything. For one thing, if your system takes you 15 minutes every time you import photos, you’re less likely to use it. Also, if you don’t have a straightforward way of naming folders, it can actually be harder to find what you’re looking for.
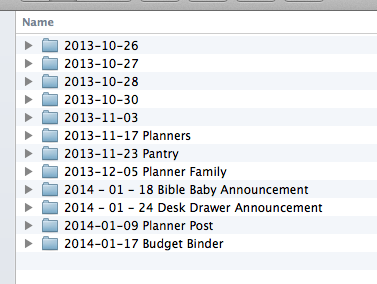
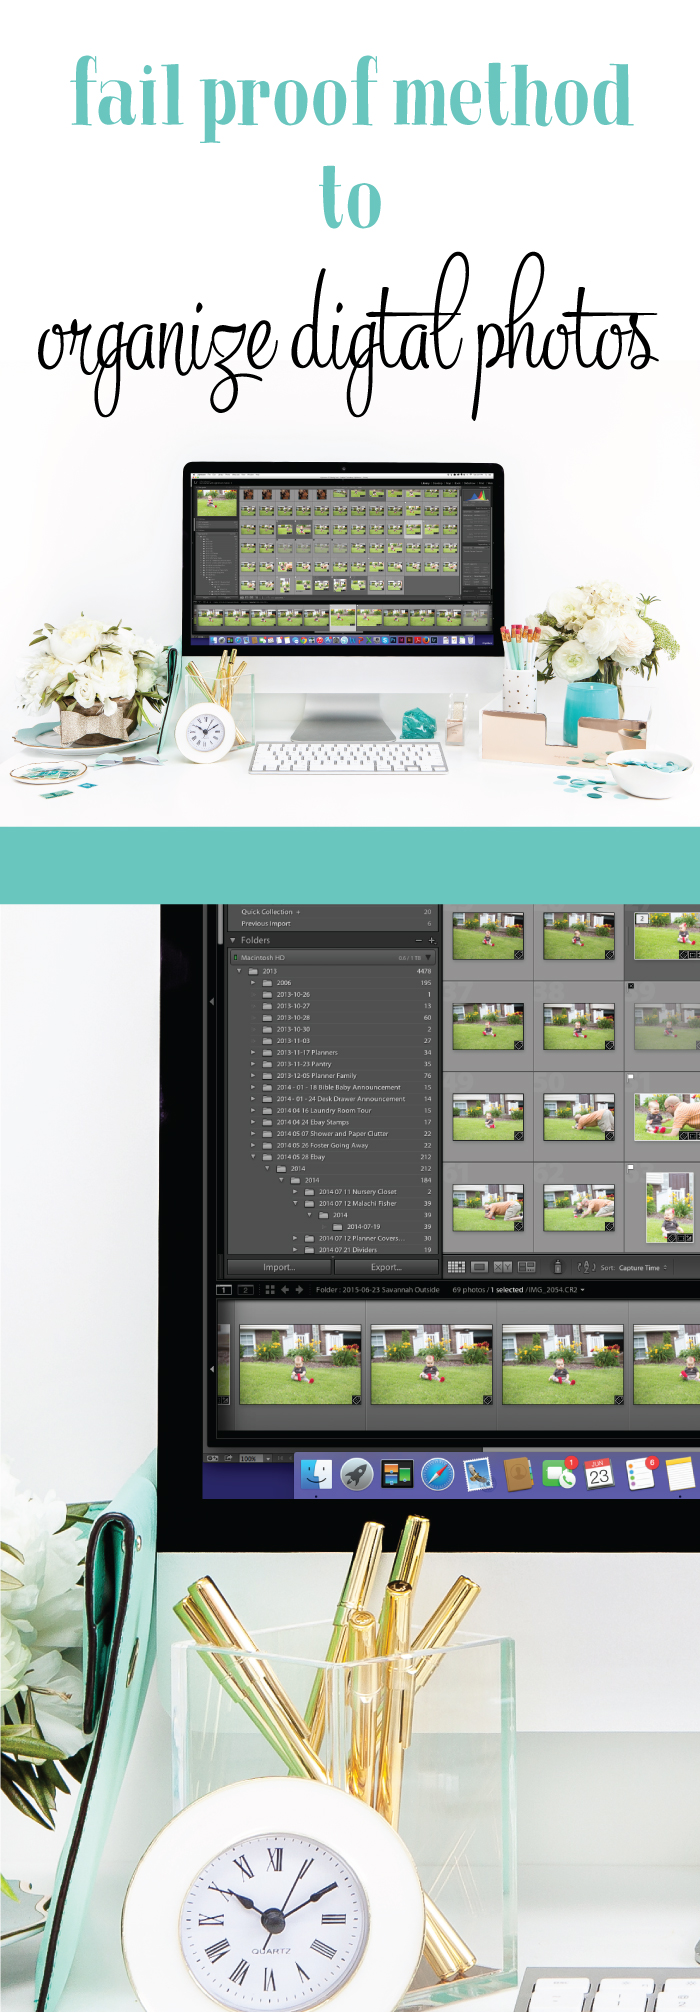
Here’s what I do. Each time I import photos, I name the folder with today’s date first. I use the format of year-month-day, like 2014-01-31. I highly recommend that you do put the year first so you can easily look at all the folders in chronological order. (If you did something like 01-31-2014, then by the time a lot of years went by you’d end up with all the January’s from every year together, then all the February’s, etc.) I also recommend using leading zero’s in front of the months and days (like 01 instead of 1 for January). This will also ensure everything can easily be sorted in chronological order.
When I want to add more description, I will put a title of the event after the date. That would look like “2014-01-31 Planner Post Pics.” Also, I try to upload photos often, but sometimes I go a month or two without uploading. When I finally get around to it, there might be five or six different events that I’m importing. In that case, I do NOT separate the events. This takes too long, and I know I won’t keep up with it. I just put the date that I’m uploading. When I’m looking through folders I know that the folder could contain anything from the previous dated folder up to that date. In the example below, I know that “2013-11-17 Planners” could actually contain anything from November 3rd through the 17th, and it’s super easy to see that at a glance. Here’s what my files look like:
I find that using the date is the most straightforward method. I usually know the approximate date when things happened and there’s no ambiguity.
Step 4: Use Your Photos
This is one of those do as I say and not as I do moments. Make sure you actually do something with your photos. You didn’t take them just so that they can hang out on your hard drive. Print them, hang them, put them in an album, etc. I would love to share with you my brilliant method of consistently using my photos, but I’ll let you in on a little secret. I majorly stink at this! I’m a complete photo failure! I have the best of intentions of printing photos and putting together a Project Life album, but I never actually do! I’ve even bought supplies for 3 project life albums, but they're headed to the Goodwill pile. I'm hoping the person who gets them will be able to put them to much better use. I liked the idea of putting together physical albums, but it's somewhat time consuming. I realized, that I would much rather have a complete album in whatever form I can get it done rather than just great intentions and a bunch of half completed albums that never make it to the bookshelf to be enjoyed. Therefore, from this point forward I plan to use the Project Life app.
Photo Organizing Software
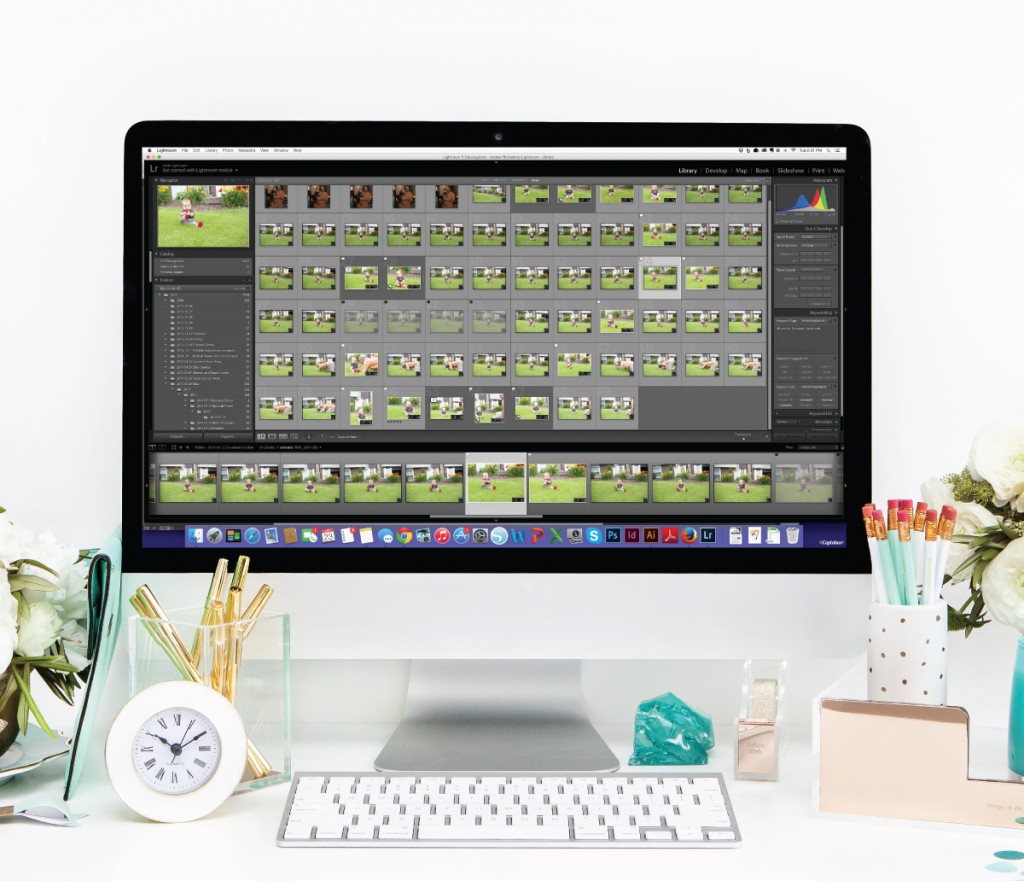
There is software that can help you do this. I personally use Lightroom these days, but I’m guessing most of you don’t have that program. (If you do have Lightroom and want me to do a tutorial on my Lightroom workflow, let me know.) I have my phone photos auto imported into Lightroom as well.
If you have a Mac, iPhoto does this very well. I really love iPhoto, and if I didn’t have Lightroom, I would consider using nothing but that. It automatically pulls in all your photos, organizes them by date, and splits them into events. You can order prints directly from iPhoto and do minor edits. The major frustration is that it's hard to access the photos.
If you don’t have a Mac, I recommend Picasa for your computer. It’s free, and it does a lot of the organizing work for you! You can edit photos in the program, and it connects to a lot of popular print services online. I used it before I got my Mac.
You can also consider using something like box.com or dropbox.com to keep your photos so you can access them anywhere. I also recommend downloading their app that allows you to access the folders on your computer (windows or Mac) just like any regular folder.
This post contains affiliate or referral links. For more information, you can see my disclosure here.
How do you organize your photos? Do you struggle with actually getting them into albums like I do? What are your favorite programs to use?






 Copyright 2025, Get Organized HQ.
Jenn F Says
Great post! I’m bad at not deleting and just buying new sd cards for my phone and camera. I’m deathly afraid of losing photos because of my computer crashing. Do you back up a second copy anywhere?
LauraJane Says
Post authorI do back my photos up. I use crashplan that automatically backs things up. I think I also have some in some other cloud storage.
Leslie Says
Thank you for this! I couldn’t figure out why I couldn’t find Picasa on my MAC but now I know that it isn’t available. I really loved Picasa but am figuring out IPhoto.
LauraJane Says
Post authorI like a lot of thing about iphoto as well.
Sierra Says
I’ve only been able to find one way to organize physical photos that’s actually feasible.
I’ve got a photo box that came with dividers and I have them split up by subject. My self, mom, brother, our pets, and those old black and white photos of other family members we never met. School photos stay in one folder for me, and one for my brother (the envelope they came in, consolidated down to one.)
It’s still a little more haphazard than I’d like, but it gets the job done! 🙂
LauraJane Says
Post authorGetting the job done is great even if it’s more haphazard than you’d like.
Nancy Says
Thankfully, my hubby usually downloads all our pictures. That is, if I use my camera and not my phone. All pictures are in folders nice and neat. My problem is that he puts the date on there and not the event! So, I get to go rename all the folders 🙂
LauraJane Says
Post authorThat’s great that your hubby keeps up with the downloading. I like naming with both date and event name.
Fuzzy Says
Great post but I don’t delete many of my older photo’s of my rescue animals even if they are blurry or not as sometimes they are the only photos i have of them to remember them by
but i do need some system to organize the rest and yours just may help me
thankyou
Sabrina Says
I use ThisLife.com to organize all my photos. This way they are also backed up online in case of a computer crash. ThisLife uses facial recogination and tags all those people then you can review and change if you need to. It puts everything in date order. It is also linked to Shutterfly so you can easily make photo gifts and it can pull pictures from instagram and facbook among others. Works for me. 🙂
Amy Says
I use Dropbox to automatically sync my iphone photos to my PC. Then, every few months I organize them into folders by Month. Sometimes I’ll make a sub folder but usually that’s it. Then I back up to an external hard drive. My plan is to also burn them to DVDs to keep at my parent’s house as offsite storage, but I haven’t done that yet.
LauraJane Says
Post authorSounds like a great system.
iHanna Says
I agree with you, taking and storing photos is much more enjoyable if the files don’t clog up the computer for ever like a mountain you don’t want to climb! I try to delete at once when they’re loaded into the computer, and to make photo books every now and then. It’s so much fun go look at the photos of computer.
Thanks for a great article.
Kelly Says
I would love to see your Loghtriom Workflow!
Tina Says
I use Picasa to organize my photos. It also allows me to tag faces, so as I’ve accumulated photos over the years, I can quickly put together a photo collage for a family members birthday or see how my kids have changed over the years in a slideshow. I also date my folders like you – although, I only use the year-month. I stopped using the actual day because my photos are just too numerous. I’ve vowed to get ‘it done’ before I send my last kid to Kindergarten -but I see that not happening…. sigh. I agree – DELETE – DELETE – DELETE. I have so many duplicates. I want to go to a site like Shutterfly, and continue to make printable books as I reduce my photos … but I’ve only managed to work on a few gift books to date. Bottom line – enjoy the moment – stop before you shoot (a pic) – sometimes the memory is better than the photos could ever be – and seriously – I sometimes lose the joy of the moment stressing over the image/poses/lighting, etc. 🙂
LauraJane Says
Post authorSounds like you have a good system. I totally agree on the getting it “done.” It is tough.
Donna-Marie Lee Says
I have Lightroom and would love a tutorial on using it to organize.
Heather Says
Great post. I’d love a Lightroom file naming post too! ????
Rebekah Says
Excellent article. Do you have an updated article? I found this on Pinterest. How do you organize in LR? And you may want to update because Picasa is discontinued. I agree, it was an excellent program.
Rhonda Says
Please do a tutorial on Lightroom!
Pingback: Weekly Round-Up 7.5.15 – High-Heeled Love