Tour of My Planner Lists Section
Welcome to part five of the Create Your Own Planner series. In the last post of the series I shared the main section of my planner, but did you wonder what was hiding out behind all those other tabs? In this post I’ll take you on a tour of the next two sections in my planner. Here are the other posts in the series in case you missed them:
Part One – Start with the Basics
Part Two – How the Discbound System Works
Part Three – How to Print 8.5 by 5.5 Planner Pages
Part Four – My 2014 Planner Tour
I know I say this often, but it bears repeating. I’m showing what is working well for me right now in hopes of inspiring you, but this exact system may not be ideal for everyone.
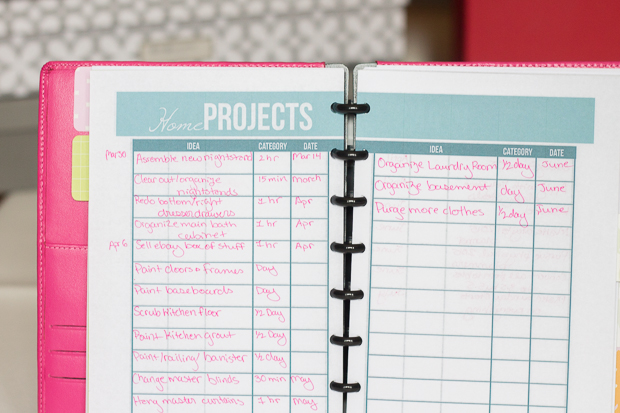
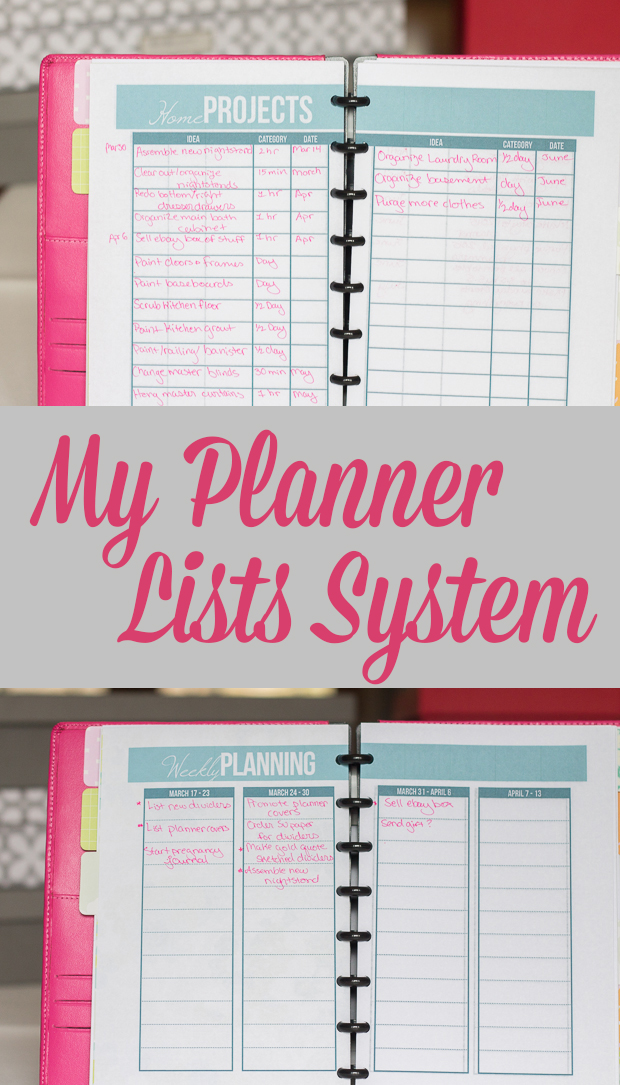
Behind tab 2, I have several lists. They all have the same format, with Idea, Category, and Date columns. My lists include:
- Home Projects
- Product Plans
- Blog Post Ides
- Business Plans
- Misc Ideas
I capture things on these lists for two reasons. First, it’s so that I don’t forget anything. For example, if a stellar blog post idea pops into my head on a random Saturday, I want to be sure that I don’t forget it.
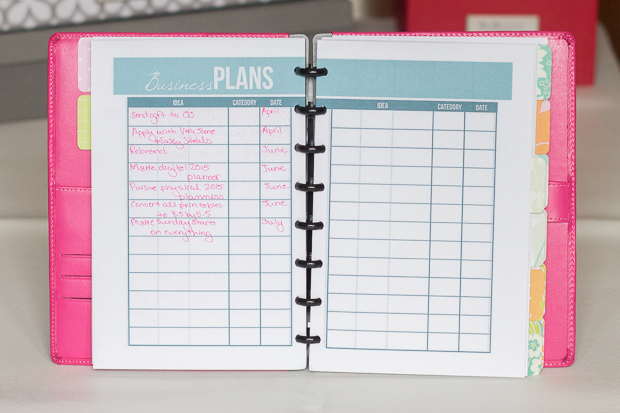
However, many of the items on these lists I have no fear of forgetting (I’m definitely not going to forget that the kitchen grout needs painting since I see it daily, for example). I use this as a place to prioritze everything I need to do and help keep me from feeling completely behind. When all these things live in my head, I tend to feel like I need to complete them all right away, which is definitely not feasible. Writing them down and giving them a ballpark target completion date helps.
I’ve had these lists for a while, but I recently took it a step further, and this is the key for me to tie it all together. Just having a whole bunch of lists without a consolidated plan to complete the tasks doesn’t accomplish much. Therefore, I created these weekly planning pages. (They are a lot like my quarterly planning system, but with a lot more space in each week):
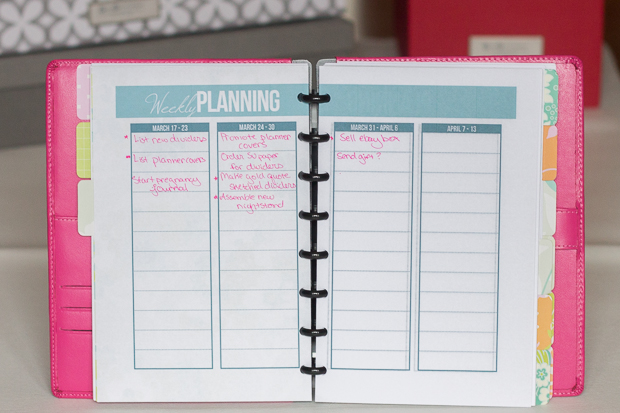
Here, I record my main tasks for the week. When I add something from one of my master lists to this sheet, I put last date of the week to the left of the item on the master list, and I put a star beside it on my weekly plan. That way I know to cross it off the master list when it is complete. Seeing this view also keeps me from overpacking each week with more than could ever really be accomplished.
I will say that I’ve also tried keeping these master lists in digital form using ToDoist, and I didn’t mind that too much. Honestly, I’m still undecided about which method I prefer.
To answer some anticipated questions, you can get the pretty dividers here. You can download the list and weekly planning pages as printables for free by clicking here. (Please download right away if you’re interested, because they’ll be going in my shop soon, and won’t be available for free here anymore.)
How do you keep your master lists and ideas? How do you keep from feeling overwhelmed with all your lists?




 Copyright 2025, Get Organized HQ.
Elizabeth Beach Says
i purchased your planner but do not know what several of the sections are purposed for. Where can I find these instructions? These are especially that back sections. Thank you.
LauraJane Says
Post authorWhich pages are you wondering about? I can do a post or video showing how to use those pages.
Elizabeth Beach Says
i don’t understand the pages with just numbers on them. Thank you.
LauraJane Says
Post authorAre you talking about the 31 day habit trackers where it’s intended for you to check off all 31 days?
Elizabeth Beach Says
I don’t know what pages they are because a lot of them do not have headers and only have a series of numbers at the bottom. Is there any way that I can have access again and you can help me print it correctly? ElizabethBeach