How to Print 8.5 by 5.5 Planner Pages
Welcome to part one in the How to Create Your Own Planner series. In this series, I will give you ideas on how to create a planner that works well for you, walk your through how my own planner is set up, and I’ll cover some of the logistics of creating your planner. I started this series in this post by talking about the disc bound system that I prefer for my planner.
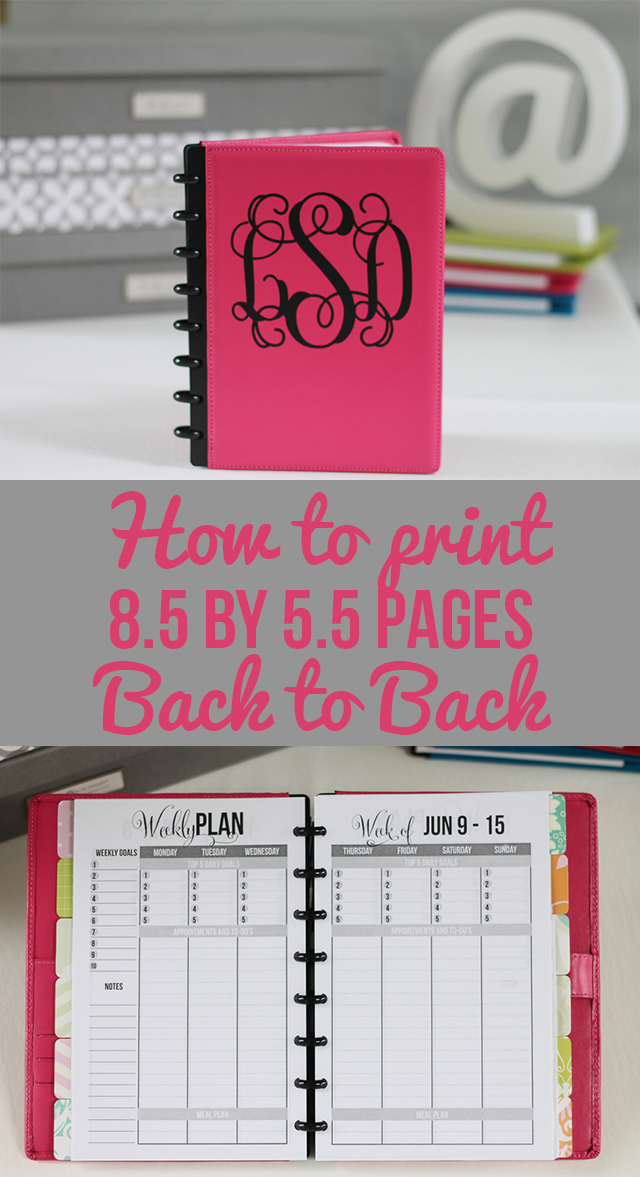
I’m starting off with the most requested topic for this series instead of starting with the first step in creating your own planner. By far the most frequent question I receive is how to print 8.5 by 5.5 pages (like these) back to back.There are a lot of ways to accomplish this, so I’ll cover most of your options here.

VERY IMPORTANT NOTE: One important thing to know first is that you CANNOT use the 8.5 by 11 pages with two 8.5 by 5.5 pages side by side to print back to back. These are perfect if you want to use option 1 below, but they will not work for back to back printing. It won’t work no matter how you arrange it, so don’t waste your time trying! You need to either have a special 8.5 by 11 file with pages in an order that really doesn’t make sense unless you’re printing back to back, or you need a file with the pages already in 8.5 by 5.5 format. If you’ve bought any of the 8.5 by 5.5 pages from me, you should have both files included, so you can print back to back if you’d like. (If you can’t find them, forward me a copy of your receipt and I will send you a link where you can access them.) If you’ve have 8.5 by 5.5 pages from somewhere that doesn’t offer the 8.5 by 5.5 size pdf, then I’m afraid you’re out of luck. You will have to use option 1 below.
Option 1: Leave Back Pages Blank or Print Note Pages
One simple option is to allow the back pages to be blank for notes or to print the lined notes pages on the back of all the pages. This will allow you to use the standard letter size printables that have 2 to a page, and then you can just cut the pages in half. Like I said above, this is really your only option if you don’t have an 8.5 by 5.5 file available.
Option 2: Get Your Pages Printed Professionally
Another easy option is to get your pages printed professionally, so you don’t need to go through the trouble of printing it yourself. In order to do this, you must use the files that already in the 8.5 by 5.5 size. Also, you will need to make sure the first page in the file is either a title page or a blank page, so that the pages line up correctly. Otherwise, you won’t be able to have pages that are supposed to be a two page spread side by side. In other words, page 1 will be the first page by itself, and then pages 2-3 will be the first two page spread, pages 4-5 will be the second two page spread and so on.
My favorite and I think the most affordable source for getting this done is www.BestValueCopy.com. For the 8.5 by 5.5 size, color copies are less than 5 cents per page, and black and white copies are even cheaper! You can get an entire weekly planner printed for $2.50! The shipping is fairly expensive, but I think it still comes out cheaper than going to a local office supply store. Another affordable option is 9 Cent Color Copies. Unfortunately, they do not have a website that you can order from, so you have to e-mail them back and forth to order, but their shipping is a little more affordable.
This is what I personally do for most of my planner pages, because it’s so quick and easy.
Option 3: Print the Pages Yourself Directly on 8.5 by 5.5 Paper
If you want to print the pages from your own printer at home, this method is pretty straightforward. I highly recommend that you watch the video of how to do this, as I think it’s easier if you can see how to do it instead of just reading the steps. Again, VERY IMPORTANT, make sure that your first is blank or a title page. In other words, page 1 will be the first page by itself, and then pages 2-3 will be the first two page spread, pages 4-5 will be the second two page spread and so on.
First, cut your letter size paper in half (before you’ve printed anything), so that you now have a stack of 8.5 by 5.5” paper.
Second, put your 8.5 by 5.5 paper into your printer and print only the odd pages. This is really easy to do in the print dialog box of Adobe Reader (see the video if you’re not sure how to do it). I recommend doing only a few pages at a time so if you do mess up, you’ve only wasted a few pages rather than an entire document.
Third, take the pages you printed and reverse the order the order of the stack. This DOES NOT mean simply flip the stack over. It means take the top page and set it to the side. Then take the next page and stack it on top of that one and so on.
Fourth. Place the stack of printed pages in your printer’s paper tray such that it will print on the blank back side of them. Unfortunately, I can’t tell you exactly how this works for you printer because every printer is different. I recommend a little trial and error and then make a note (or even take a photo) of the proper direction to place items you wan’t to print on the back of. Place that note somewhere handy by your printer so you always know what direction to place pages to print on the back of them.
Fifth, print only the even pages, and that’s all!
Option 4: Print the Pages Yourself on Full Size Paper in Booklet Form
This is an another way to print back to back if you want to print directly on regular size paper and then cut it in half. For this you will need use the file that is sized at 8.5 by 5.5 and has a title page first. I highly recommend that you watch the video of how to do this, as I think it’s easier if you can see how to do it instead of just reading the steps. I think this method can be just a little more complicated, but it’s really up to you. For this method you use the booklet option in the print dialog of Adobe Reader. Print all the front sides first. Then reverse the printed stack of pages, and print all the back sides on the back of those. Then cut the pages in half. The video shows in detail how to accomplish this.
I hope this was helpful to you, and let me know if you know of other ways to accomplish that you find easier or if you know of other affordable sources to have your pages professionally printed.


 Copyright 2025, Get Organized HQ.
Leslie Says
I’m trying this! thanks so much for sharing. I like the note pages on the back for the week. Either way you gave two options which i think is awesome! Thanks so much for sharing.
James P Says
Many printers have a booklet printing option, saves having to use files that are in a specific but non sequential order. Also handy for work references that are handy to have in your planner.
Christi wilson Says
This is awesome!!! Thank you so much! I’ve bookmarked this page for future reference!
LauraJane Says
Post authorSo glad it was helpful to you!
Vanessa Says
That’s great! That’s what I look for 5.5 x 8.5. How did you set the pages in order to print easier? That’s my struggle.
LauraJane Says
Post authorI’m not sure if I understand the question. I have both he standard 8.5 by 5.5 file and a file that offers the pages side by side on an 8.5 by 11 page.
Vanessa Says
Oh, one more thing is which program are you using for making planner? I used Excel and Adobe Reader but it seems not right. Let me know. 🙂
LauraJane Says
Post authorFor printing, I use Adobe Reader. I design the planners in the Adobe Suite (Indesign mostly and graphics in Illustrator).
Vanessa Says
Oh thanks! I don’t have Adobe Illustrator. That’s awesome to use that program. Thank you.
Tamara Says
Where did you get the monogram for your planner?
LauraJane Says
Post authorI made it myself with the my cutting machine and some black vinyl. I also offer just the monogram by itself in my Etsy shop: https://www.etsy.com/listing/176038215
Tania Says
Beautiful! What software do you use to create your pages?
Thanks!!!
J. Macall Arnold Says
thanks so much!! I have been racking my brain for a couple of days now trying to figure out a process that seems like it should be easy but is much more complicated! Haha. How much ink do you seem to go through? I’m printing a half year (June 2014-Dec 2014) including 1page/day 1 page/month. And I’m purchasing my other fillers pre printed. you don’t have to do the math Haha but I’m wondering if you think I need to get a new ink refill specifically for this. Tia!!!
LauraJane Says
Post authorPersonally, I use option 2 and get my pages printed professionally when I’m printing out a whole year’s worth. It’s both easier and cheaper than printing it from my home printer. A lot depends on your printer. My black ink will last quite a while, and I’m sure I could print way more than a whole year on one cartridge. Color is a different story. You can also try places like 123inkjet where the remanufactured cartridges are tons cheaper than new cartridges. Some people have great success with that. Or some folks refill their own. I personally only buy the full price original ink for my printer because I’ve had too many bad experiences with the remanufactured inks.
Shirley Rachal Says
Can you please tell me where you purchased the hot pink planner? I saw the answer for the monogram but not the pink planner. Thanks! Love it.
LauraJane Says
Post authorThe cover itself is the Arc system from Staples. The inserts I made myself and are available in my Etsy shop (as are the fully assembled, ready to go planners). http://www.etsy.com/shop/IHeartPlanners
Trisha Says
Hi.
I am at bestvaluecopy and it is way more expensive than $3.00. What am I doing wrong? My files are 5.5 x 8.5 and I want to have a 12 month planner with front journal page/left and right side planner/left journal page and Blog Planning page.
Could you please help a sister out?! I am so confused…
LauraJane Says
Post authorMake sure you are selecting the correct size paper. Also, $3 would be black and white. Color would be more expensive (more like $10-$15).
Sarah Says
What type of paper do you request from best value copy to print on? Cardstock? Any other options?
LauraJane Says
Post authorI use their default paper. I don’t request anything special.
divadivine Says
I’m considering using Best Value Copy’s other finishing option.Would I do this coallated or uncoallated? I have zero patience for hole punching so I’m just going to do a wire finish with a hard front and back cover.
LauraJane Says
Post authorI do collated, but if you are only printing one copy it shouldn’t matter. I think doing that would work great.
June Says
Your video was very helpful.
Thank you.
June
Rutuja Says
Hi,
I just wanted to know which paper to use for the printing in order to get perfect print? I tried printing the planner pages I have designed, but they’re too light and look disgusting once on paper.
Please help.
LauraJane Says
Post authorIt’s up to you, but I like 32lb bright white paper.
Tiffany Says
Hi there!
I’m interested in getting copies printed professionally, and I was wondering if you could provide directions for how you do it on Best Value Copy? I’m a little lost!
Thanks!
LauraJane Says
Post authorI’ll add creating a tutorial for Best value Copy to my to do list. I do only recommend it for the dated planners. It wouldn’t work as well for other types.
ELIZABETH Says
Can you help me, pretty please?
What I have:
I’ve created my pages on PowerPoint, and saved slides in portrait orientation for letter paper (however, the slides are 10 x 7.5 inches, should I change to 8.5 x 5.5?) Then I saved as a PDF.
What I’ve tried:
I changed the page size to 8.5×5.5 in the Acrobat print dialogue box. I printed a test page in multiple and booklet form, and it didn’t work. Because of the 8.5×5.5 page size, it prints on a smaller scale on my letter size paper, with a wide bottom margin.
I’ve also tried not changing page size in the print setup box in Acrobat, and printed a test page using multiple and booklet format, and the top/bottom margins are “squished in” making the page centered, which prints smaller than 8.5×5.5.
What should I do?
Do I go back to my PowerPoint file and change the slides to 8.5×5.5?
Do I do anything at all with the page sizes on Acrobat print dialogue box?
I hope I was clear! I’d really love to use my Martha Stewart junior arc notebook for this upcoming school year (it was cheaper hahaha). But I just may exchange it for the larger $25 size. This half letter size printing is so confusing.
Thank you!!
LauraJane Says
Post authorI rarely use Powerpoint, so I can’t give much advice there. I will say that there will be extra space at the top and bottom because the ratio is not the same. If it filled that space then it would stretch the text which wouldn’t be good.
Arlyn Says
Hey! So for Option 2, printing professionally at Best Value Copy, is there a way to print front and back pages that work out in the correct order? Will they know how to do that?
LauraJane Says
Post authorIt will work only if you have a file that is already set up in the order you’d like. You also must start with the page BEFORE you want it to start or the pages won’t line up correctly.
Kevin Says
If your are printing from Microsoft Word, set up your paper as standard (8.5 x 5.5) and select the booklet option for printing. When you select this option, you will be given another option on how many pages to print in each ‘booklet’. Select 4. Then use letter size paper in landscape orientation to print. This will keep the very last page of your file from printing on the back of the very first one. Using this arrangement, you can set up the whole notebook just like you want it and print it all in one printing. Remember that page 1 does NOT face page 2; rather page 2 will be on the left facing page 3 on the right. After printing, you will have to cut the pages in half and reorder them. Do this reordering by laying the two stacks of halves (in the order they were printed) next to each other (One stack should have page 1 on the top and the other should have page 3 on the top.) .and create a new pile by taking alternating pages from each stack.
Sharika Says
Thanks for sharing this. I don’t print often, but do that at times. I will save this page for future, because nothing stays in my head.
I had the same question which program you use, got the answer from other reply as Adobe. Have got that, will work. Thanks.
Mehran Says
Part 3 helped me a lot. Although I took notes on the other two videos as well, this one proved the easiest for me. Thank you for your tutorials!
EM Schiers Says
VERY IMPORTANT NOTE: One important thing to know first is that you CANNOT use the 8.5 by 11 pages with two 8.5 by 5.5 pages side by side to print back to back.
You CAN print on 8.5×11 pages. For years, I’ve been printing daily pages with images. The trick is learning the layout sequence of 1/2 pages for printing in landscape, short side back to back. Cut them down, punch.