How to Make Pantry Labels with Cricut Joy
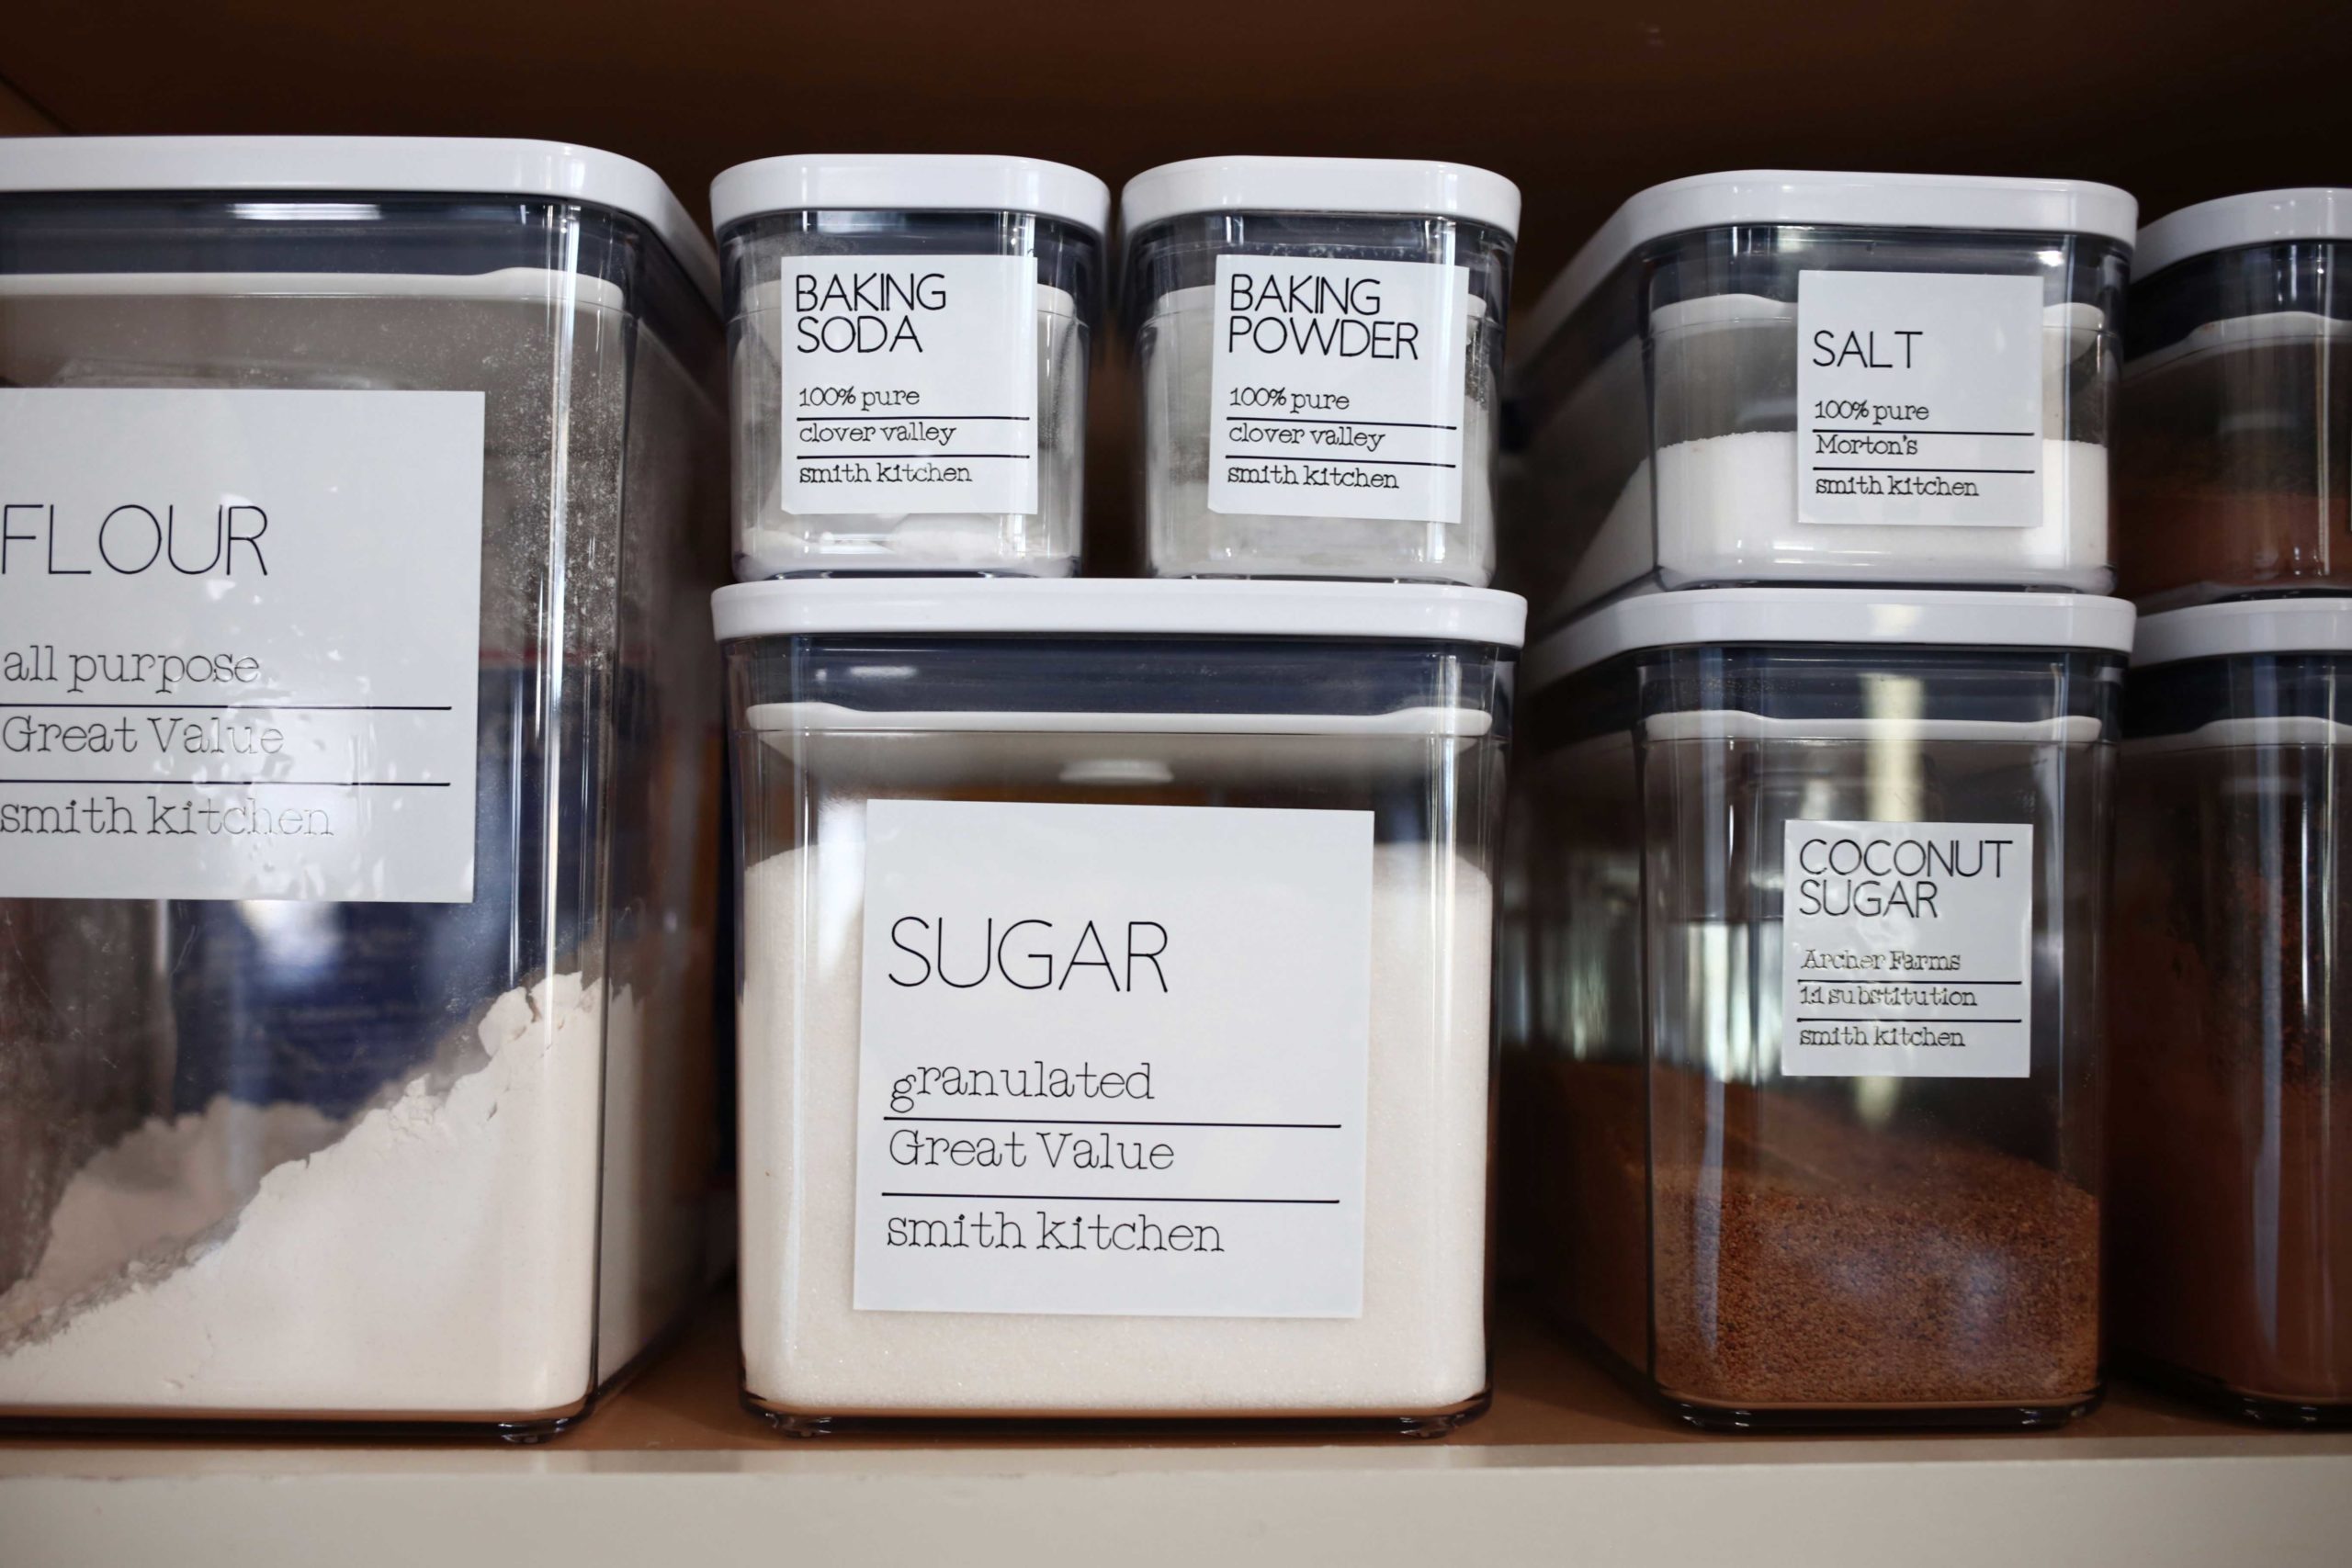
If you use storage bins in your pantry, then you already know the joys of a well-organized pantry. In my opinion, there's only one thing better than getting your pantry organized into neat and tidy bins, and that's labeling your neat and tidy bins! Today I'm going to walk you through my process for making kitchen pantry labels with the Cricut Joy. Even if you don't need to label your pantry items, these labels are cute no matter where you put them!
Big thanks to Cricut for sponsoring this post! If you are more of a visual learner, be sure to watch my video below. Otherwise, keep reading for step-by-step instructions.
Materials
There are really only 3 things you need for these labels:
- Cricut Joy machine
- Smart Label writable vinyl
- Pen from Cricut (I used fine point black and extra fine point black)
That's it!
Step 1: Set up Label Shapes
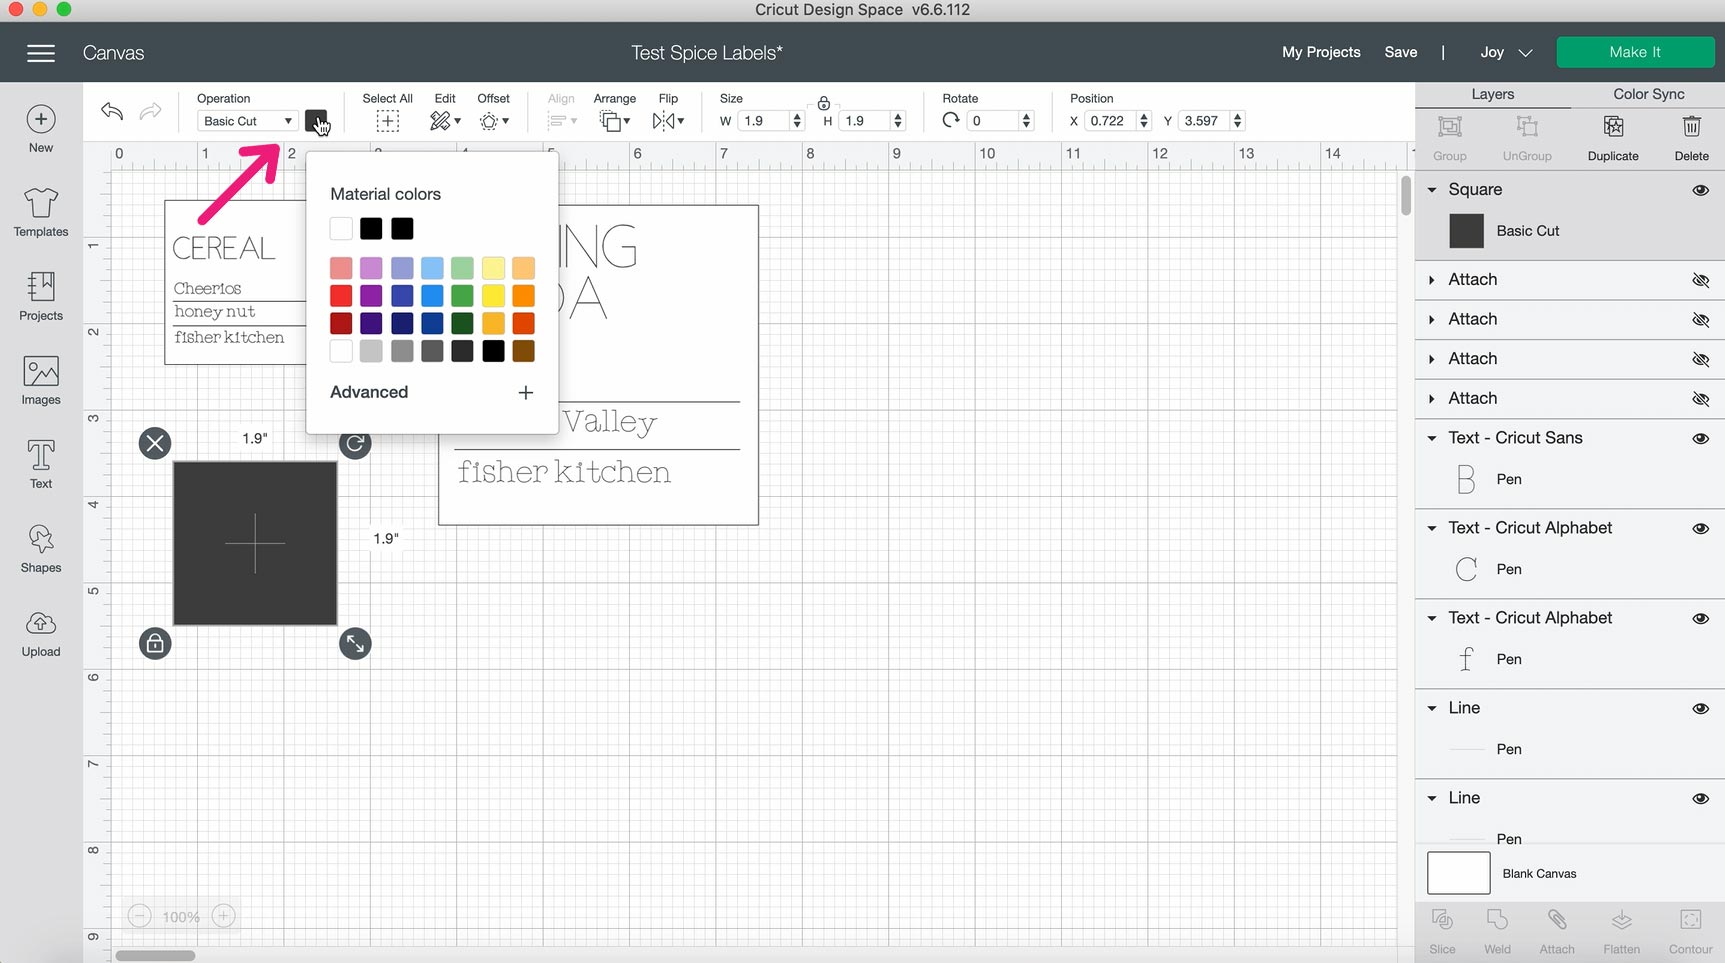
The first thing you want to do is open a new project in Cricut Design Space (the software that goes with your Cricut machine) and set up the shape of the labels. This is the part that is going to be cut out when you tell the Cricut to make your labels. I wanted square labels for my storage bins, so I selected the shape tool and chose a square.
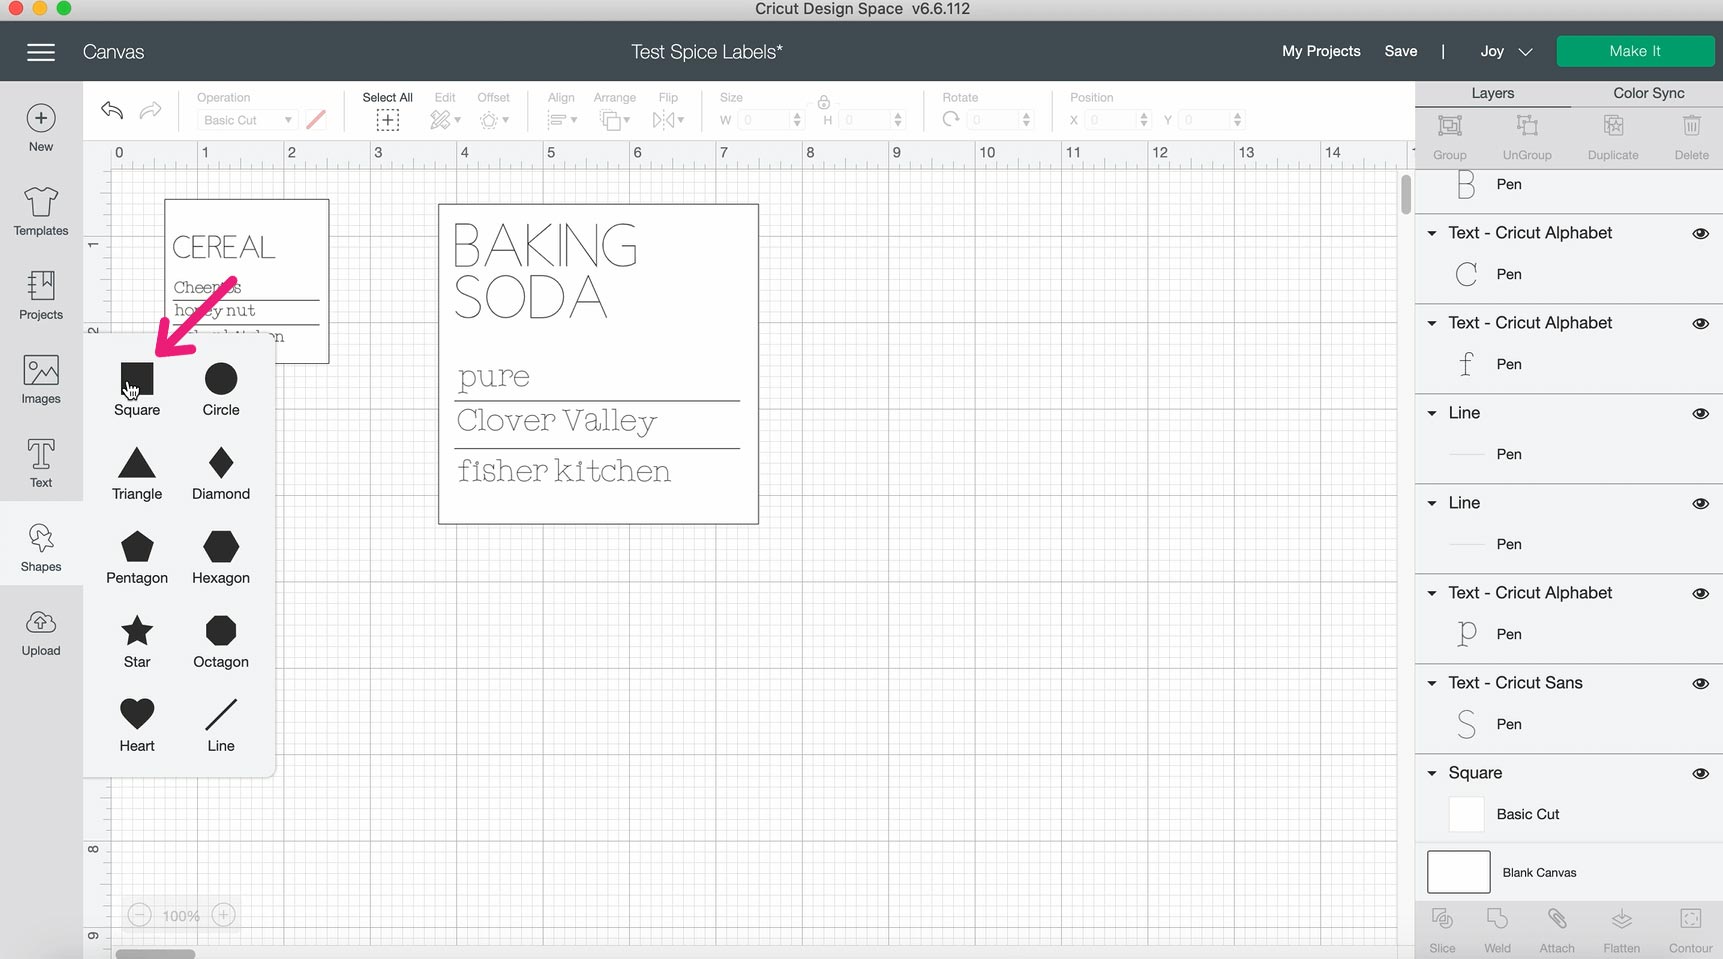 I recommend measuring your containers and deciding on one or two different label sizes that will work well for multiple containers so that your labels look uniform. In Cricut Design Space, select the shape you just added and go up to the “Size” settings at the top and enter the label dimensions that you decided on.
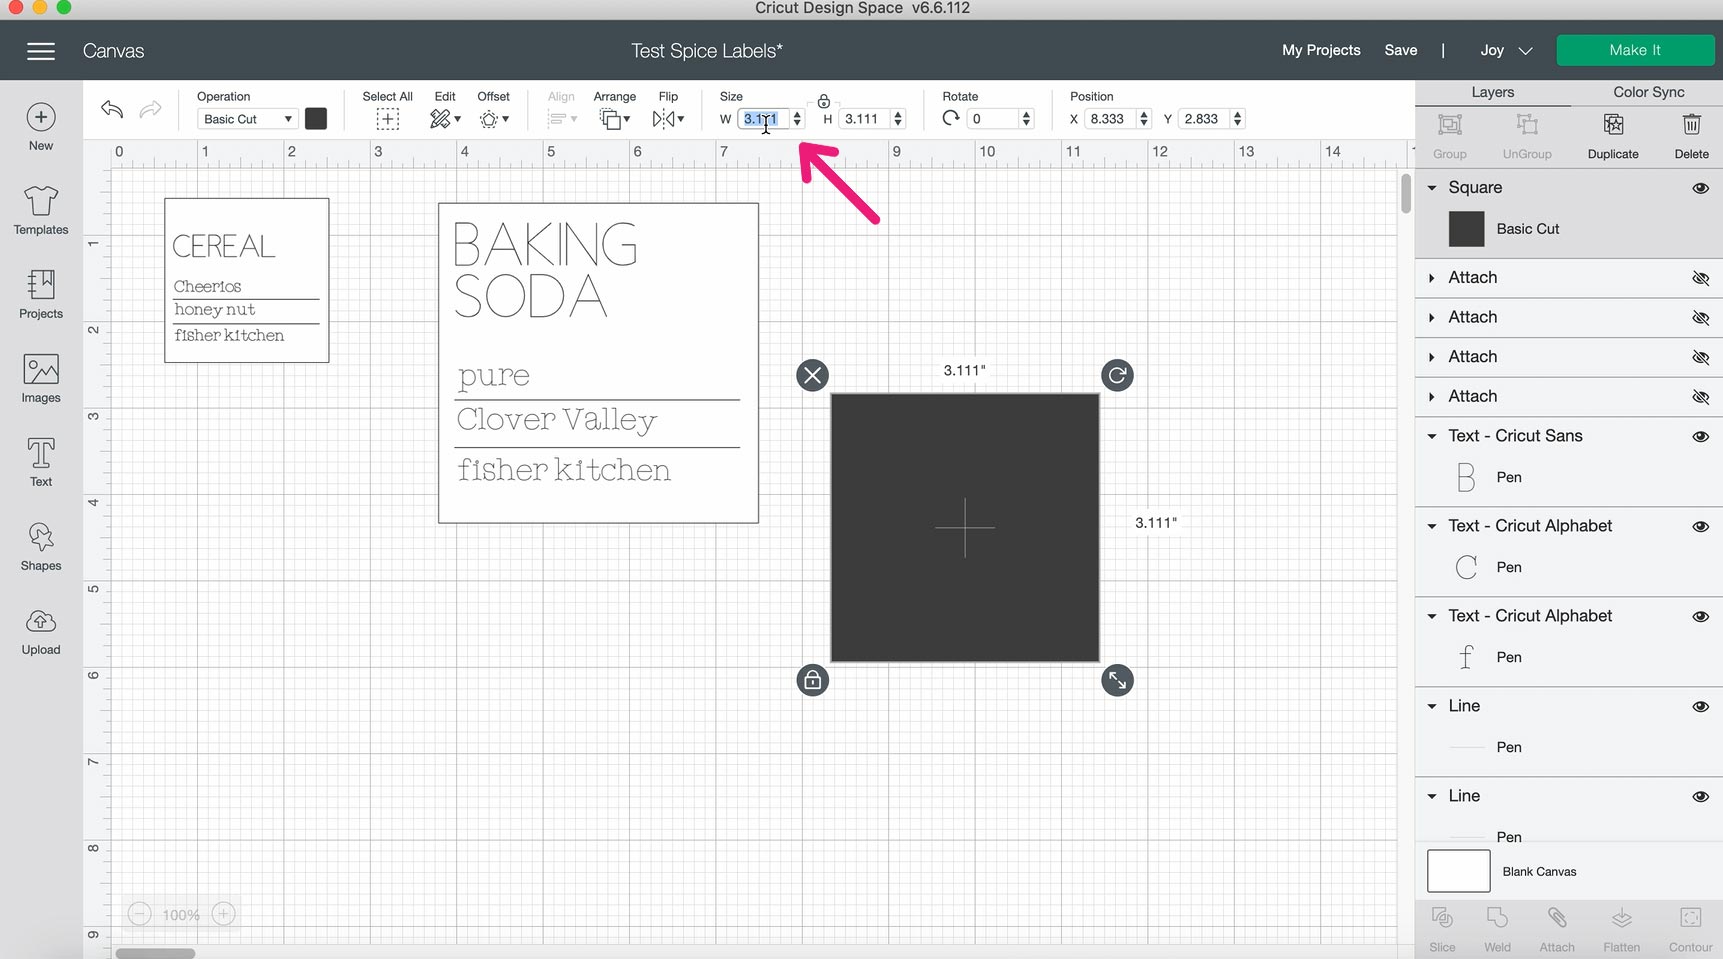 One last important step for your label shapes is to to go the “Operation” setting at the top and make sure it is set to “Basic cut.” That means that your Cricut will cut out this shape (as opposed to drawing it with a pen). You can also set the color option to white so that your label text will show up while you're designing the labels.
Step 2: Add Label Text
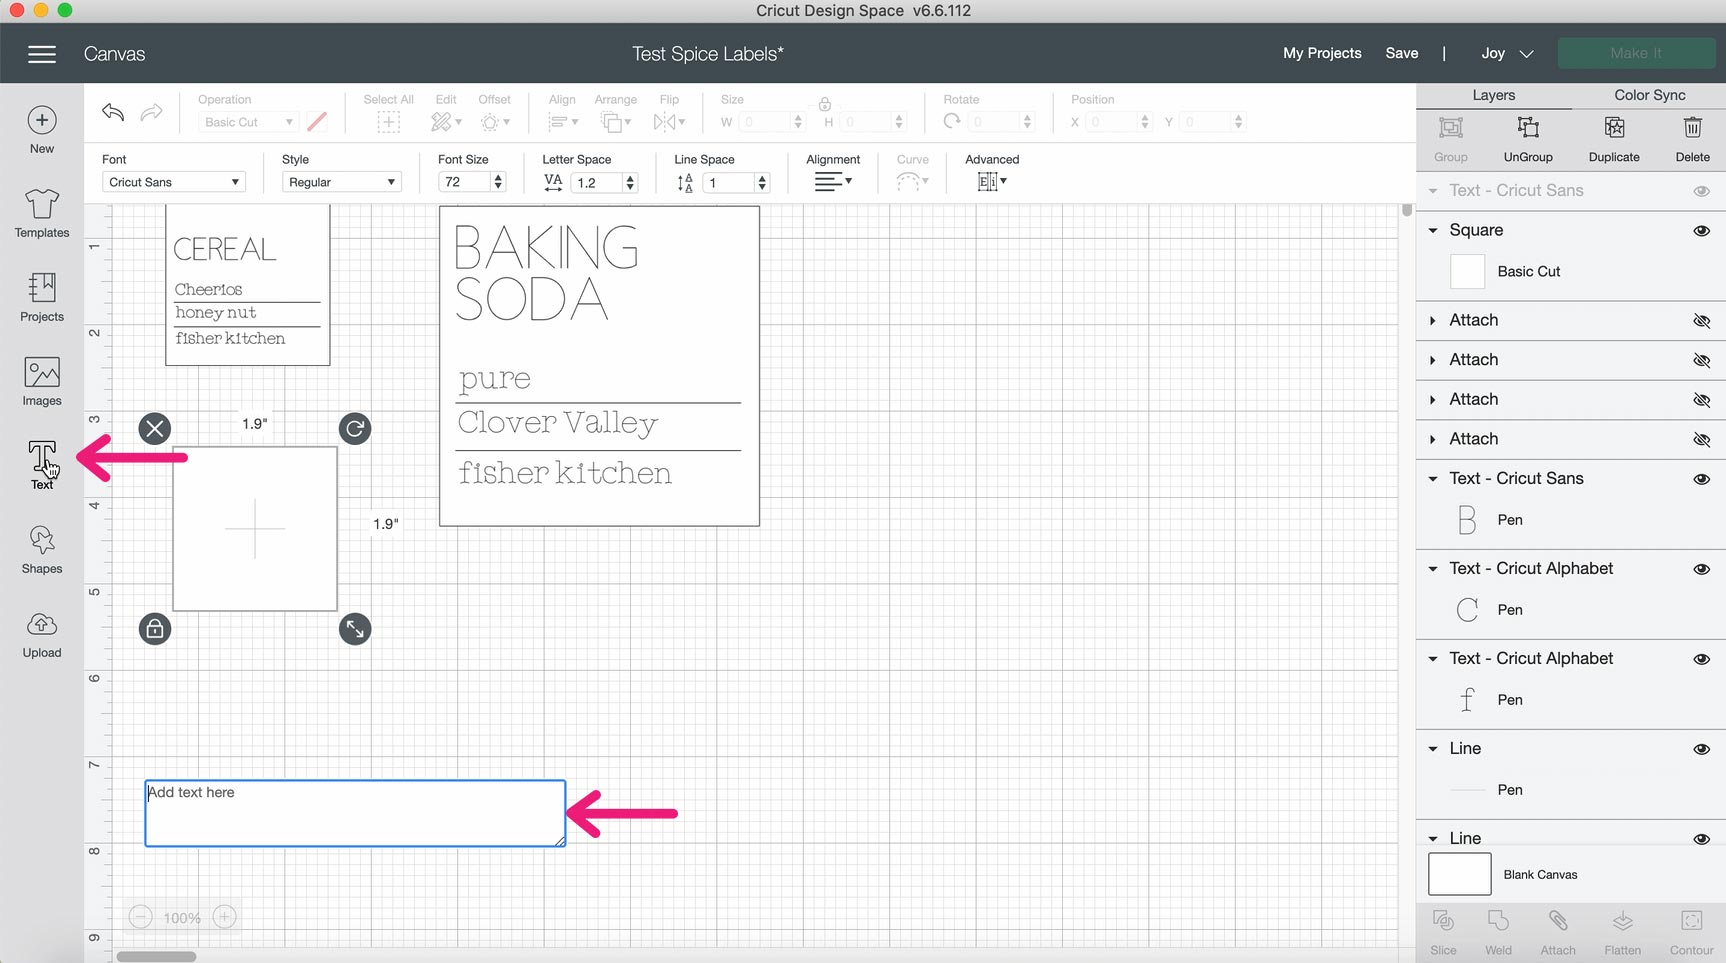
Now it's time to add text to our labels! Simply click the text tool (the big “T” over on the left) and start typing.
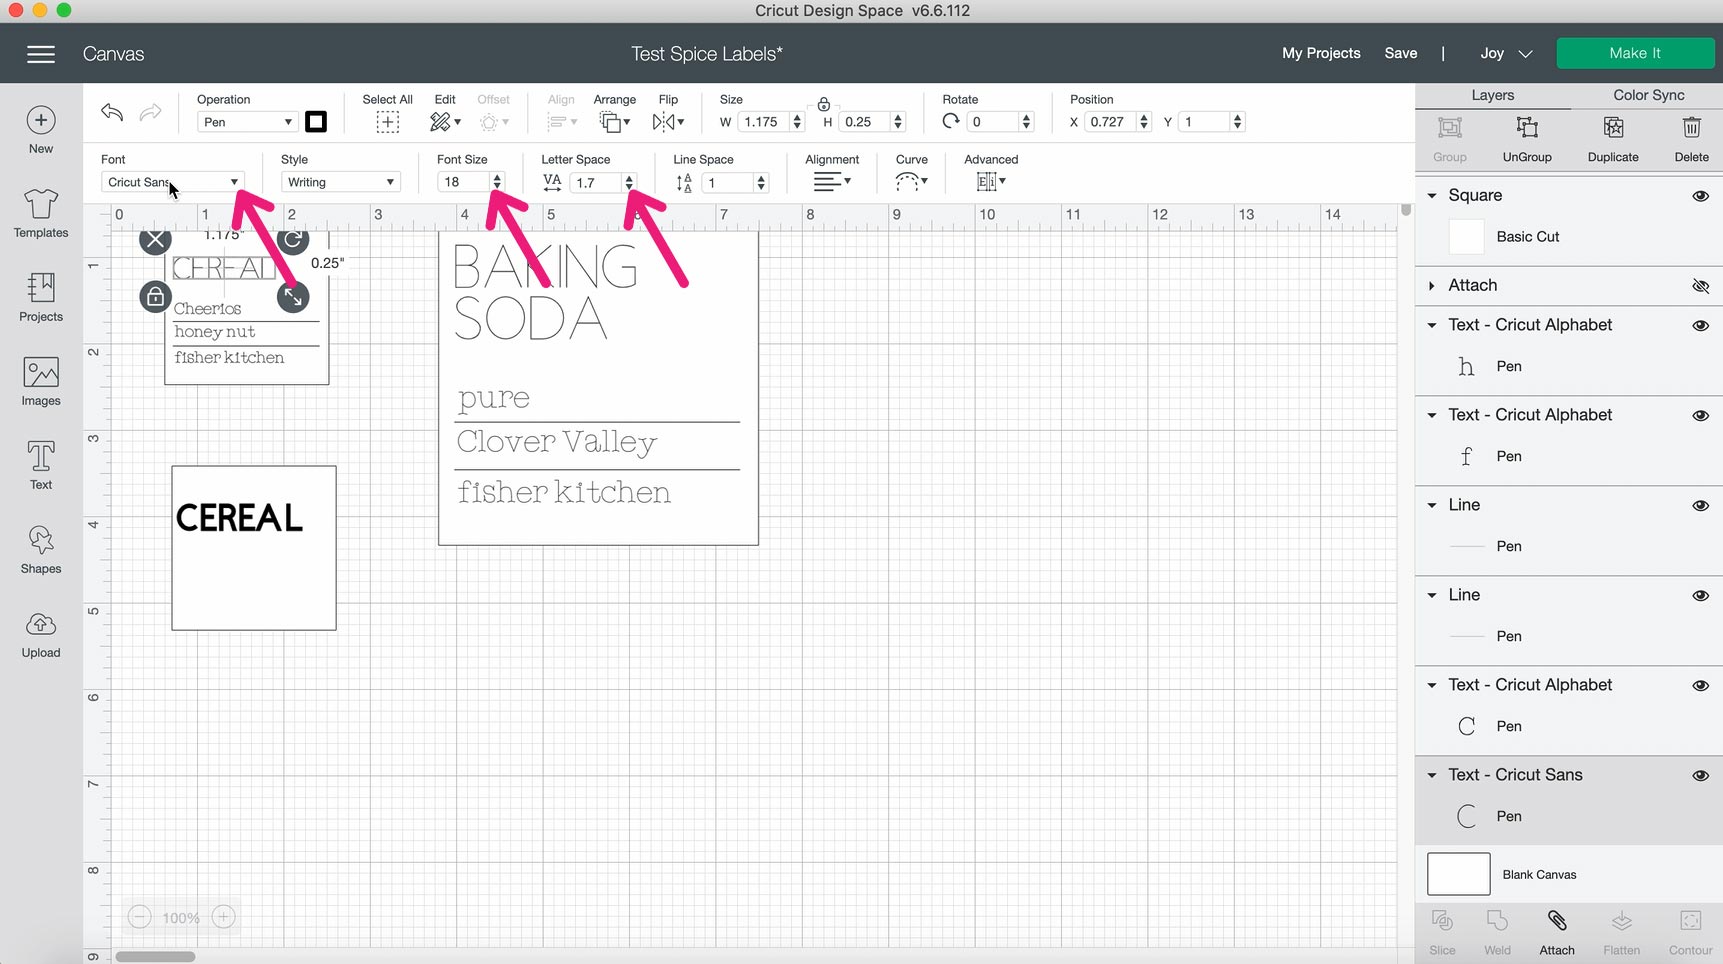
Once you have typed your label text, you can resize it, change the font and spacing, etc. I used the Cricut Sans font for the bigger text on my labels and Cricut Alphabet for the smaller text.
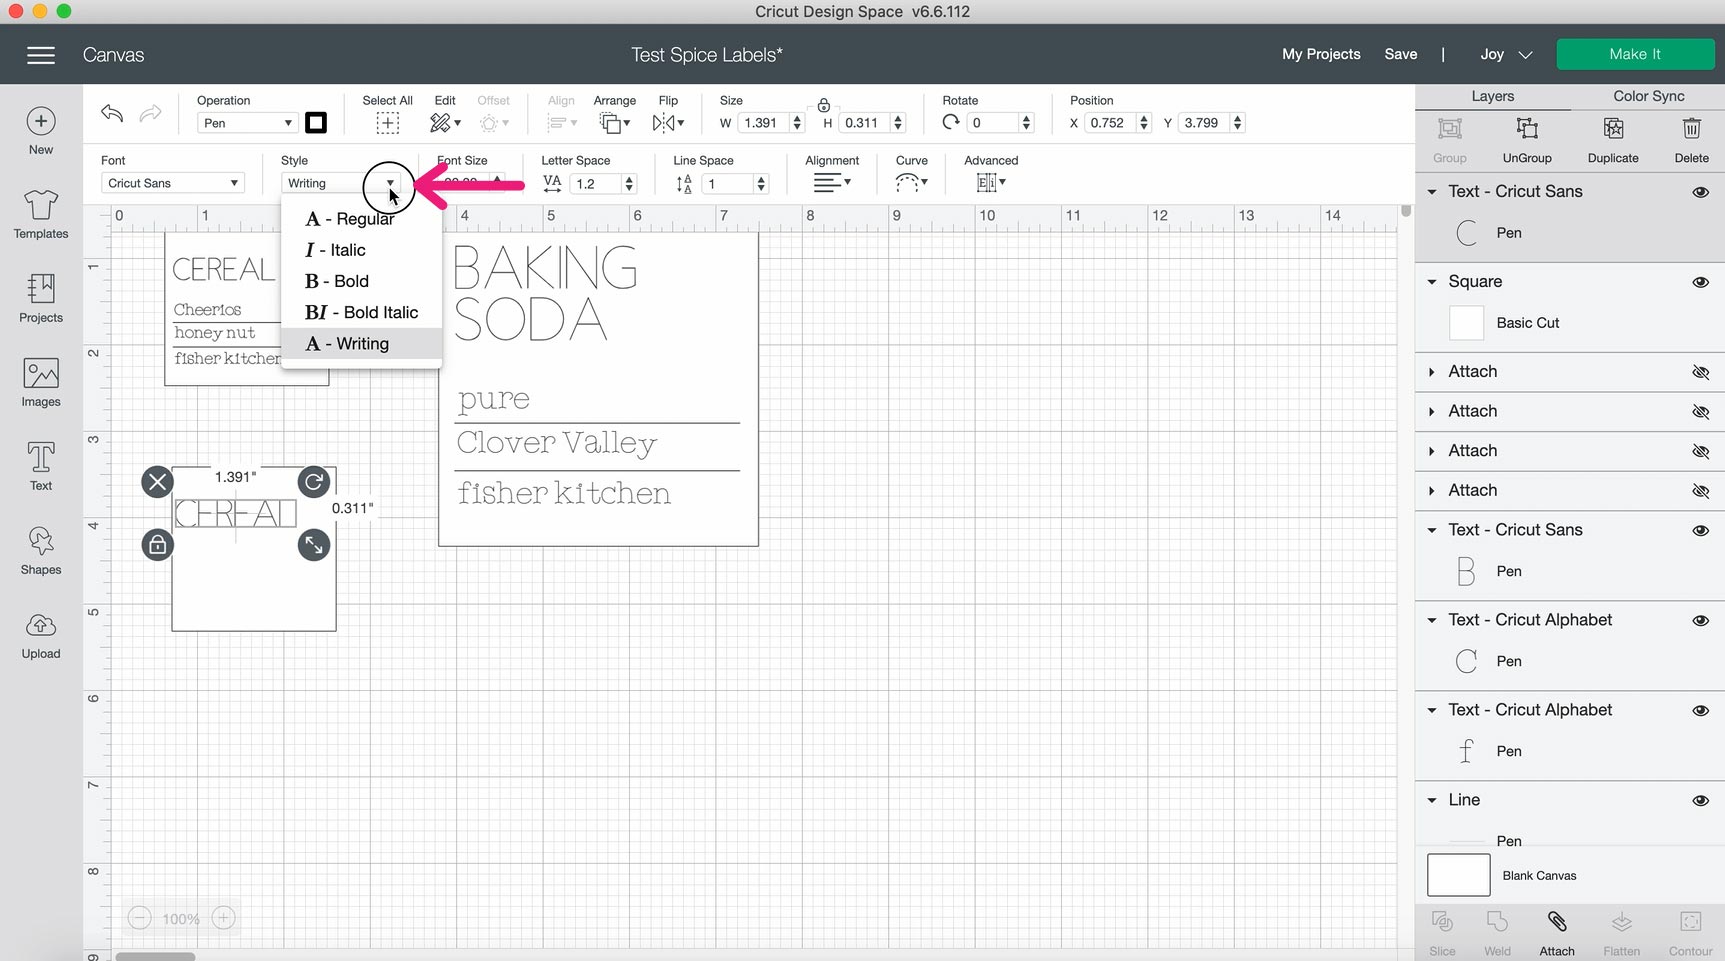
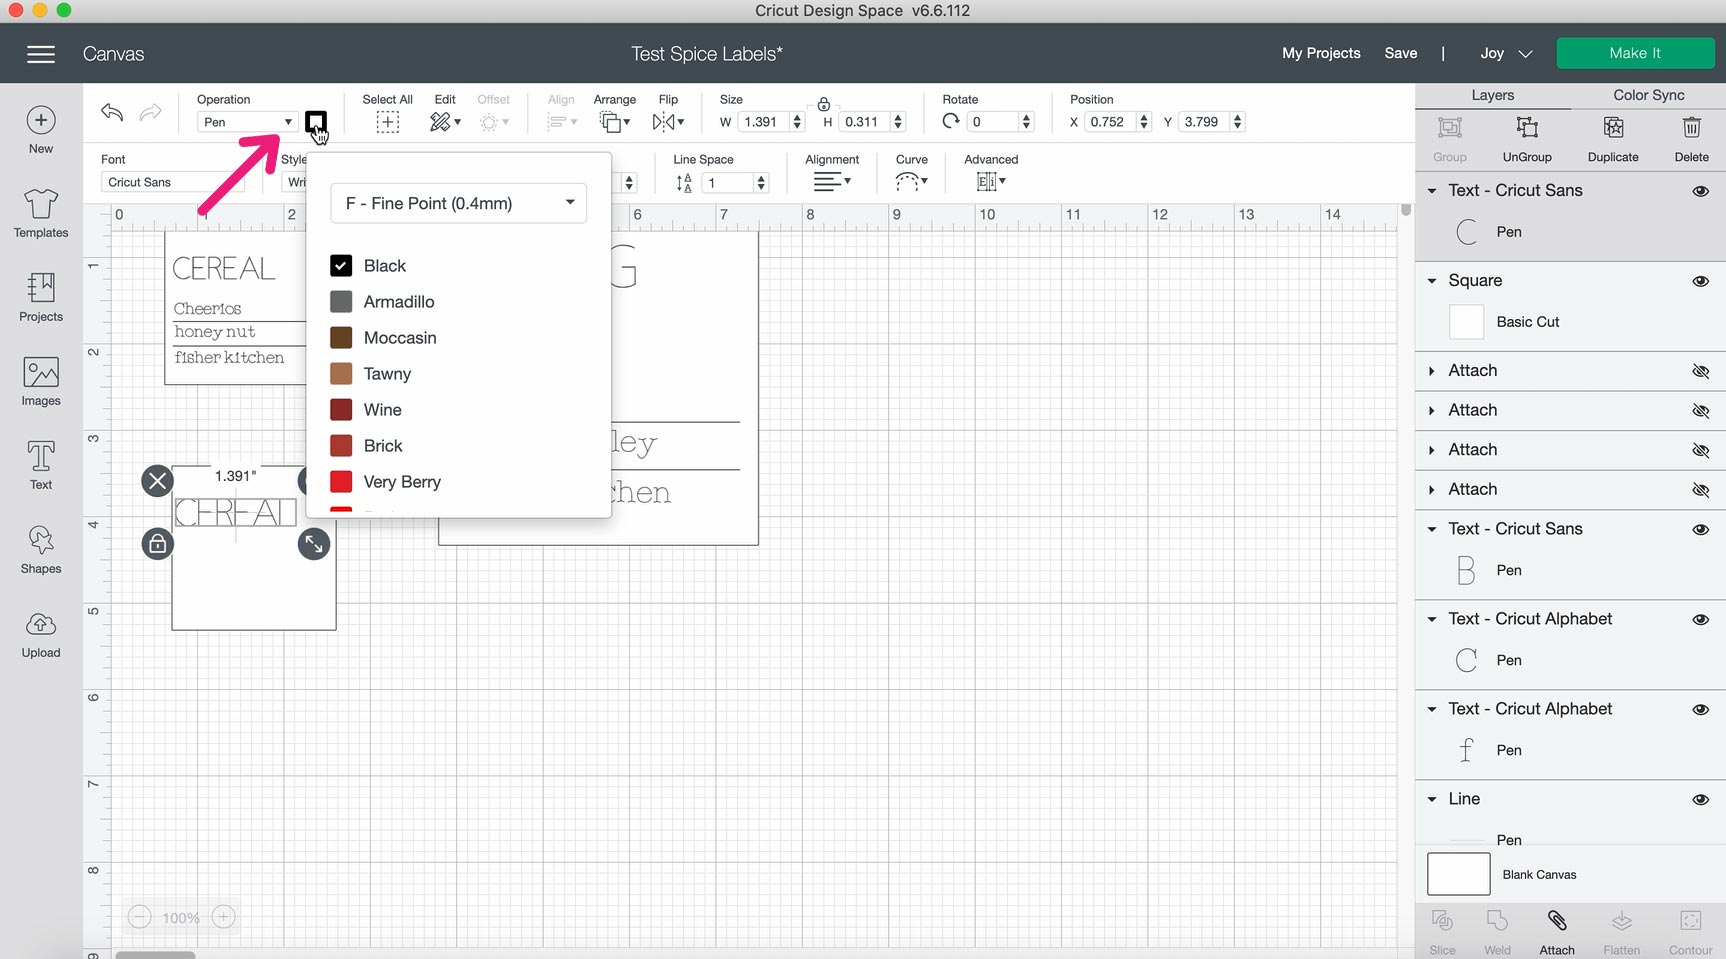
For any text that you want the Cricut to draw, make sure you change the Style drop-down at the top to “Writing.” You also want to make sure the Operation at the top is set to “Pen.” Next to the Operation drop-down, you can set the pen thickness and color. This will tell the machine when to prompt you to switch out your pen if you are using multiple colors and thicknesses.
Step 3: Add Label Details
If you like simple labels with just one line of text, feel free to skip this step! Personally, I like to add a little more detail, such as the brand name or other instructions (like the cooking time for a particular kind of pasta). I keep adding text with the Text tool until I have all of the text that I want on my label. Don't forget to set the Operation to “Draw,” then choose a pen thickness, pen color, font, and text size for each text box that you add.
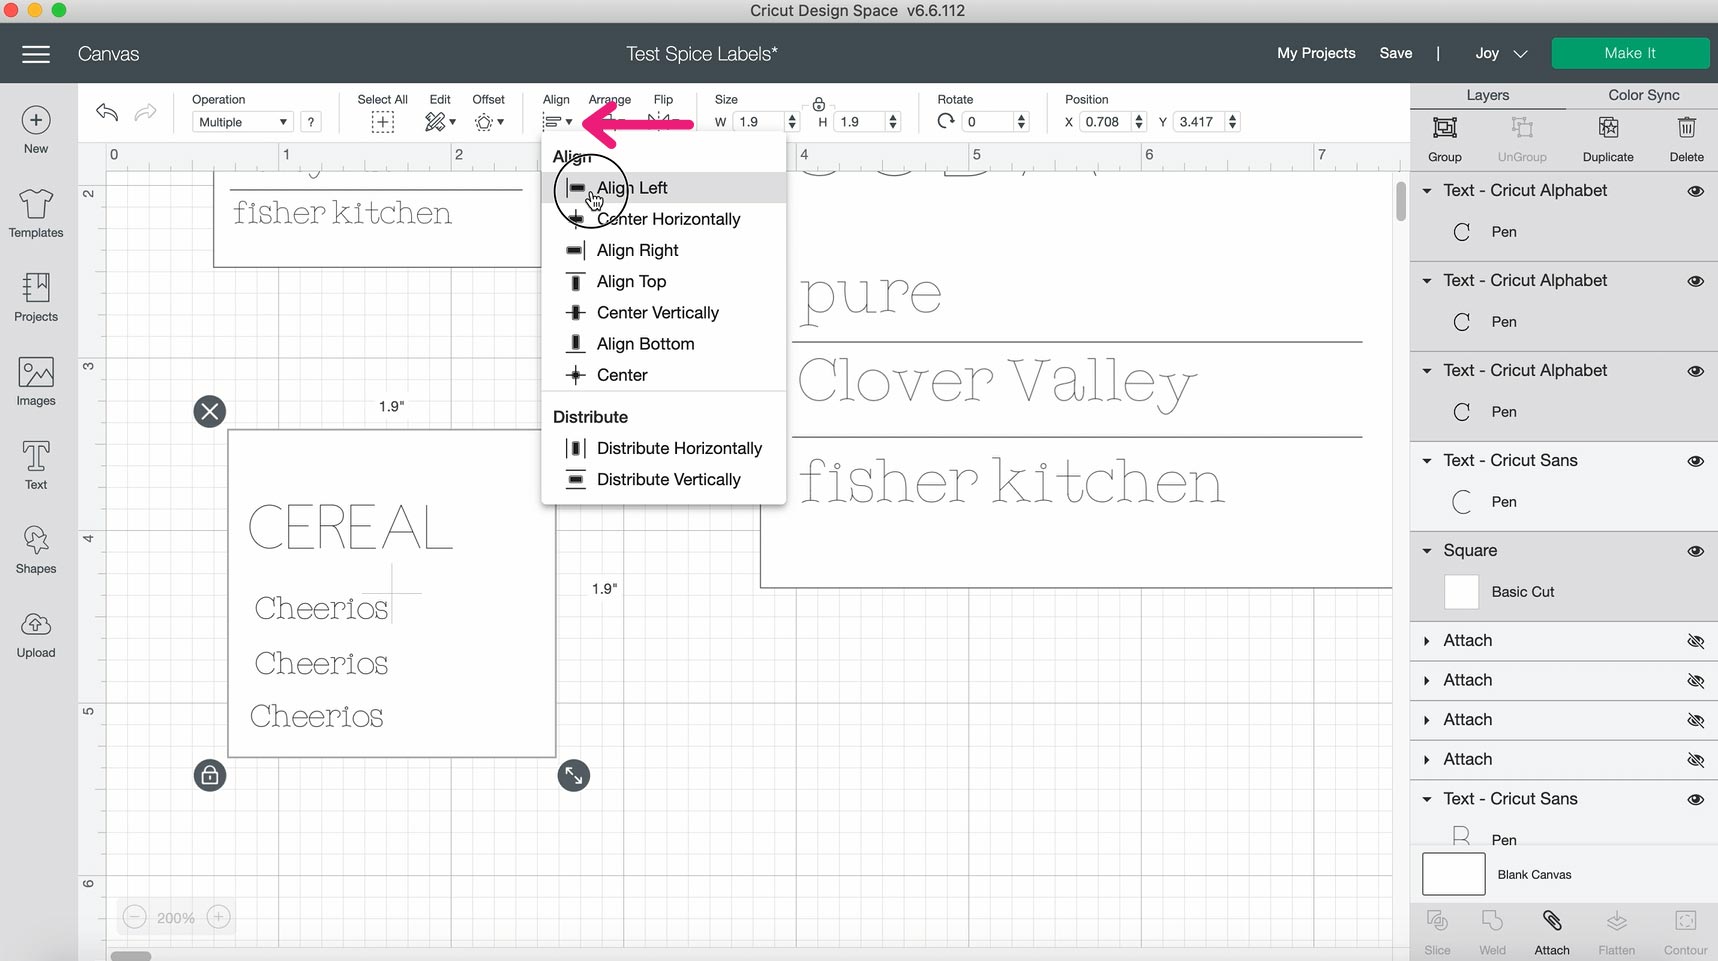
When I'm adding multiple lines of text like this, I love using the Align tool at the top to make them all line up. Simply select each line of text that you want to align (you can hold down the ctrl or command key while clicking each one to select them all) and click Align at the top, then Align Left.
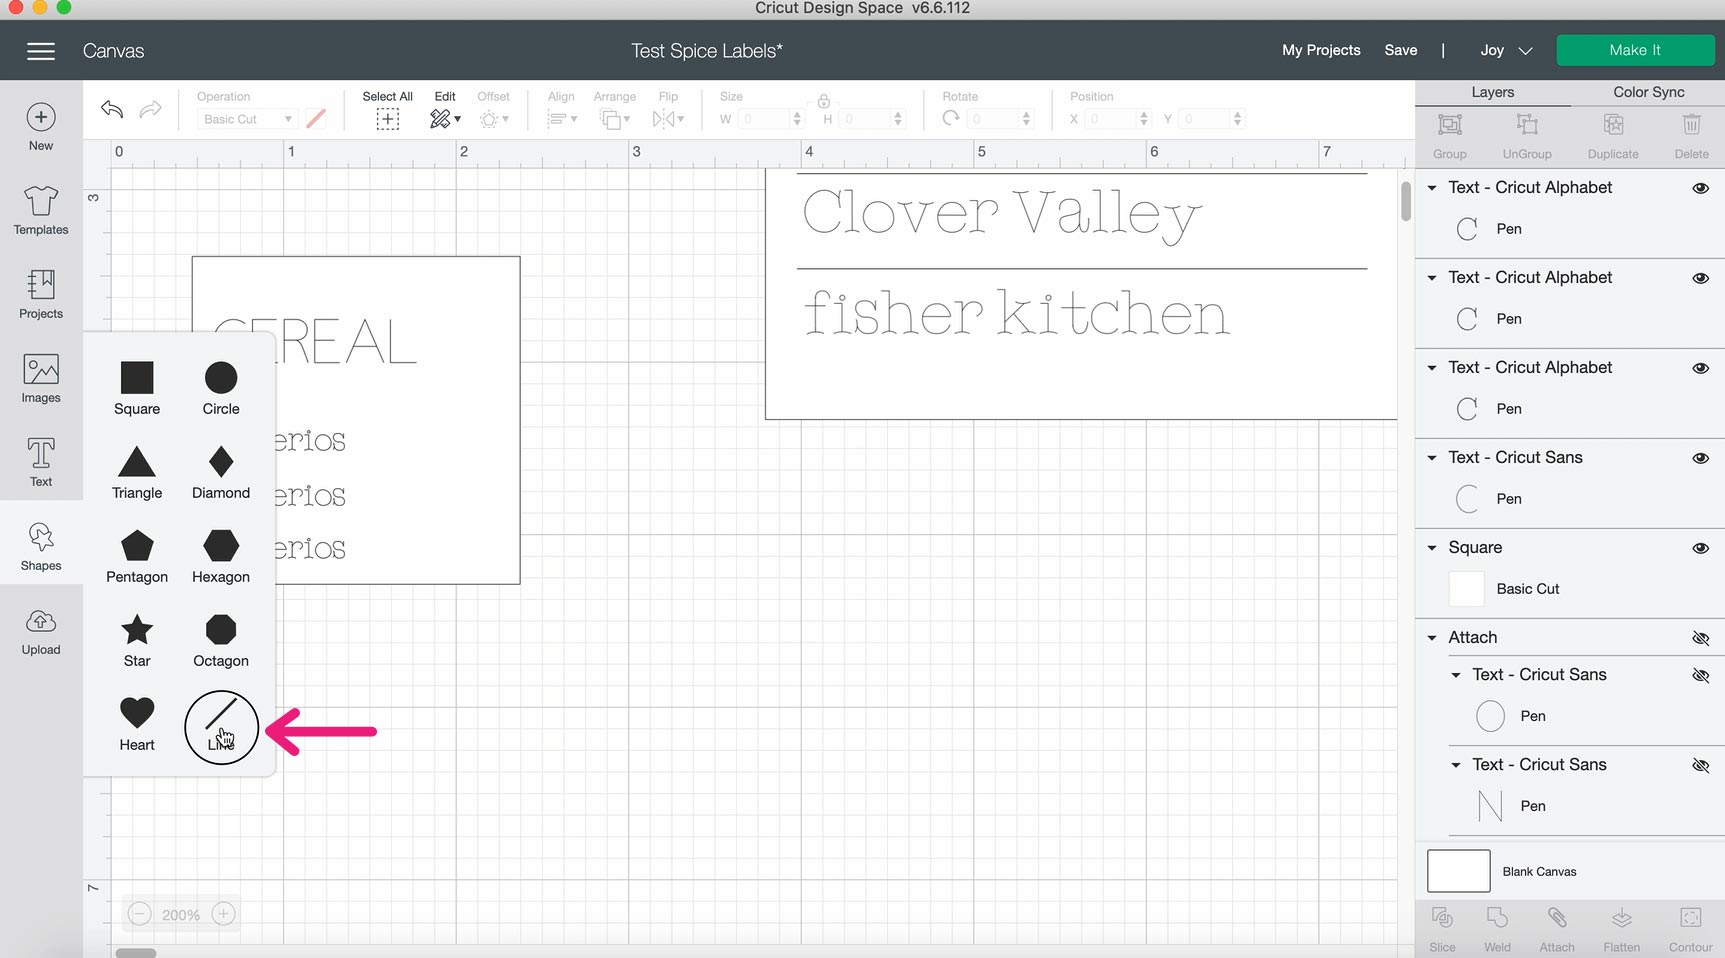
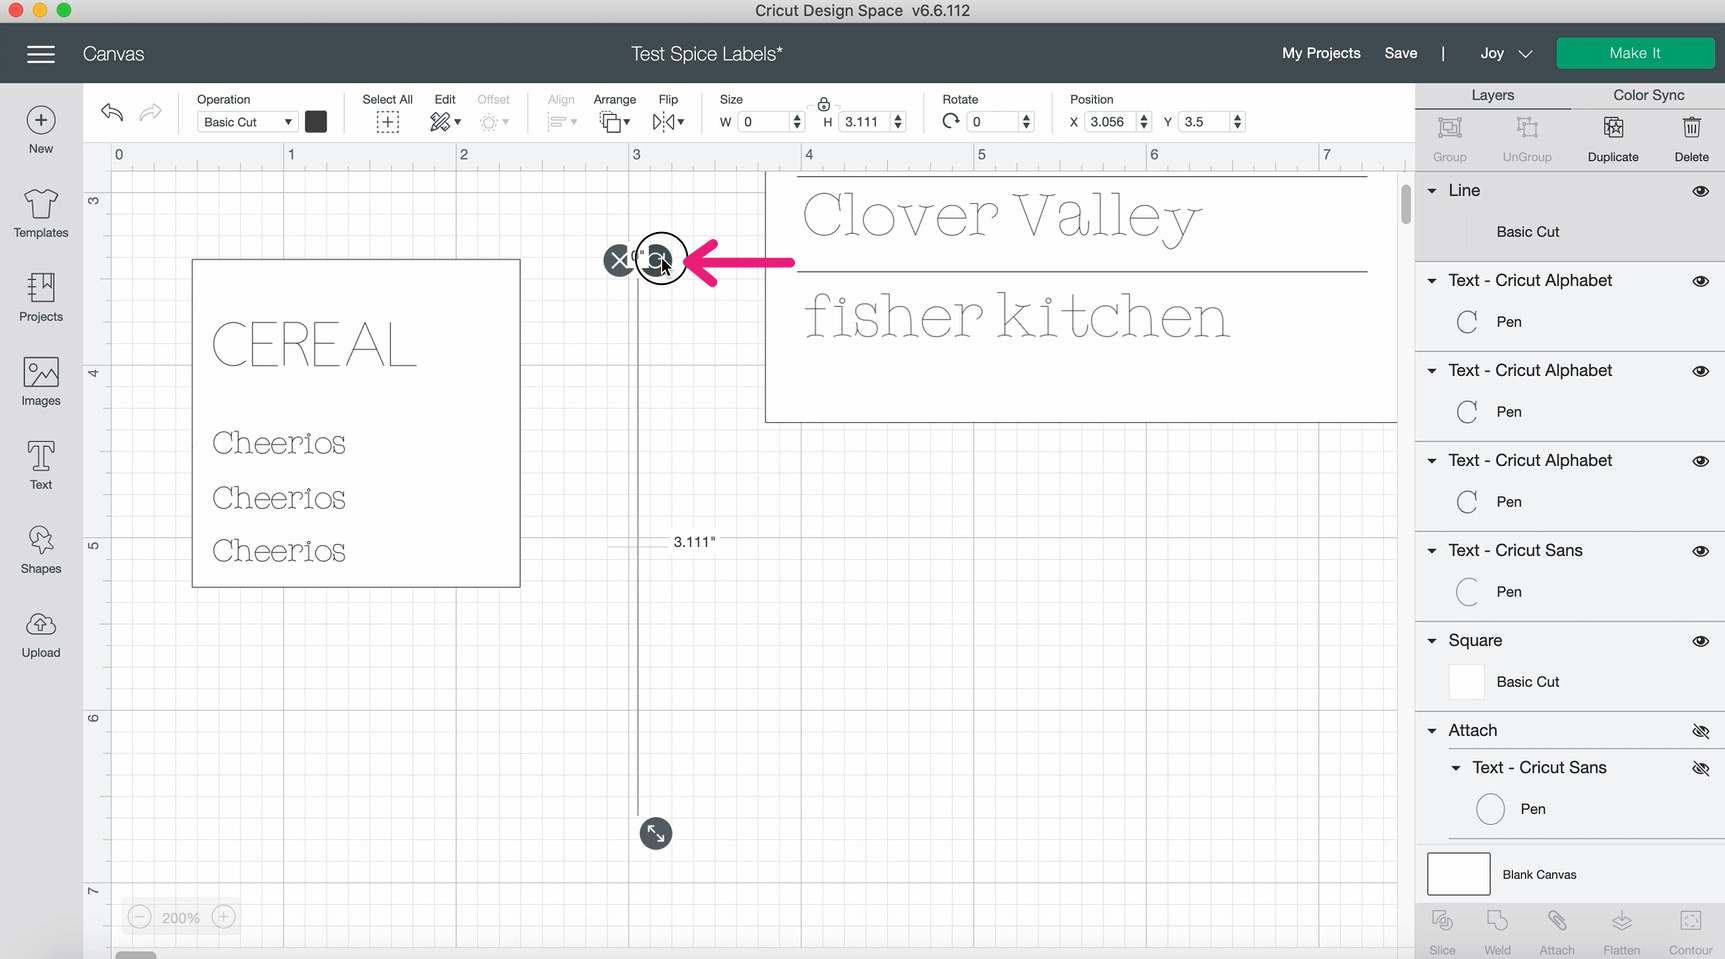
After that, I like to add in some horizontal lines by clicking Shapes and Line over on the left.
Once the line is drawn, click the rotate symbol and drag the line around while holding down shift until it is horizontal.
At this point, you can resize the line and place it where you want it. Just copy and paste it to add multiple lines. Don't forget to set the Operation type to Draw, and then choose a pen thickness and color for each of your lines, since they will be drawn by the Cricut as well!
Step 4: Cut Your Labels
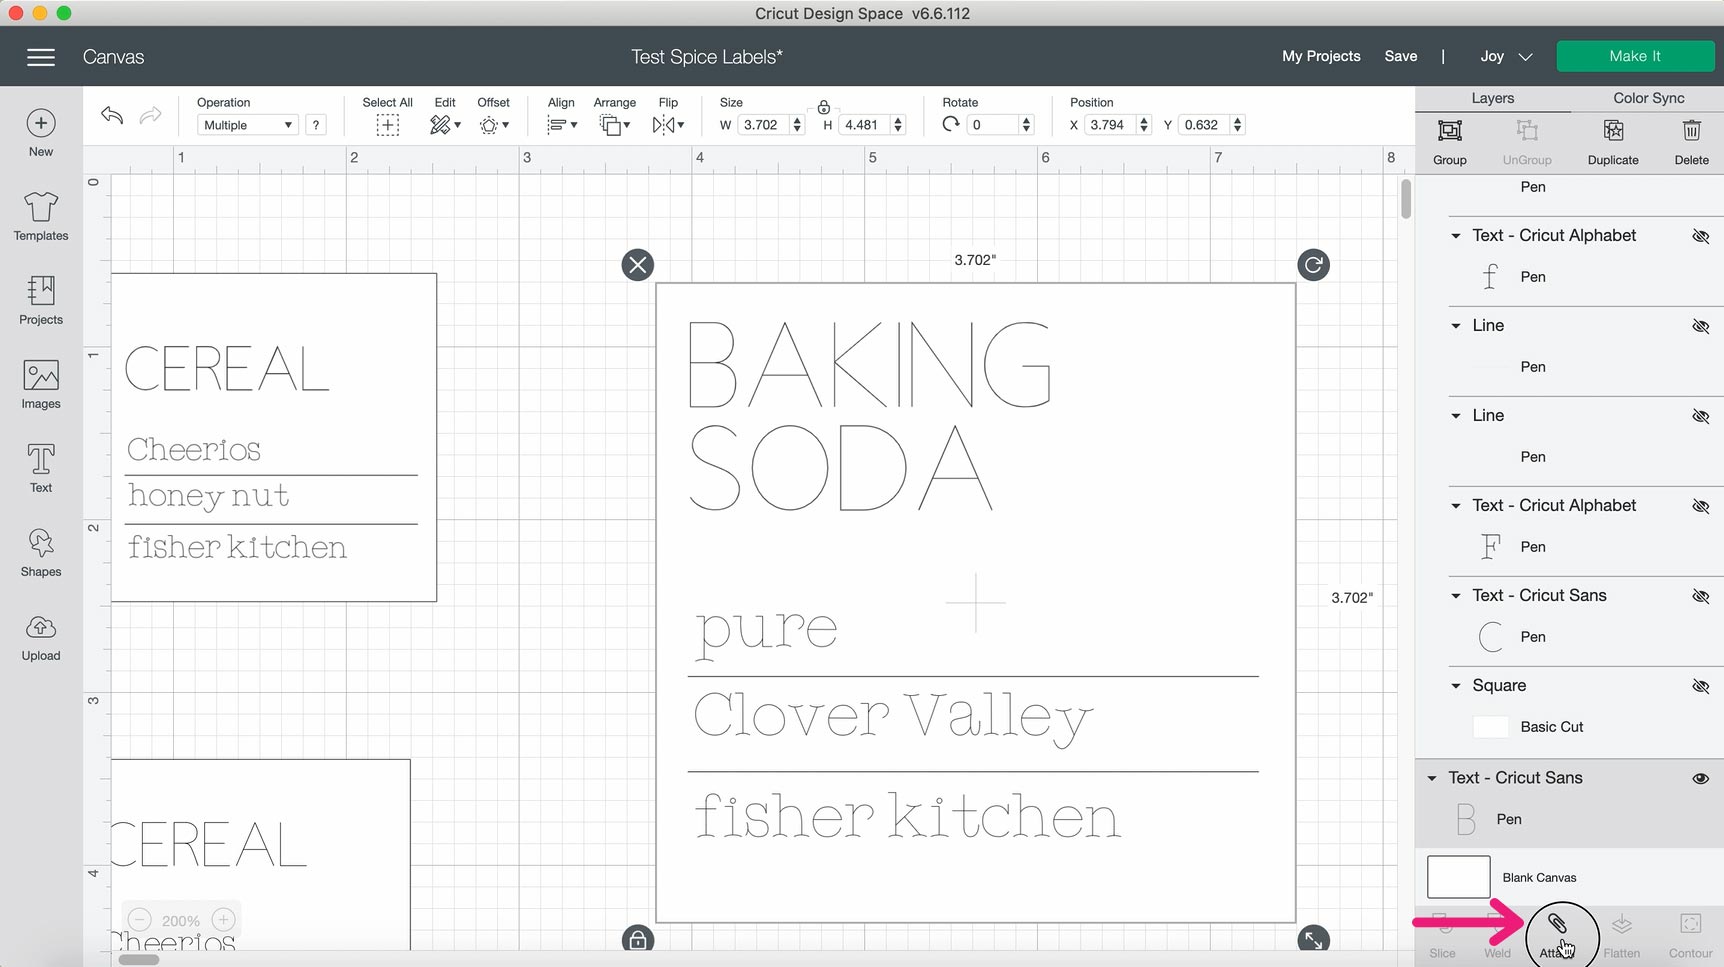
One very important step that you must do before cutting, is to highlight your entire label in Cricut Design Space and click “Attach” in the lower right. This ensures that your square will be cut out around the label text that the Cricut draws for you.
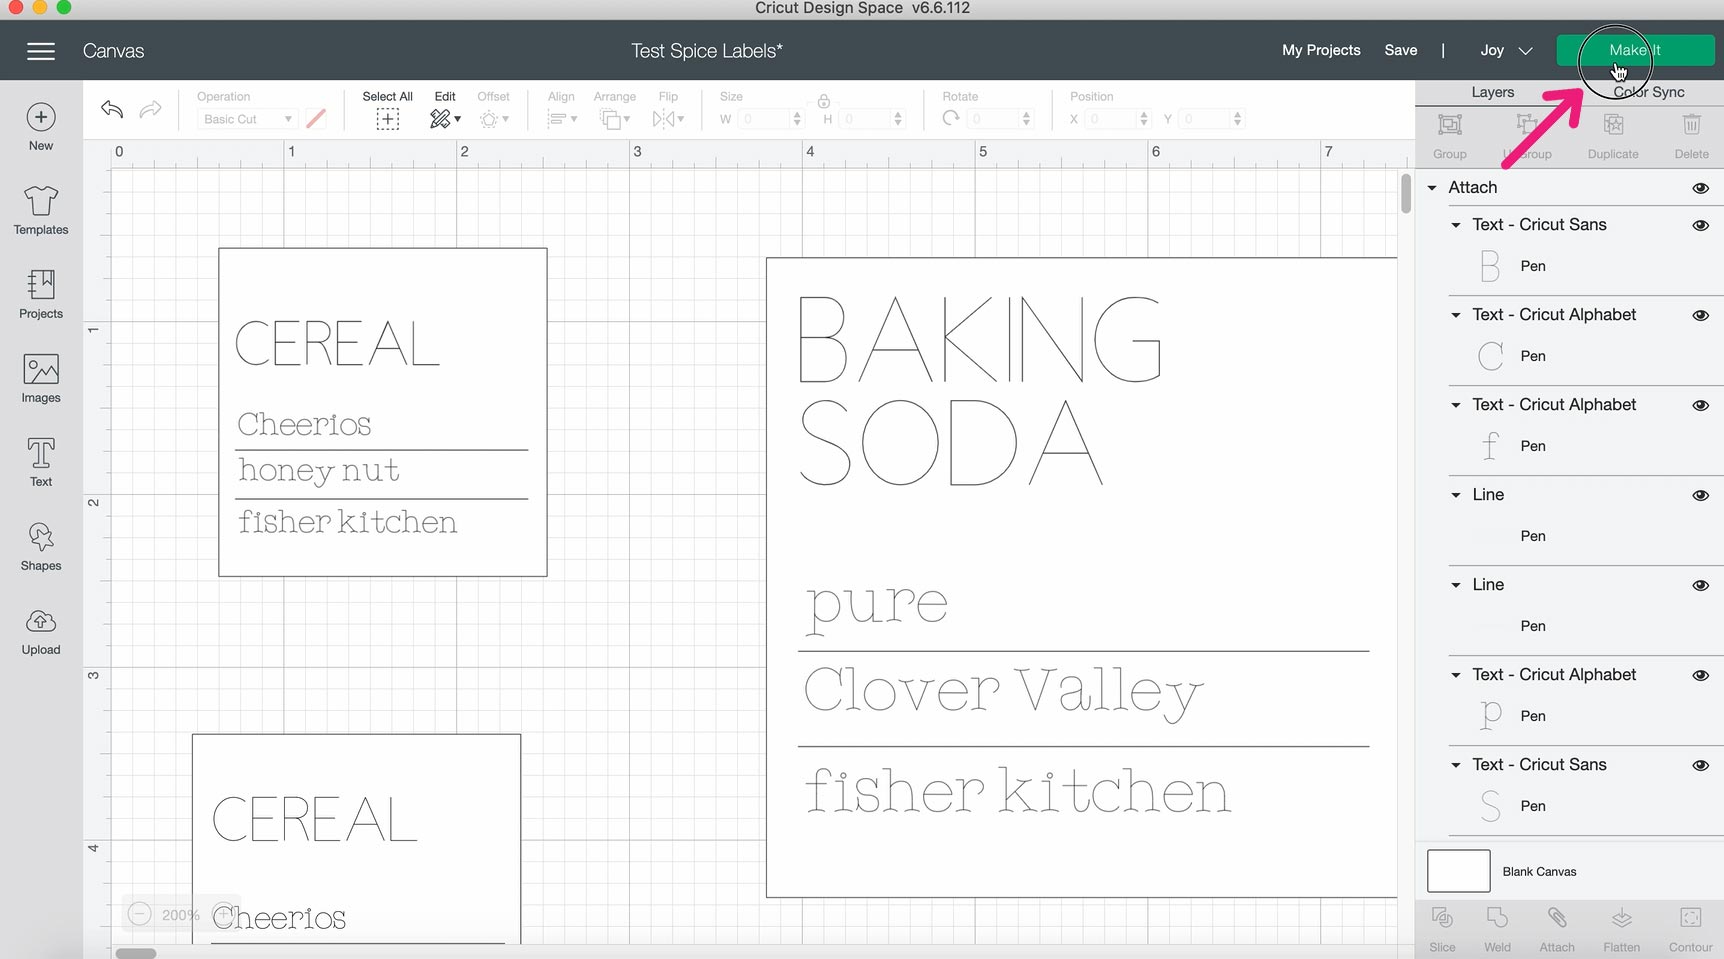
Now we're ready for the fun part! Make sure your Cricut Joy is connected to your computer (follow the instructions that came with your machine if you need help with this!) and click Make It in the top left. When it prompts you, select “Without Mat.”
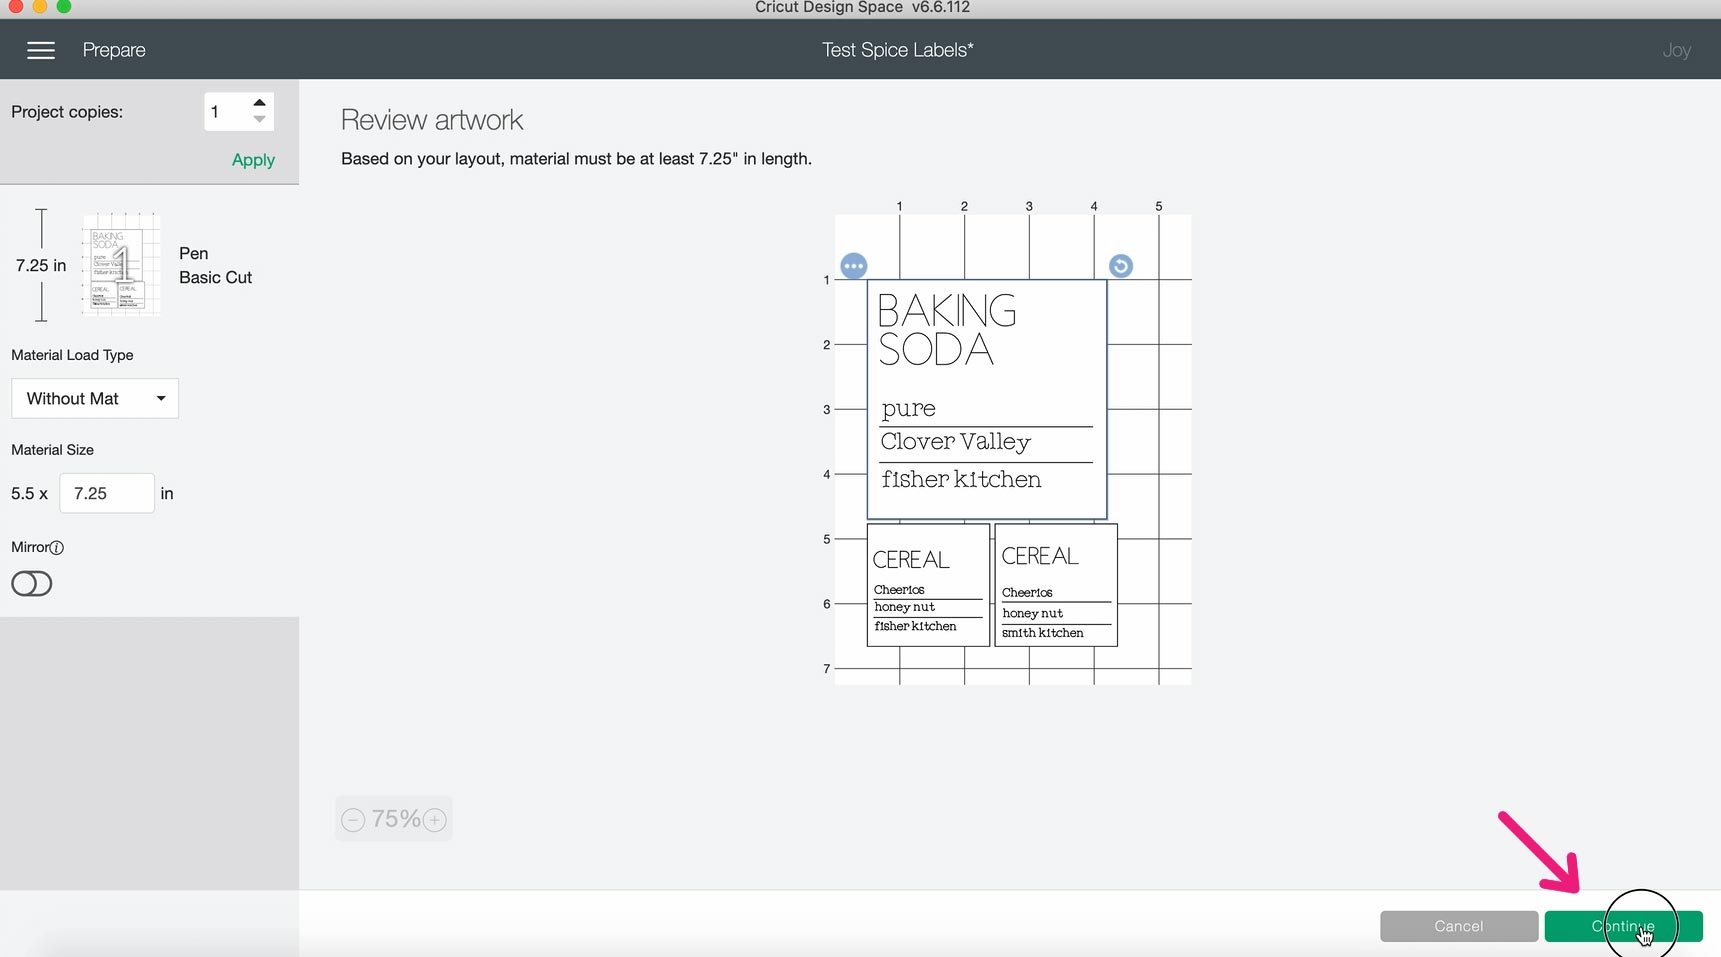
Now you have a chance to review your labels and get a piece of vinyl ready. Click Continue.
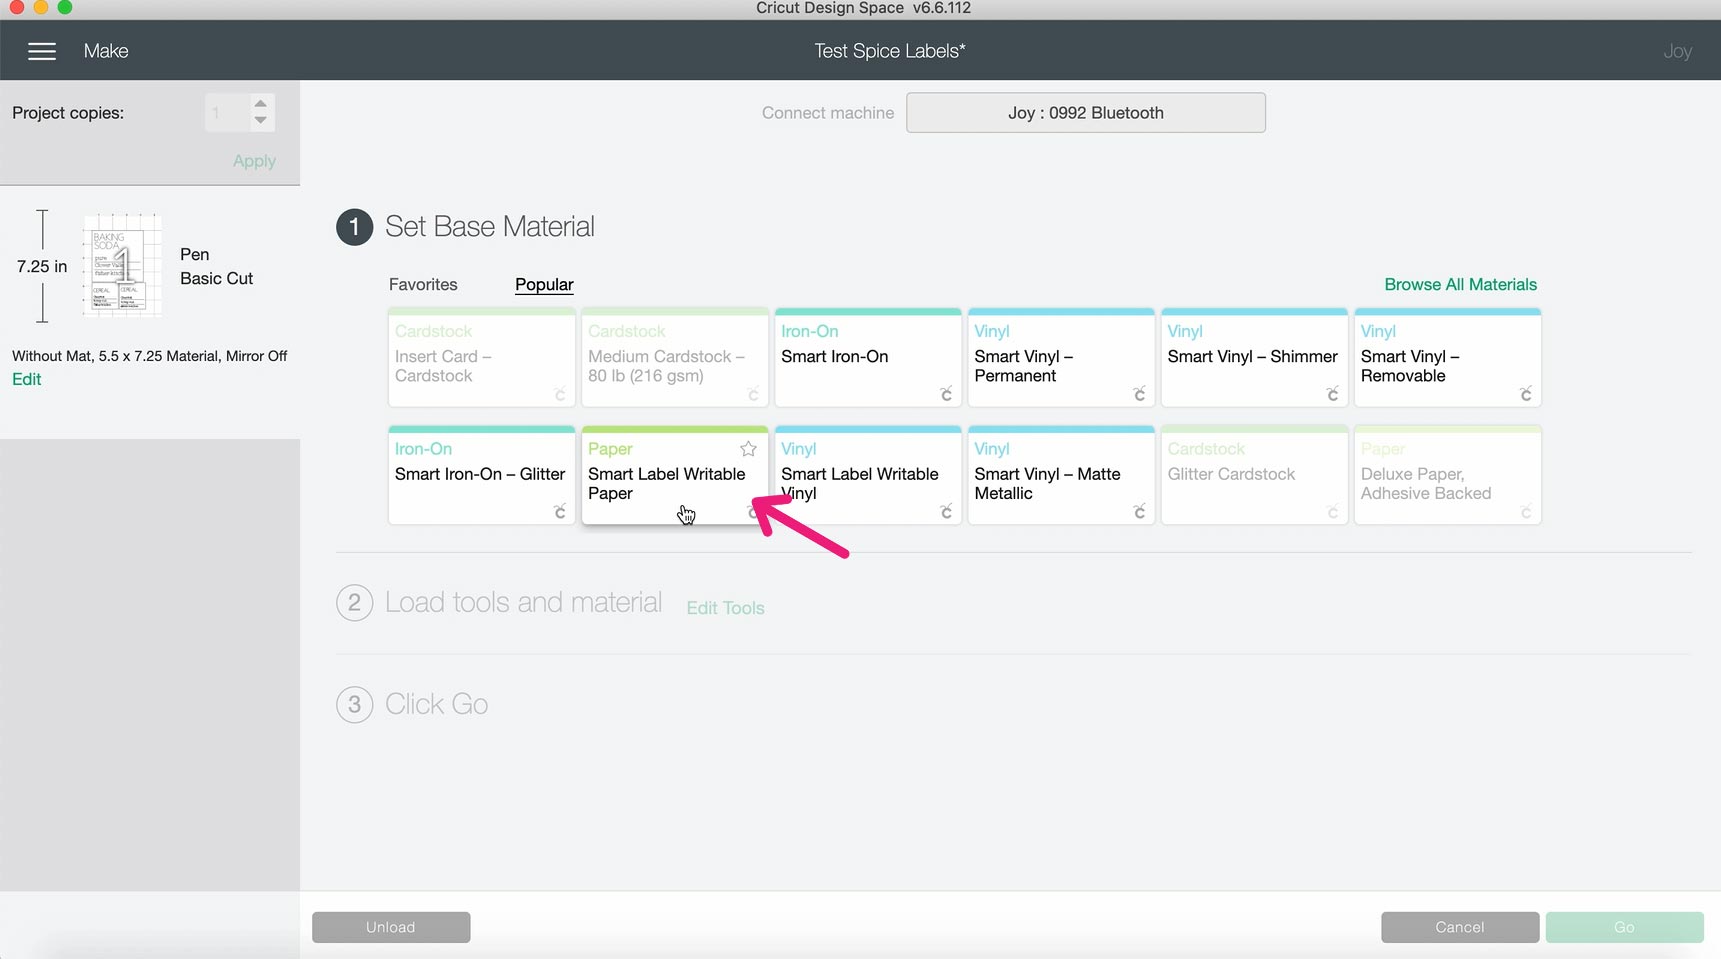
Next you'll have a chance to choose your paper type. We're using Smart Label Writable Paper, so choose that one.
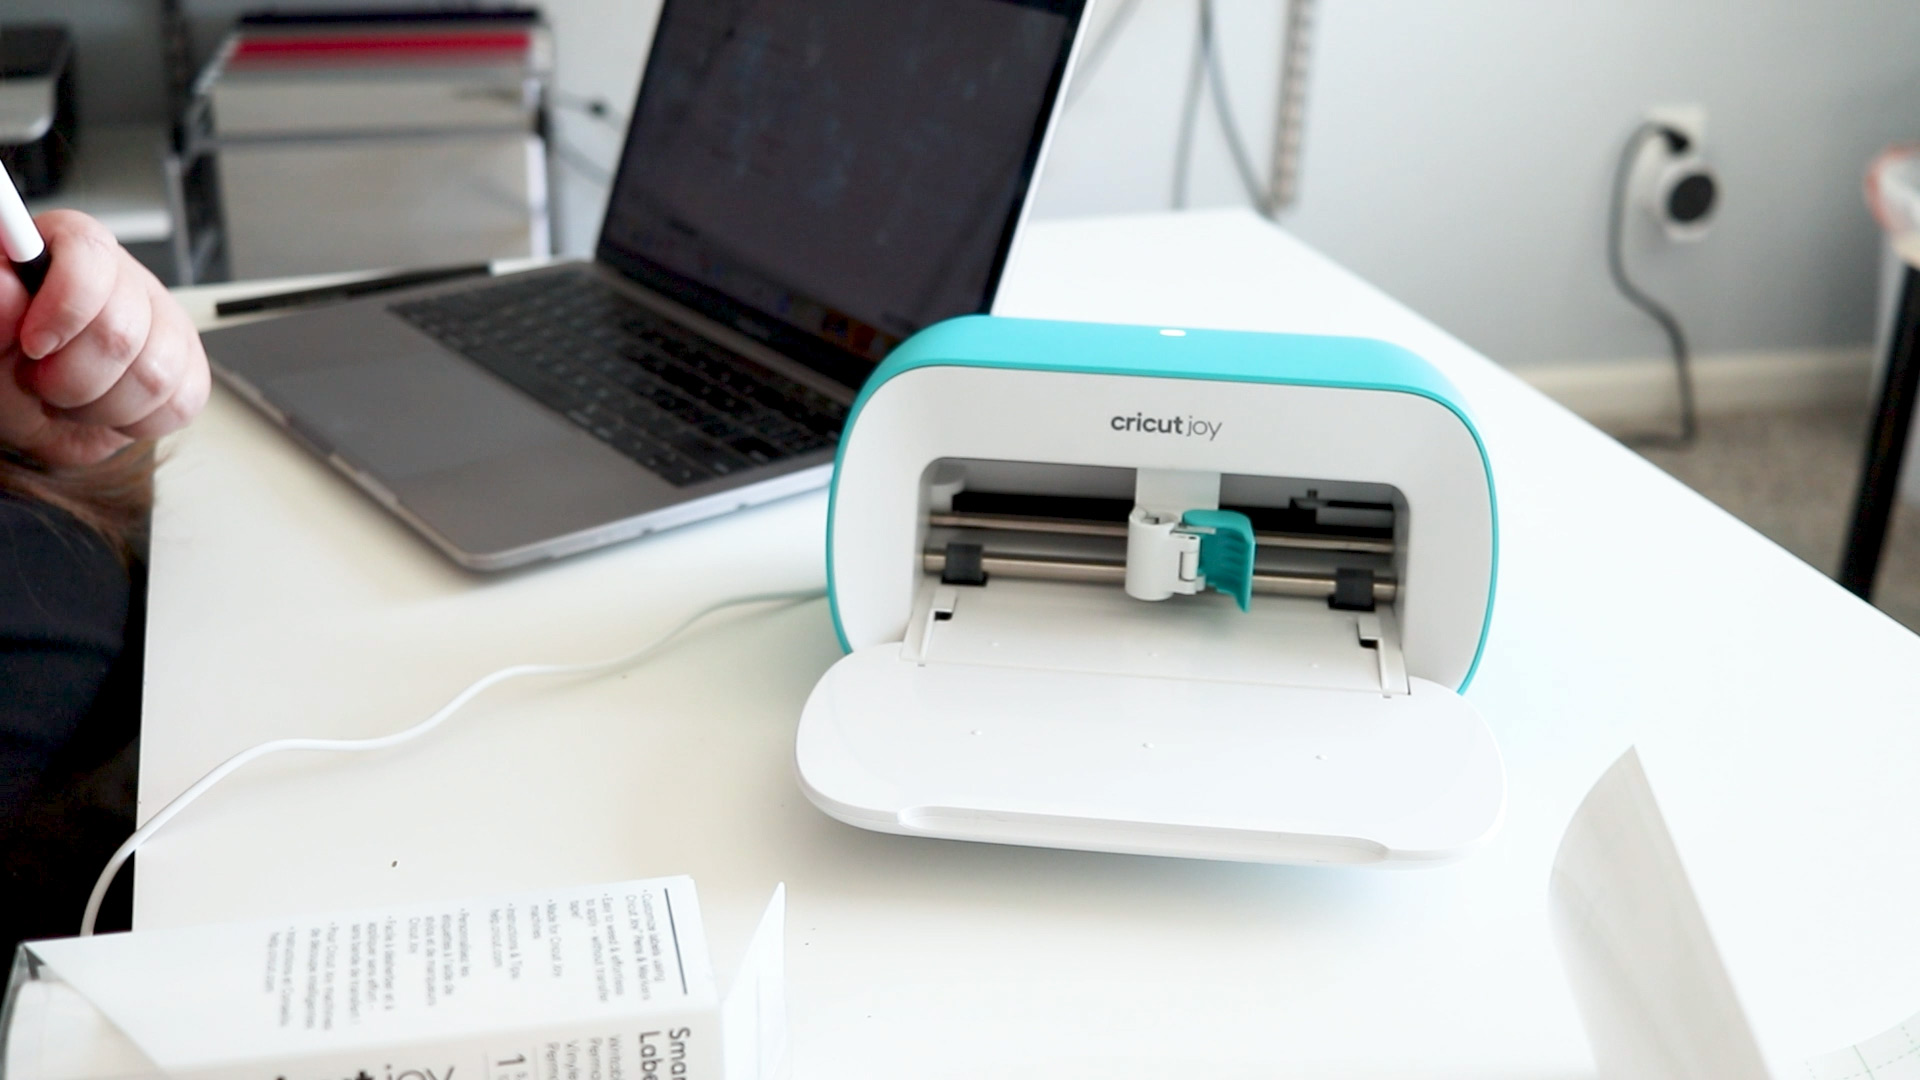
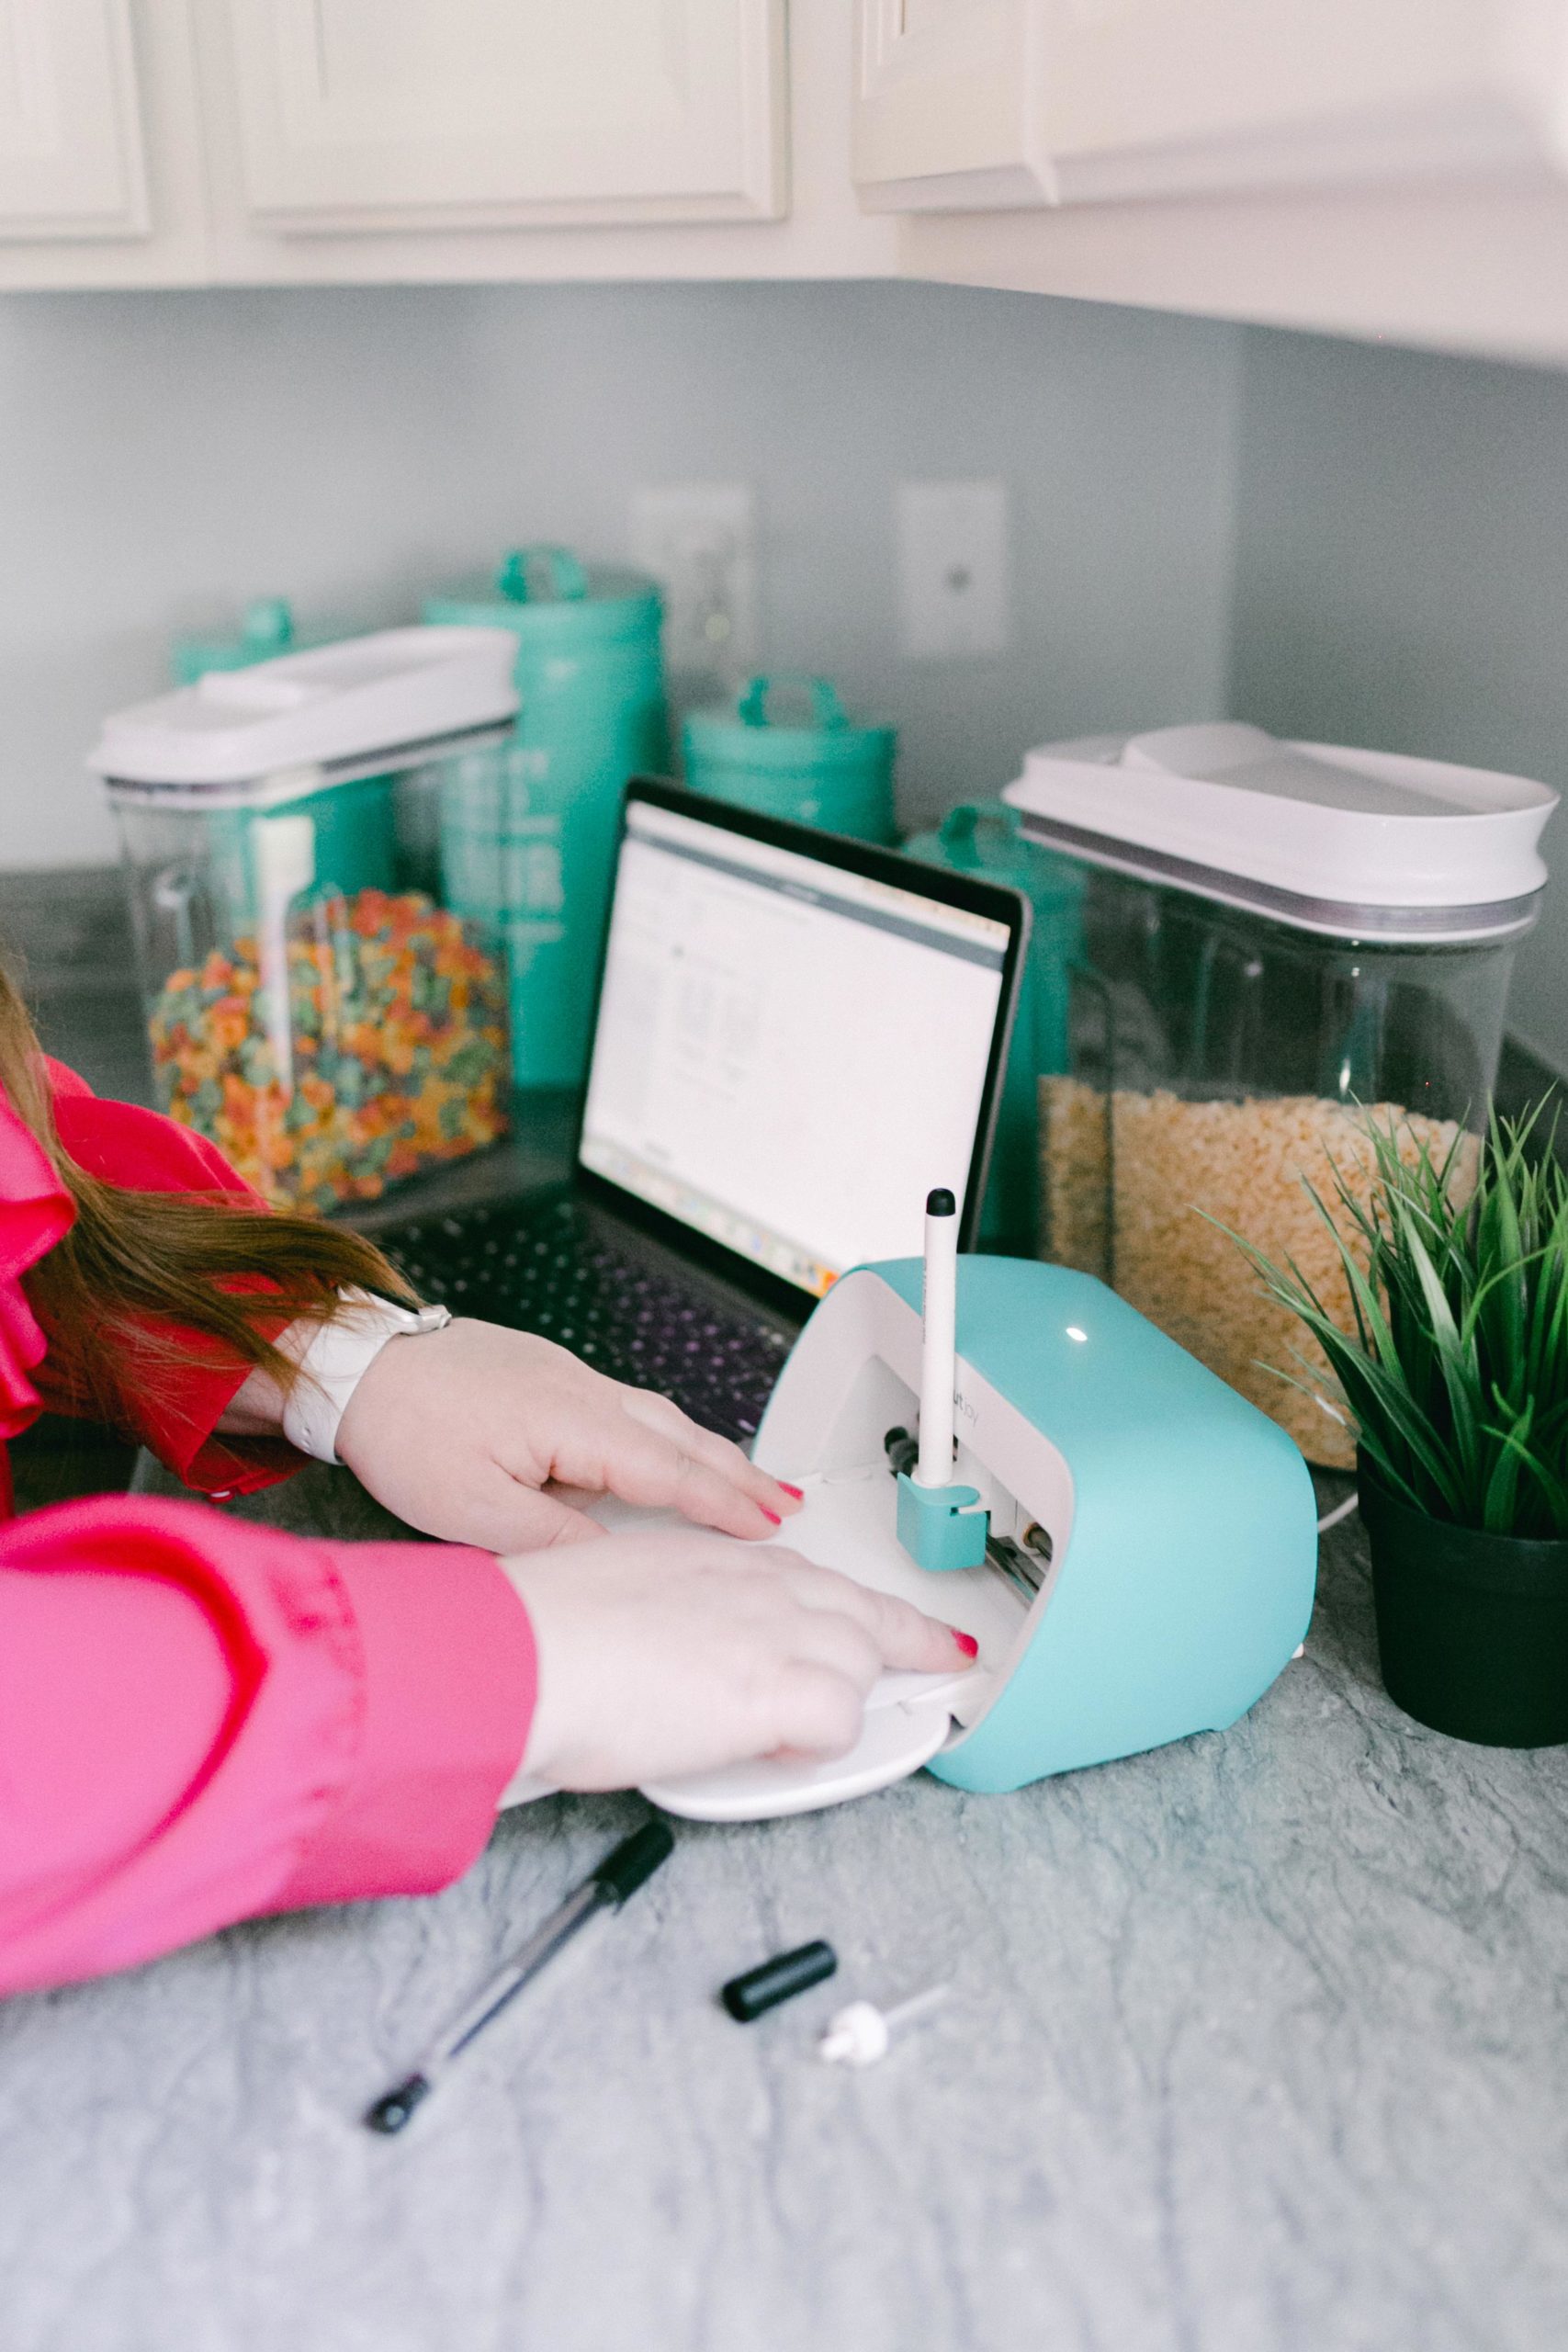
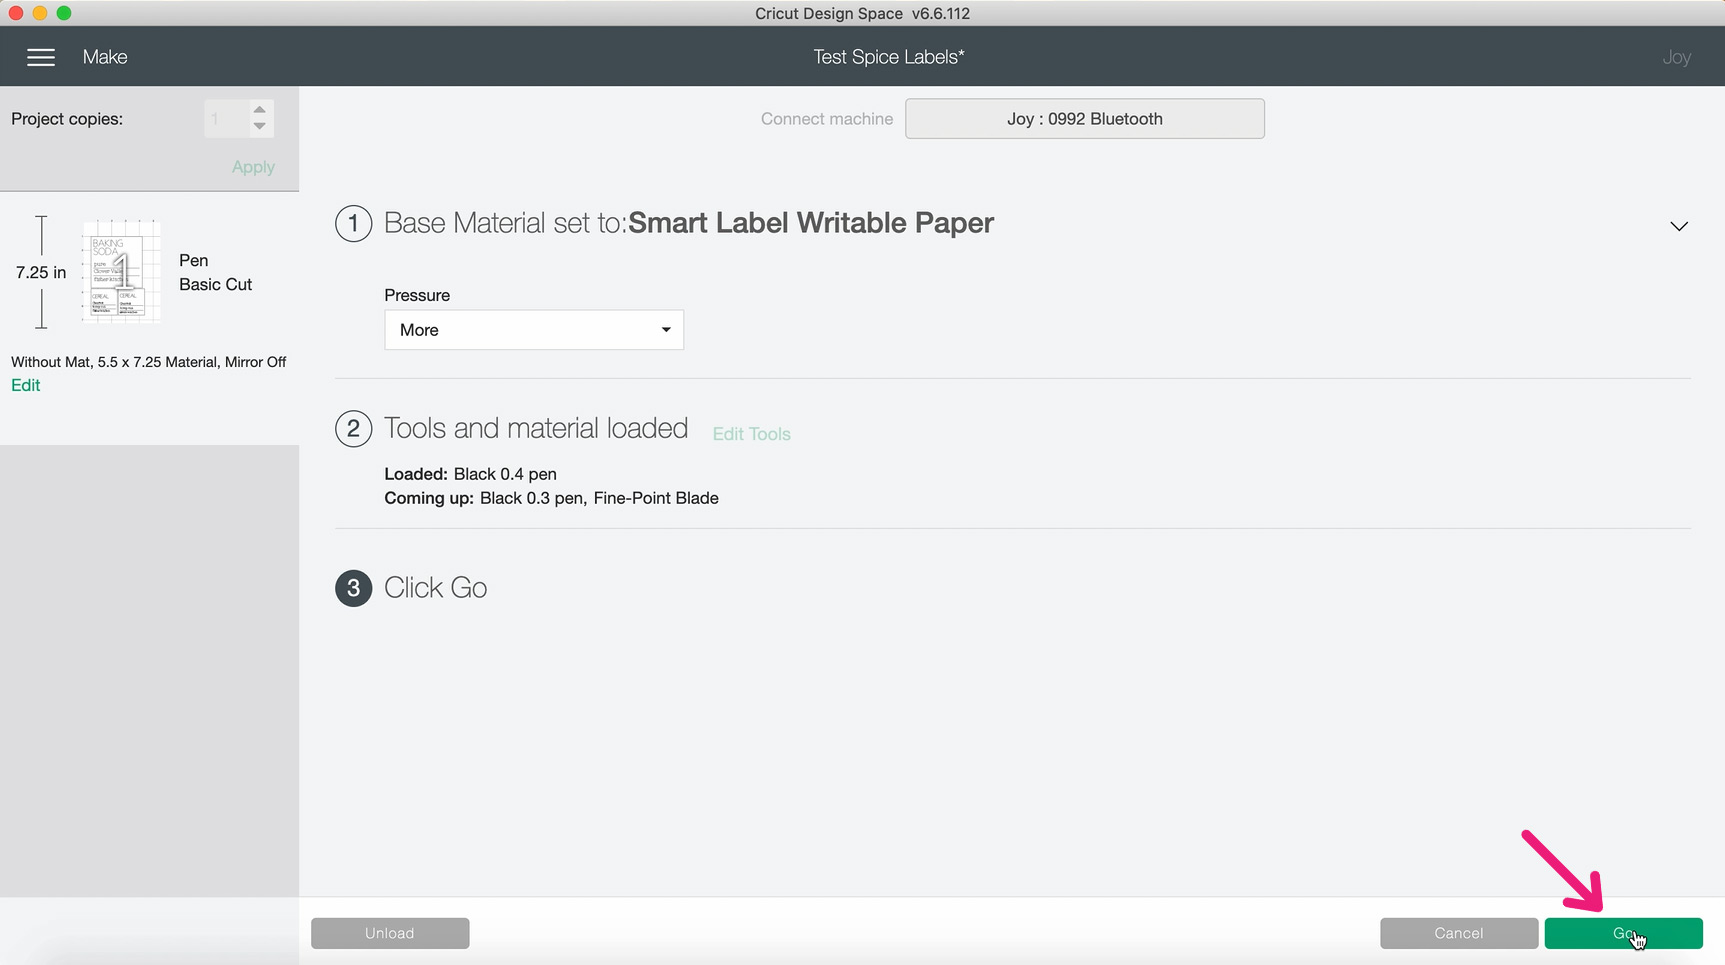
Now the software will walk you through exactly what you need to load as far as pens, blades, and vinyl. To change the pen/blade, simply open the blue latch on the machine and drop the pen or blade that you need right into the holder. Flip the latch closed and it's ready to go!
Loading the vinyl is just as simple. Push it up next to the rollers and the machine will grab it and pull it in automatically! It pulls it all the way through at first, just to check that you have enough to complete the project you told it to cut.
Once that is all set up, click Go!
Keep watching your computer for prompts about what to load next. Depending on the pens that you chose for your text and lines, you may need to switch them out in the middle. And of course at the end, you'll need to load the blade in order for it to cut out the shape of your label.
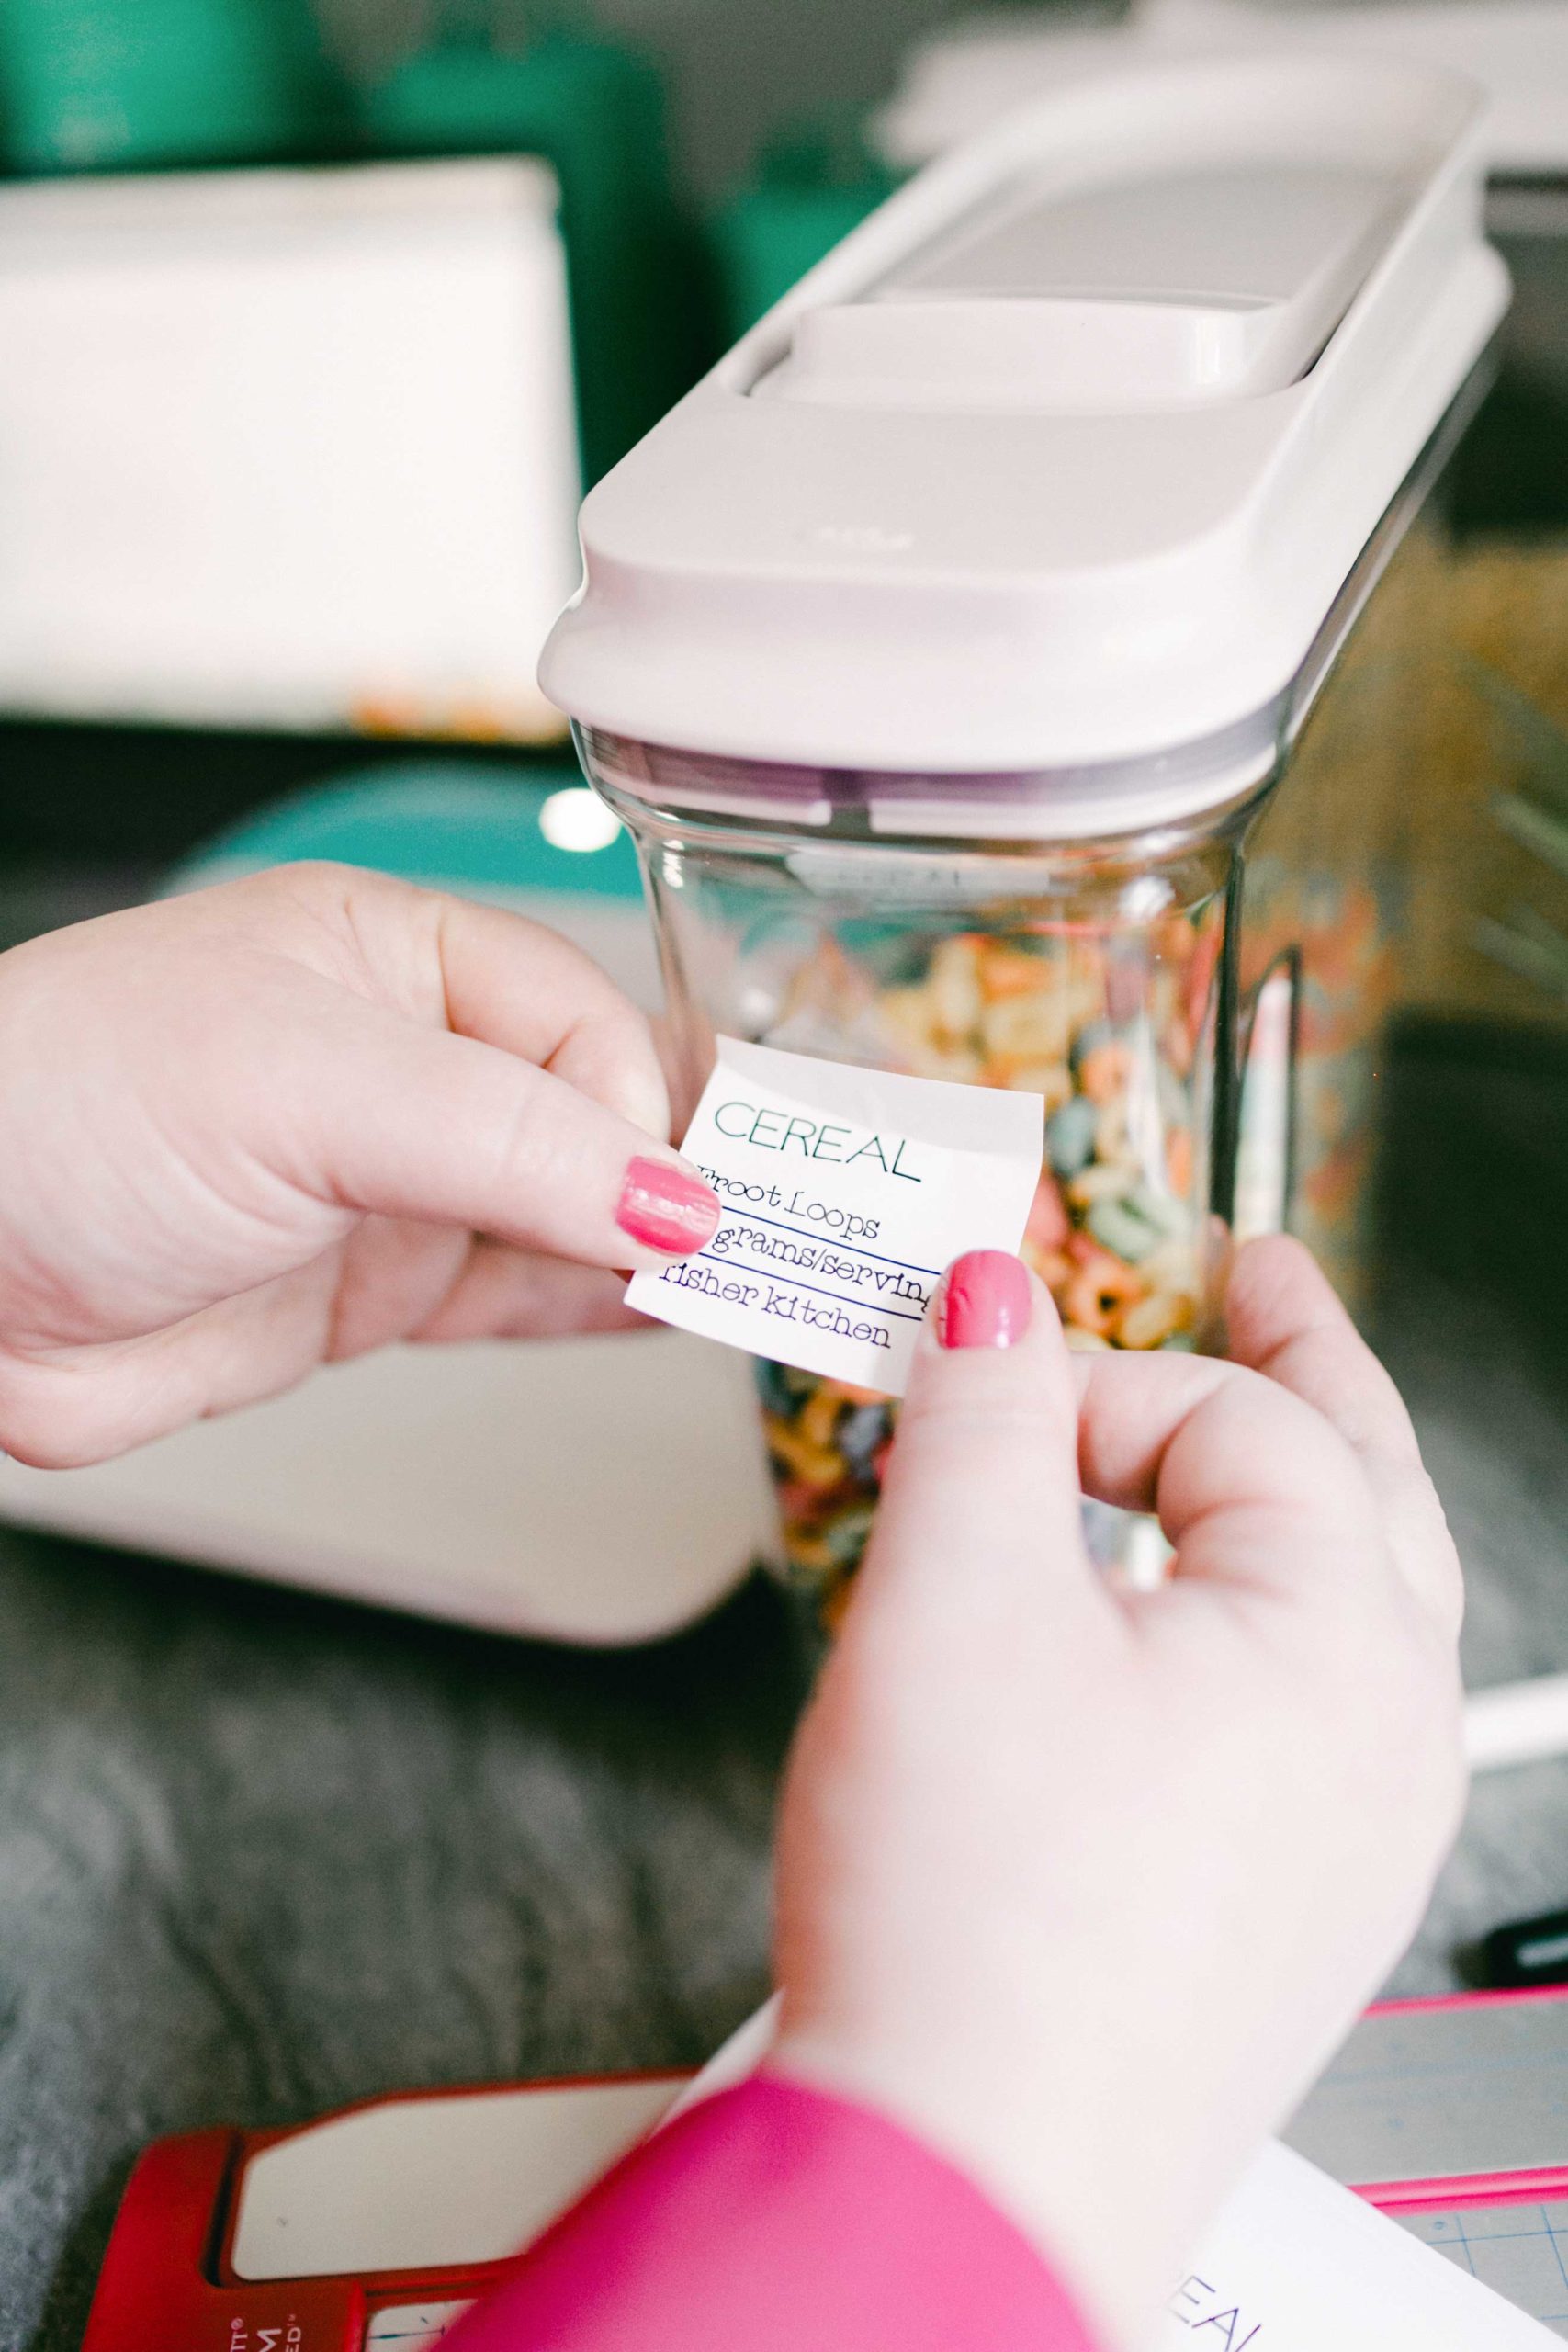
And just like that, you have yourself a nice, fancy label! Simply peel and stick your label wherever you'd like it, and repeat as many times as you need.
If you want to save some time, you can find the file that I used to design my labels here. Simply load it into Cricut Design Space and double-click each line of text to customize them.
My Cricut Joy is one of my favorite labeling tools. The possibilities here are endless! Do you have one? What have you been labeling lately? Let me know in the comments!
Happy organizing!
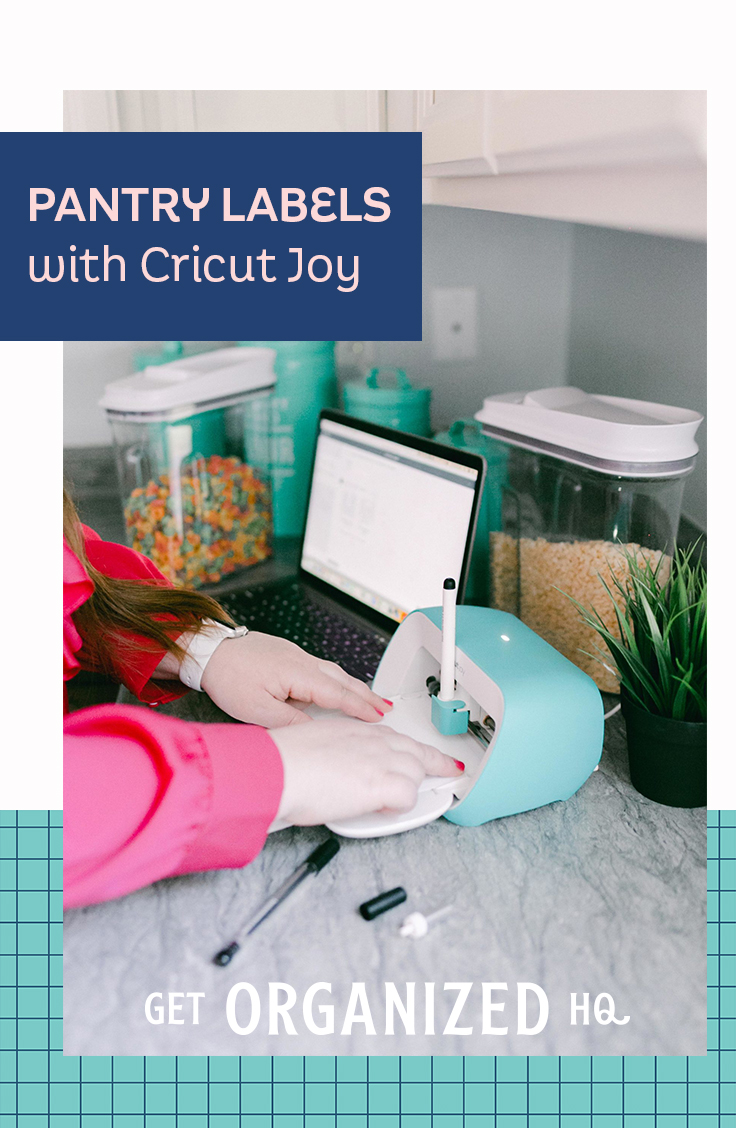
It's so easy to make your own custom pantry labels using the Cricut Joy! Simply follow these step-by-step instructions.





 Copyright 2026, Get Organized HQ.