Email Management – Is Your Gmail Up To Snuff?
Notifications, newsletters, and messages – oh my! And those are just the beginning! Communication is key, right? But sometimes that communication can get interrupted when our email management is lacking.
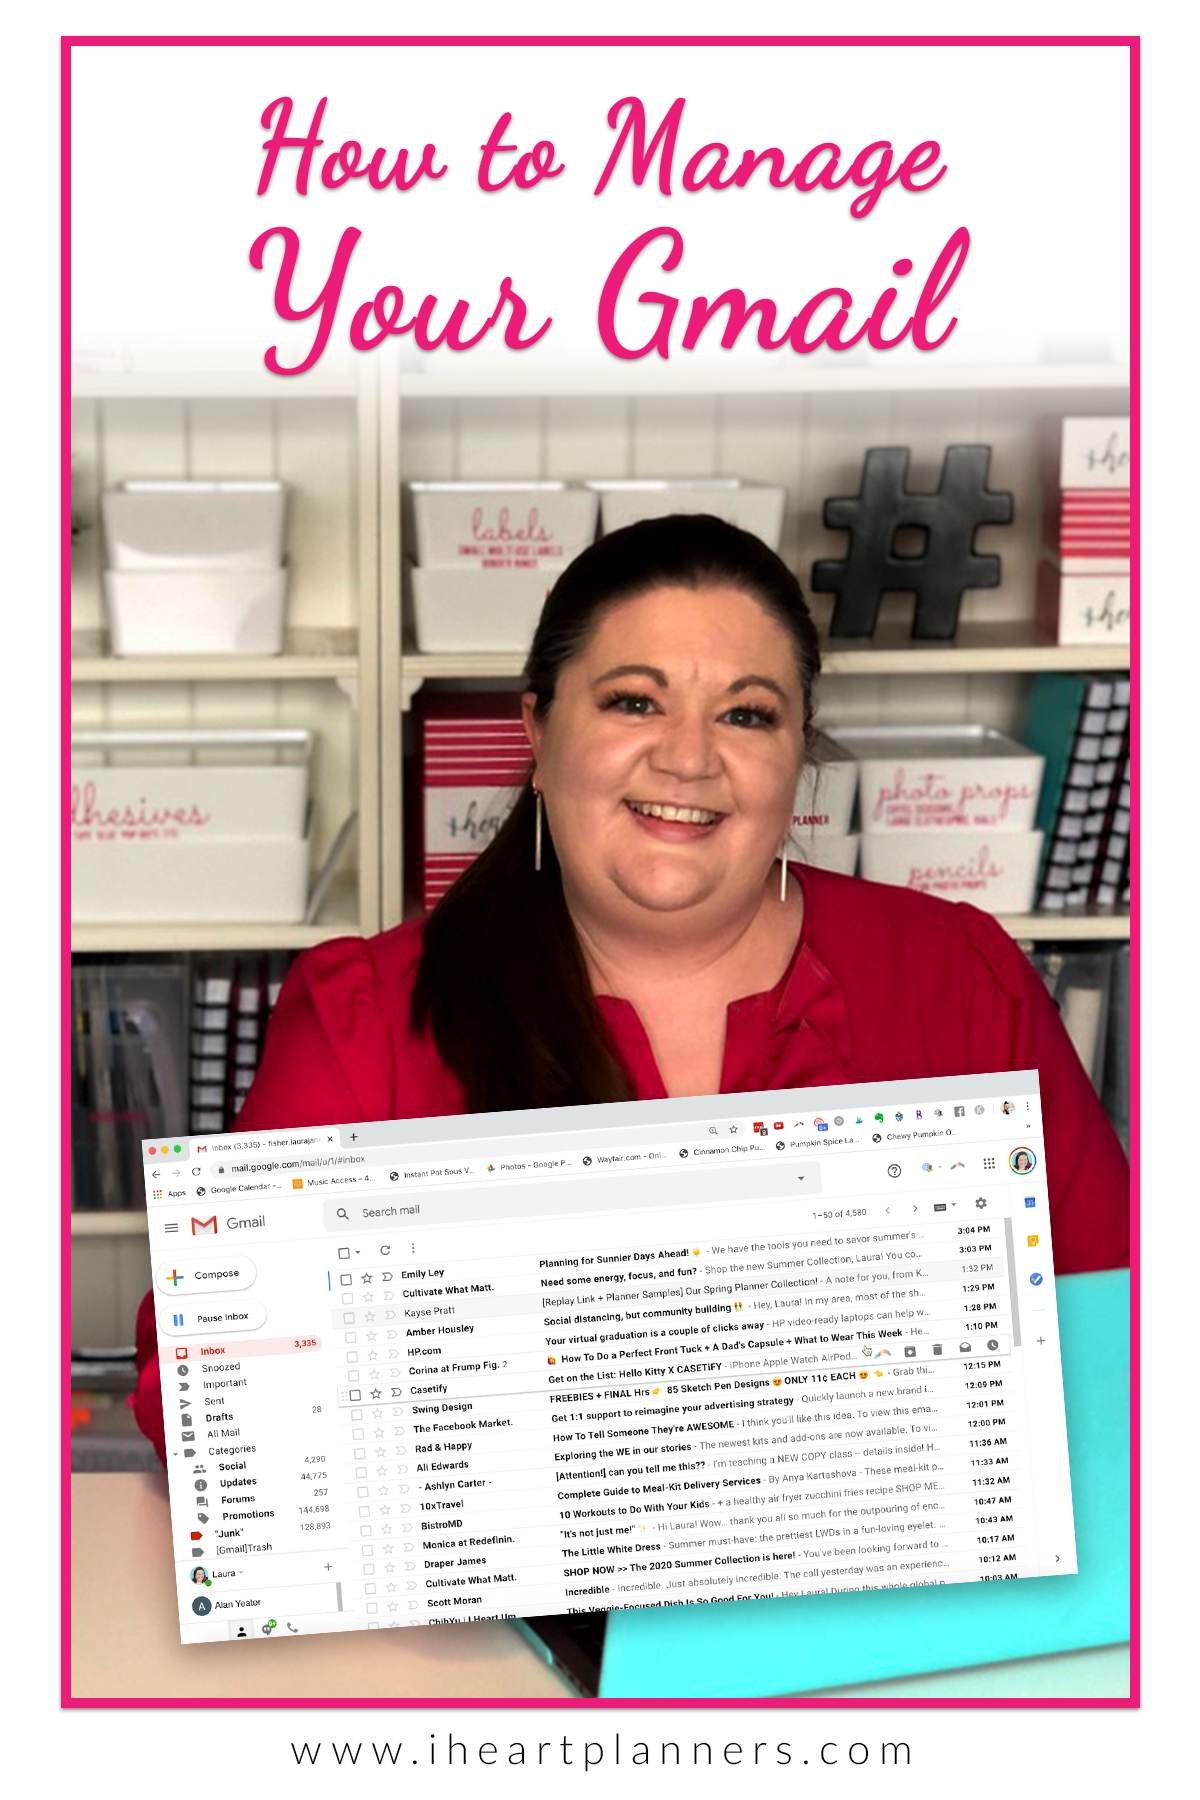
Missed information or a messy inbox can make you want to pull your hair out! But before you damage those hair follicles, follow me as I uncover some of the best email management tips to navigate your Gmail inbox and keep it looking nice and neat! You can even watch me walk through this intro to Gmail in the video below:
First thing’s first: I highly recommend using Gmail for all your email needs. I’ve been using Gmail for years and it’s one of the best email systems out there. I even showed in a previous blog post how to declare inbox bankruptcy and get your inbox back down to zero. (I had over 60,000 emails!) and a big reason why I was able to do that was because of how powerful a platform Gmail is.
If you’ve never used Gmail before, I strongly suggest switching over. Concerned with missing emails from your original email account? No problem! It’s easy to forward those messages to your Gmail so you can switch worry-free.
EMAIL MANAGEMENT: YOUR GMAIL INBOX
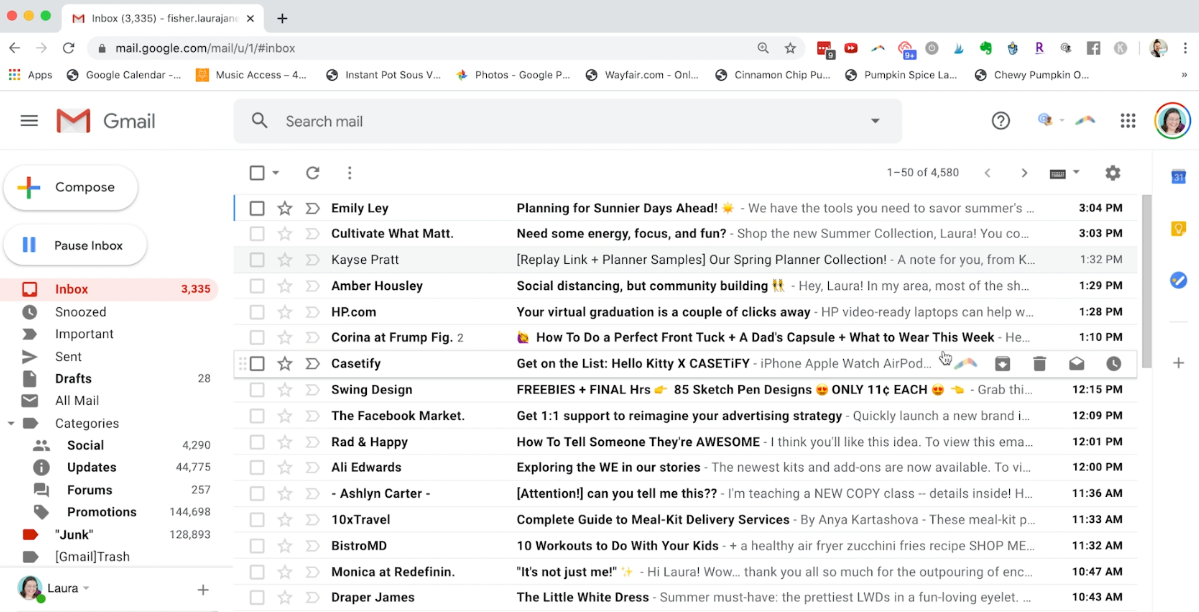
When Gmail uses the term “inbox”, what they mean is the first place all of your emails go. An email could remain in your inbox forever, or it can be removed or sorted.
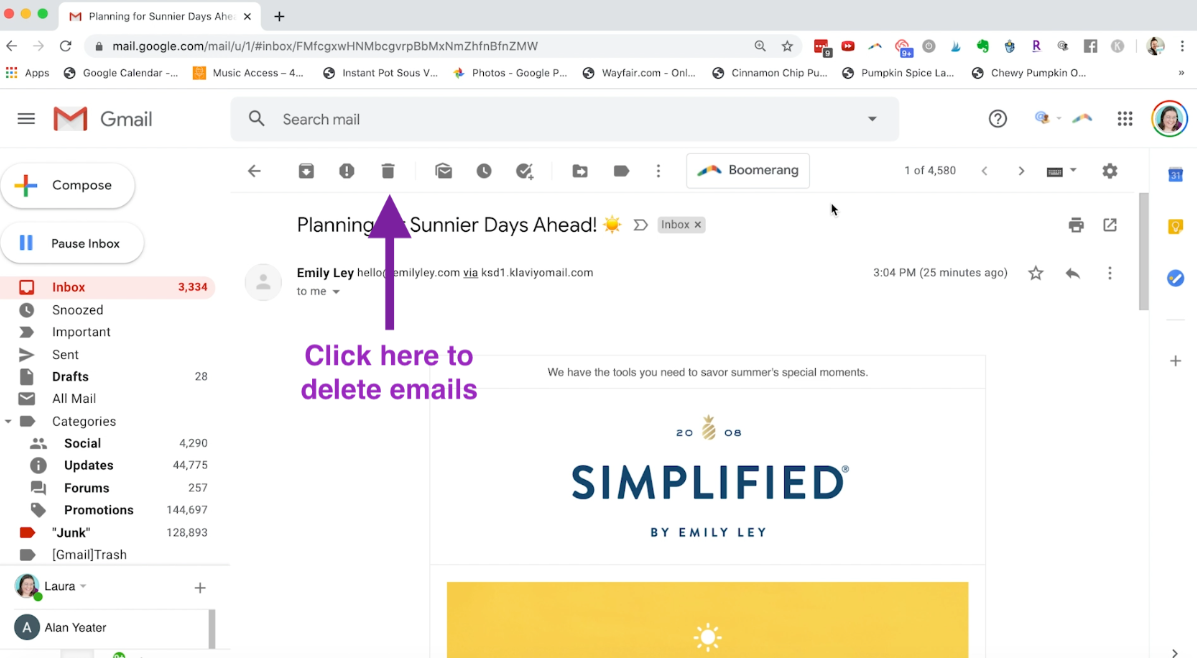
There are a couple choices you have when deciding what to do with an email. The first is hitting that little trash can icon at the top called “delete”. This button means that email is gone forever. If you have an email that you don’t see yourself referencing again or if it’s outdated information, then that delete button is your friend. If you do delete something on accident, head over to your trash folder where you can find recently deleted emails. Be aware; however, that emails will only sit here for a short amount of time so be proactive when recovering emails.
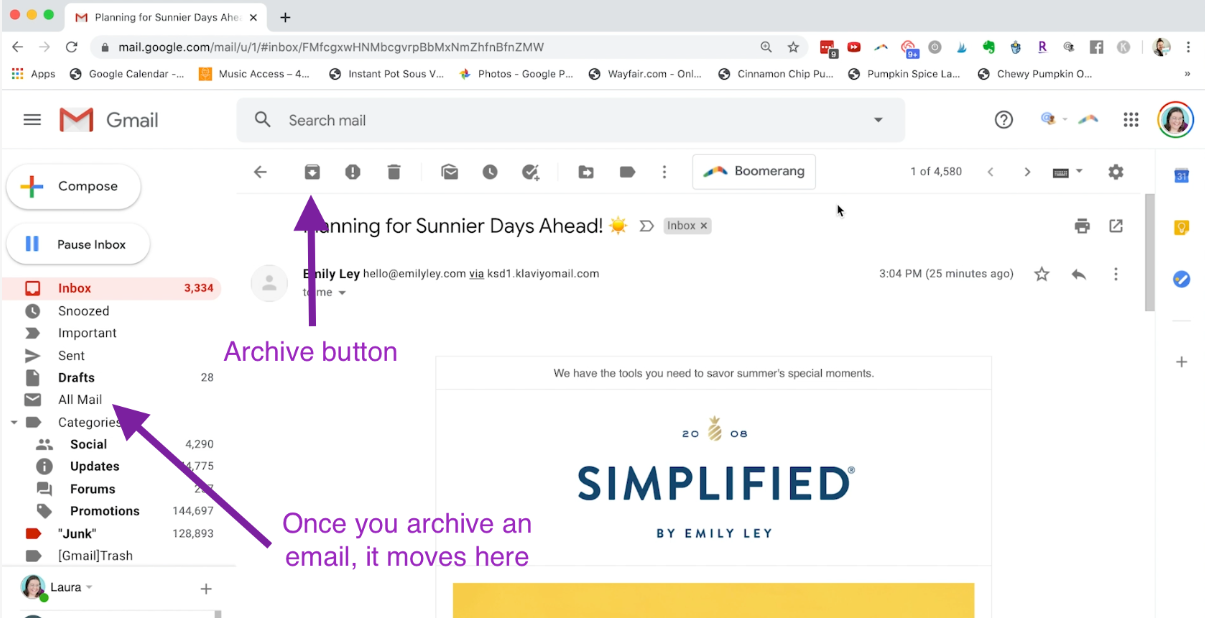
The second option you have is selecting the little down arrow icon to the left of the trash can icon. This is the archive button. Use the archive option when you want something out of your inbox, but you’re not quite sure if you’re ready to delete. What archiving does is send that email out of your inbox and into your “all mail” section.
To understand this a little better, you can imagine your inbox as a type of folder. What’s happening when an email is archived is that email is being sorted from your inbox “folder” and into your “all mail” folder. All mail is, as the name implies, a “folder” that holds every email you have. If you’re going to be referencing an email again or otherwise working with it, I would not archive it – that’s going to make it harder to find when you need it again.
EMAIL MANAGEMENT: CREATING LABELS
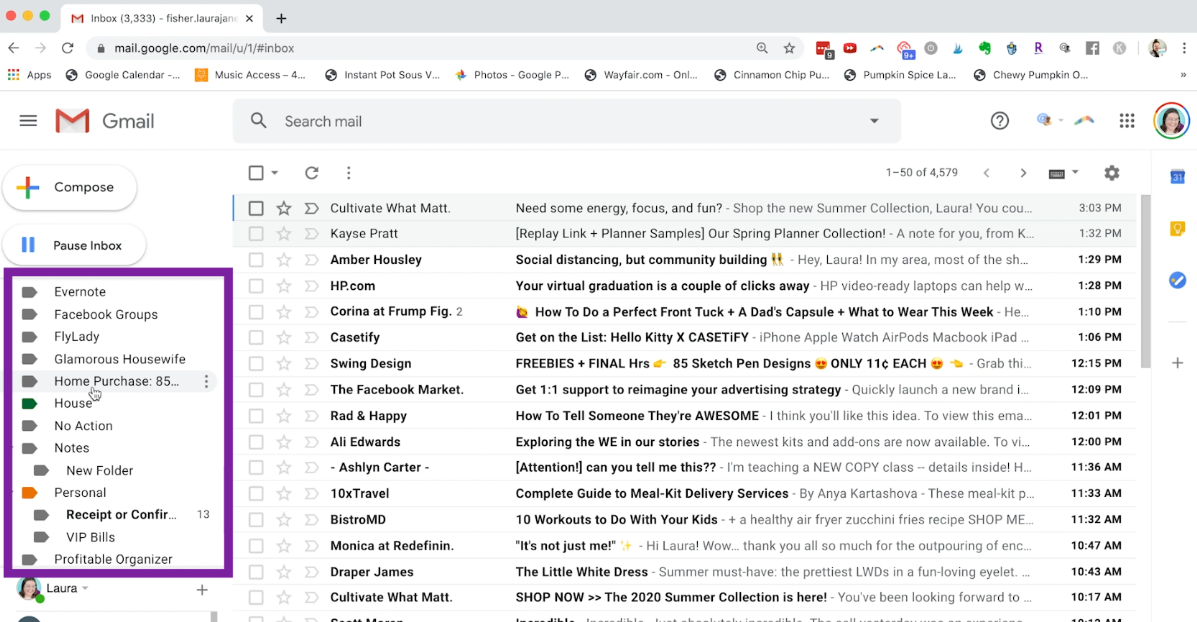
You may be asking: what do you do with those emails you’re not deleting or archiving? Well, if you look to the left side of your screen, there’s a section of what most people call folders. Technically, these are not folders, they are tags. Gmail’s term for them is “labels”. However, it does not matter much if you think of them or labels or folders – the process is the same. They are classifications for your emails.
You can have as many labels as you want and each label can have as many sub labels as you want. You can tell when a label is a sub label because it will be slightly indented on the list. The label above it is its “parent label” – or, the label it is nested inside. An important thing to note is that if you move something to a label, that email is still sitting in your “all mail” label. It only leaves the “all mail” when you actually click delete.
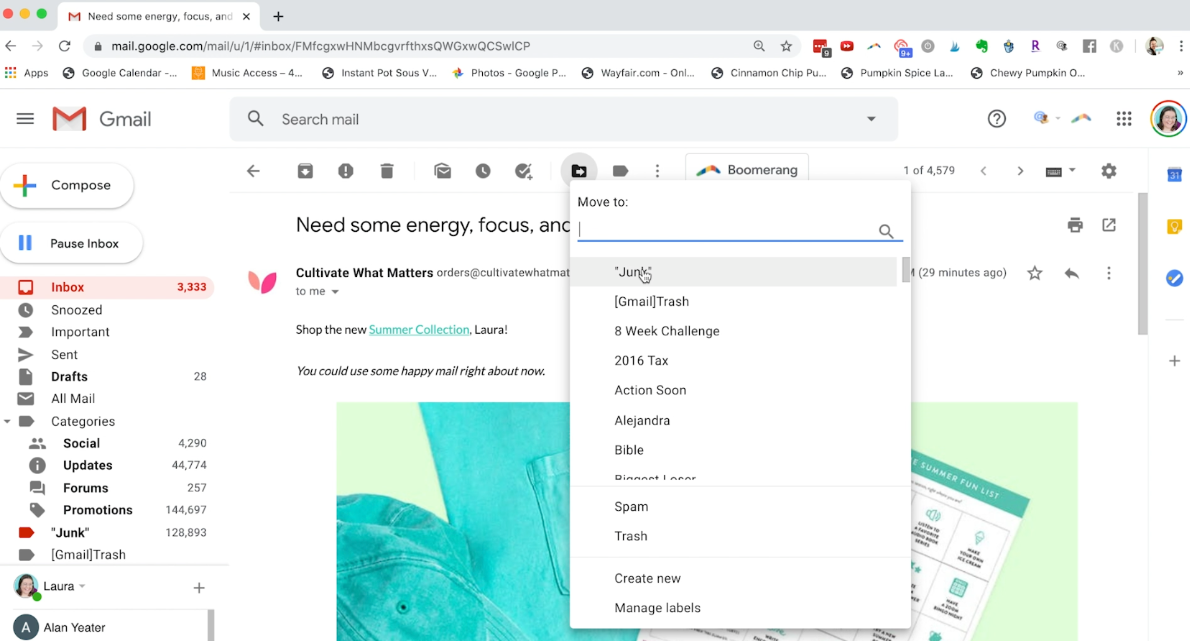
When you’re ready to move an email to a specific label, simply open the email, select the “move to” icon which is a folder with an arrow on it, and select what label you want that email to move to.
You can also access spam and trash from the move to dropdown menu. I recommend checking your spam periodically just to make sure you’re not missing something. The spam filters have gotten a little over zealous and I’ve found a message from a friend in my spam.
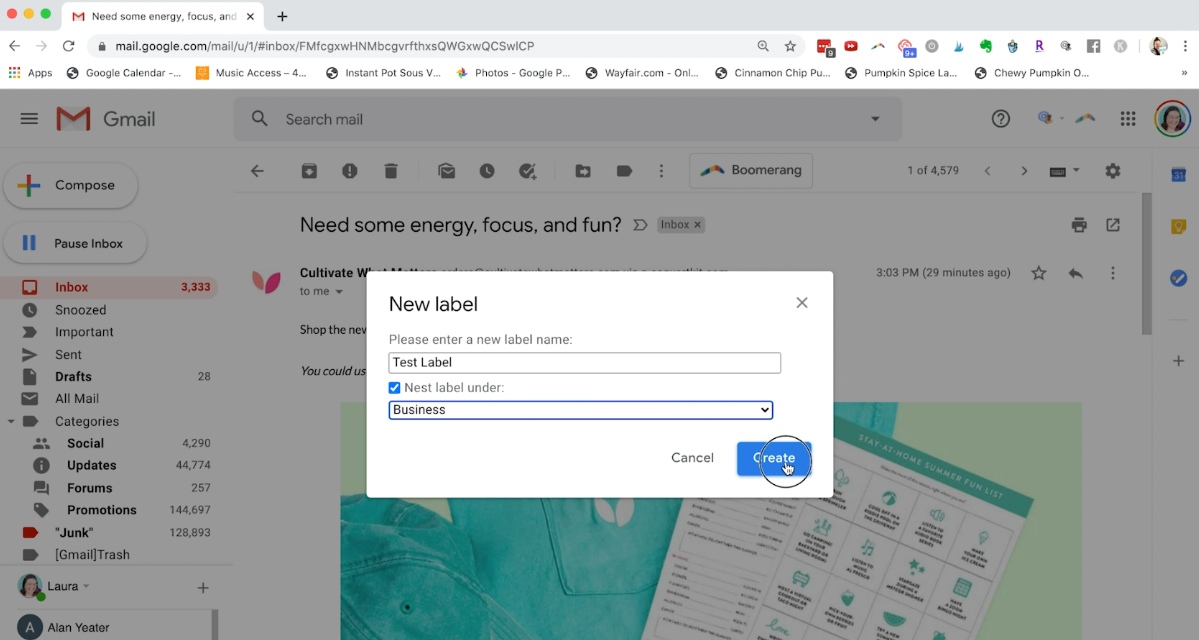
You can also create new labels. All you have to do is click “create new label” and give that label a name. If you want to make a sub label, you check that little box that says “nest label under” and select whatever label you want it to be under – it’s that easy.
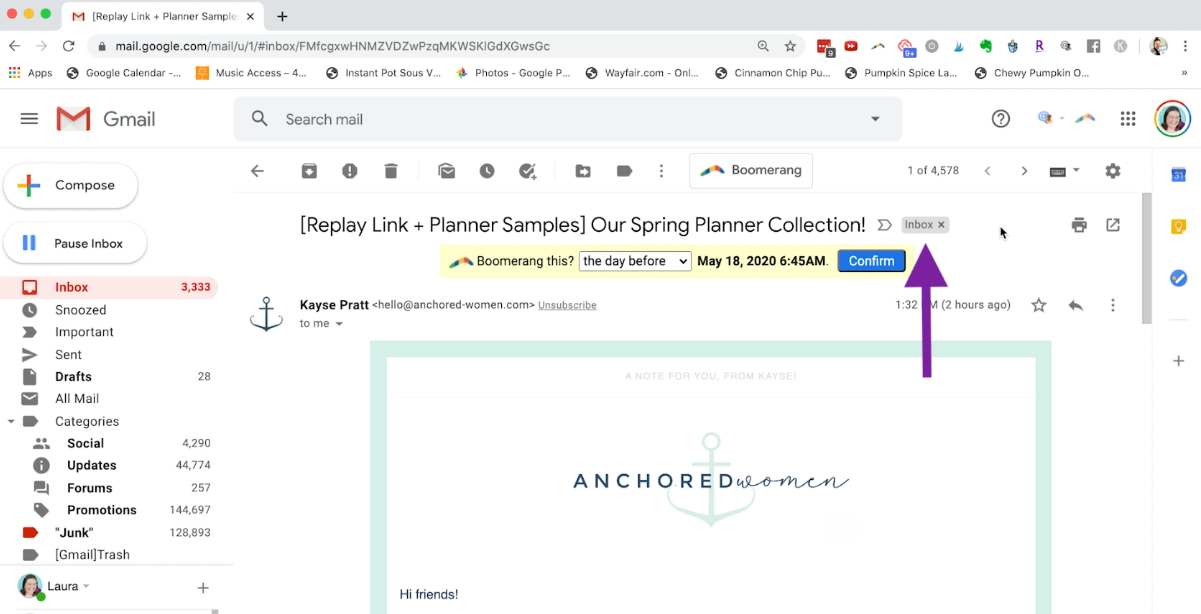
What is actually happening when you move an email is that it is removing the “inbox” tag and retagging it with a new label. Again, we can call them folders, but that isn’t actually what is happening. The labels are more like a tagging system. So, when you click on the label, it is going to show you every email with that tag. When you first receive an email, it automatically gets the “inbox” tag, which is how it shows up under that “inbox” label.
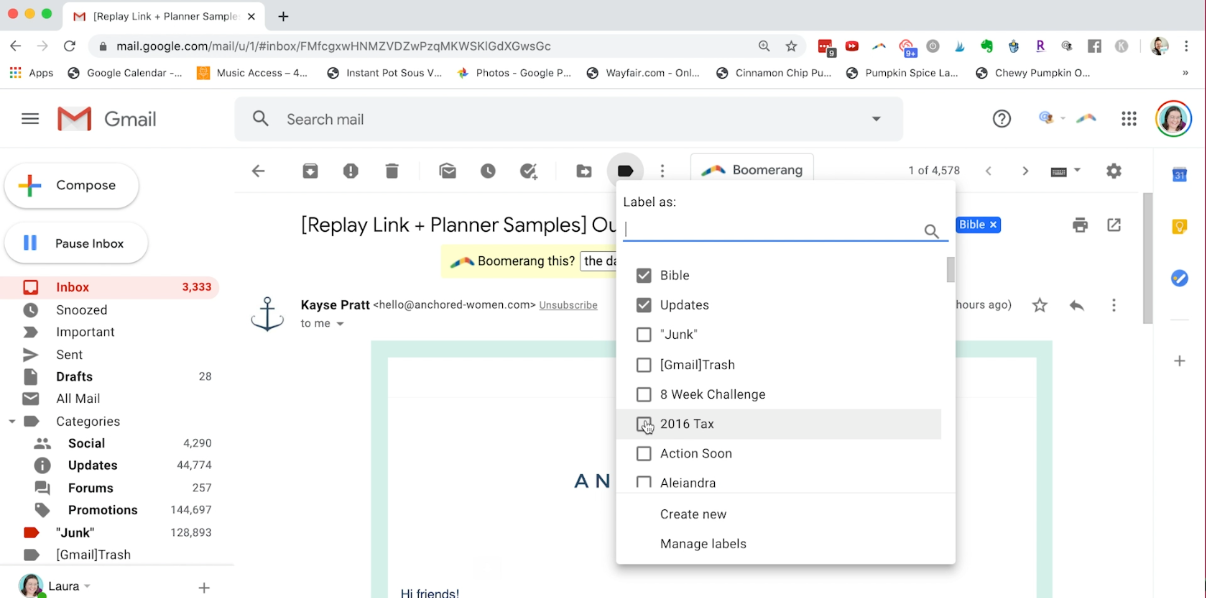
The good thing about this tagging system is that you can actually apply multiple labels to one email. When you want to apply a label, click the little flag icon (right next to the move to icon) and then hit the check mark for each label you’d like the email to apply to. Be sure to click “apply” at the bottom of the dropdown menu for your labels to take effect.
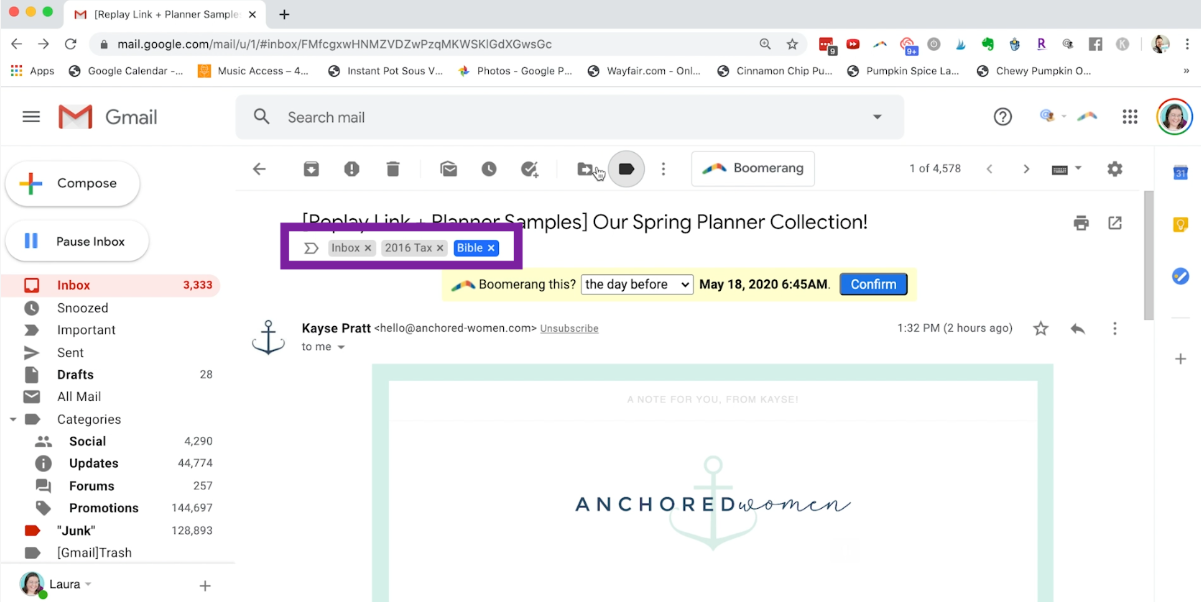
You can always see what labels are applied to each individual email. The tags will appear in small boxes right after or below the email subject. To remove a tag, simply click the little x next to the label.
EMAIL MANAGEMENT: CREATING FILTERS
One of the most powerful tools is to create filters for your inbox. This will create certain “rules” that will keep specific types of emails from hitting your inbox. These are emails you still want to receive, but maybe they don’t require immediate action or you don’t need to see them regularly. For example, I know I don’t need to know every time Old Navy has a sale. However, if I am going to Old Navy, I know that any promotional emails they’ve sent will be waiting for me in my filtered folder.
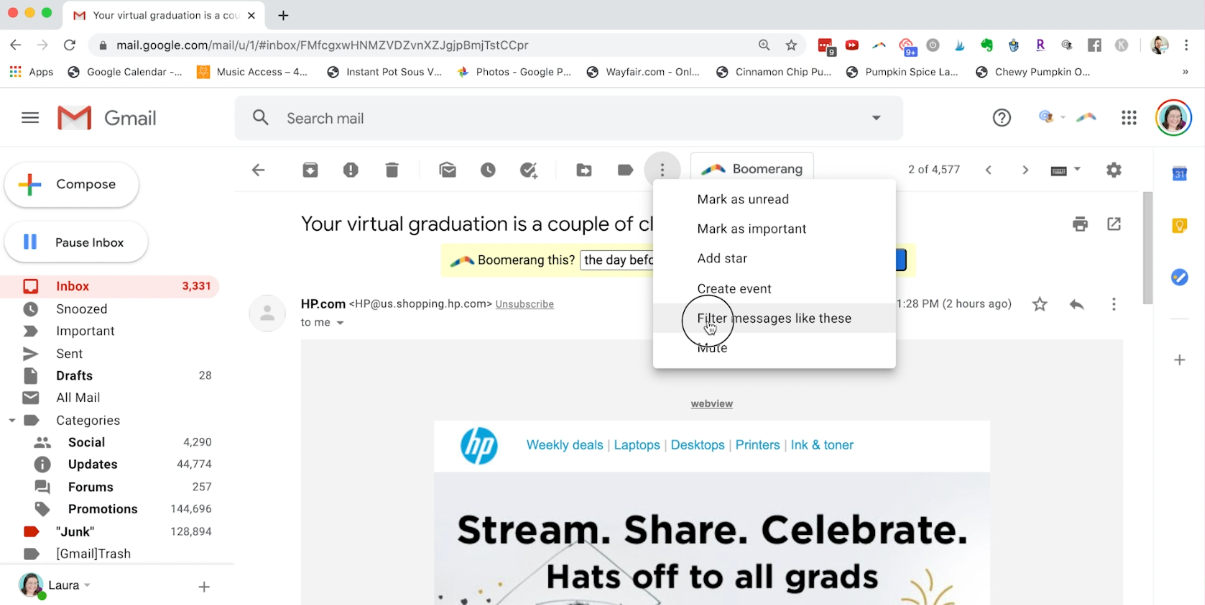
To create a filter for an email, hit the three dots on the menu (located right next to that create label icon we just talked about) and select “filter messages like these”.
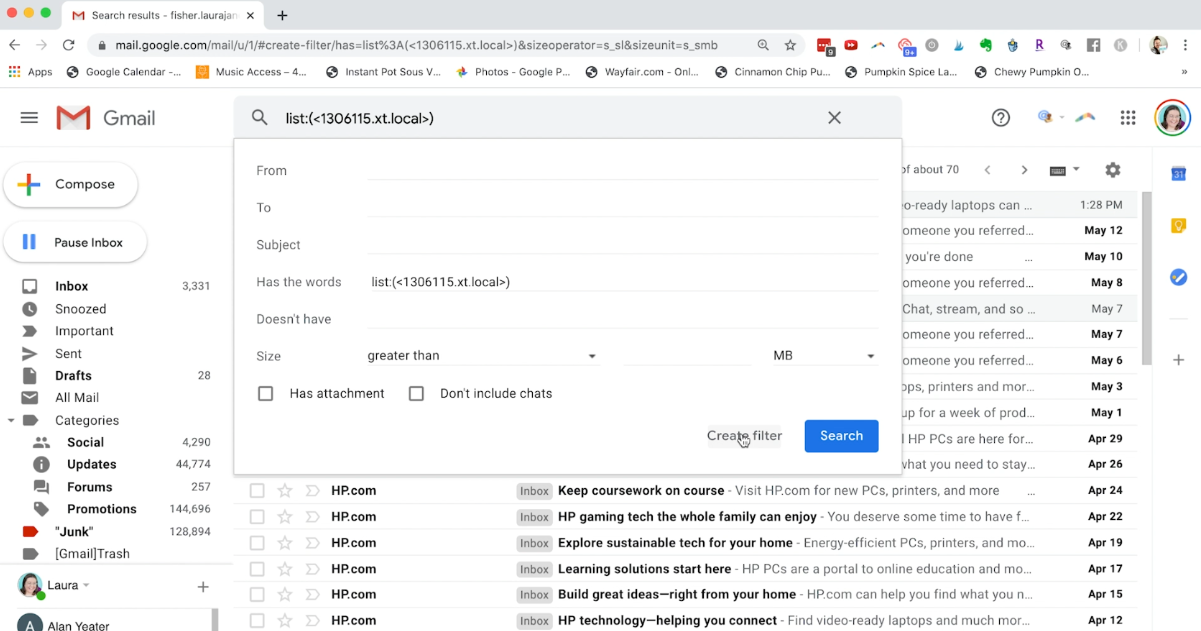
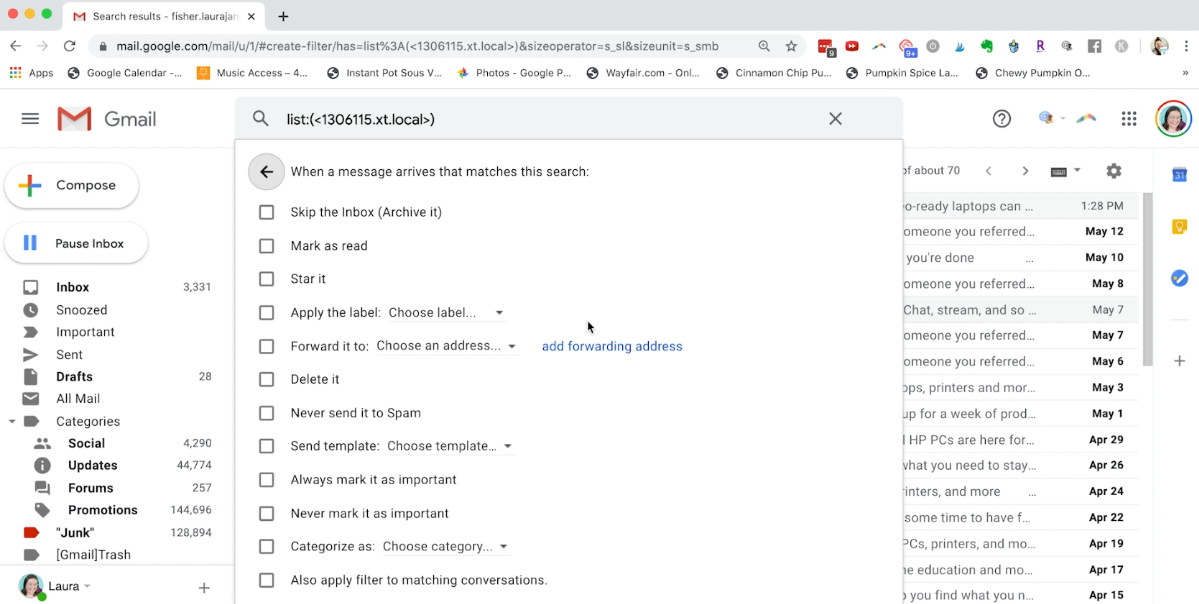
Once selected, a menu pops up asking you what aspect of the email triggers it to be filtered. You can indicate that emails from a specific sender or of a specific size should be filtered. Really, the sky is the limit here.
Once you create the filter, it will ask you what to do with emails that meet the criteria you mentioned. This is where you can really get into some interesting options in those nitty gritty details. Anything you can dream up, you can most likely accomplish. Automatically archive certain emails, or tag them with automatic labels – I encourage you to play around with this tool to really get to know all the things you can do.
EMAIL MANAGEMENT: QUICK TIPS AND TRICKS
Gmail offers you the ability to star or mark an email as important. These icons appear to the left of each email and are indicated by a star icon and flag icon, respectively. When marking an email as important, Google is going to try to “learn” what types of things you find important and populate the important tag for you.
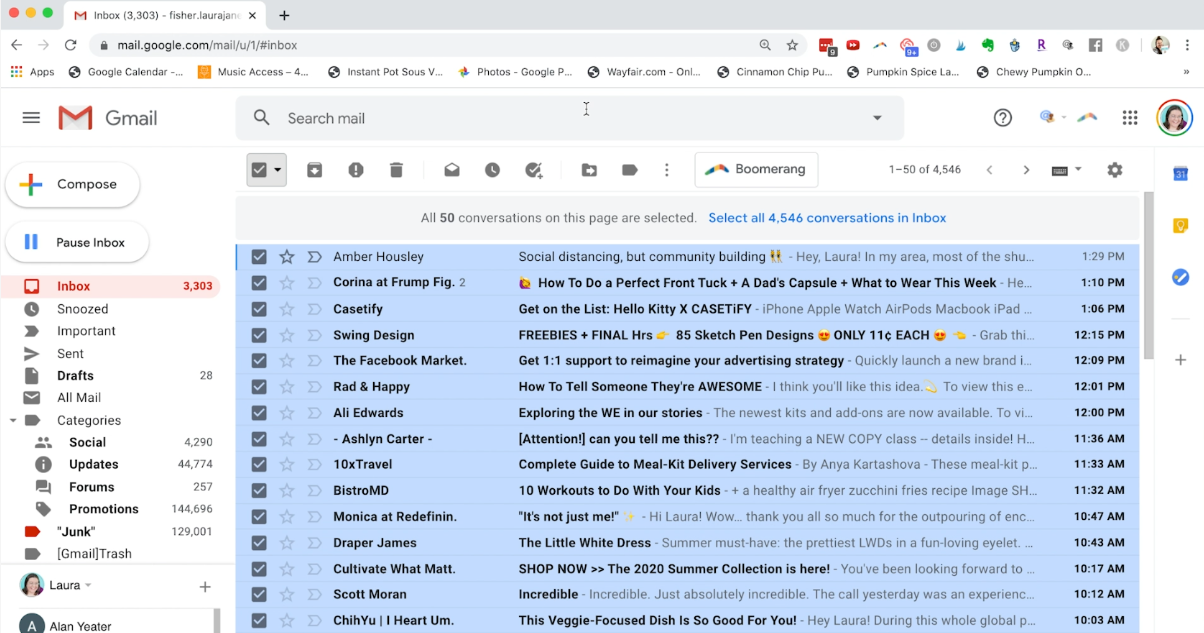
The box to the left of the star icon indicates selecting more than one email. You can select all of your emails by clicking the “select” box at the top of the screen. Any action you take will apply to all the emails you have selected.
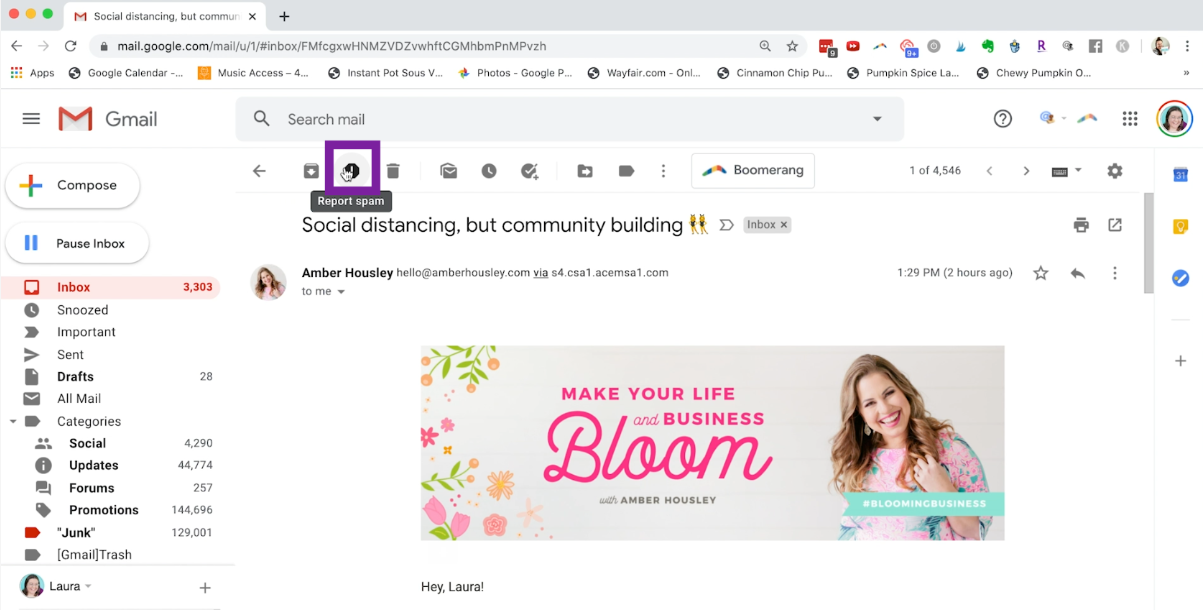
When marking an item as spam, be sure you’re using that “report as spam” button only for emails that are truly spam. If you subscribed to a newsletter and you no longer want it, don’t mark it as spam, just go ahead and unsubscribe. Reserve your spam folder for things where the sender is attempting to scam you or in situations where you never gave the sender your email in the first place.
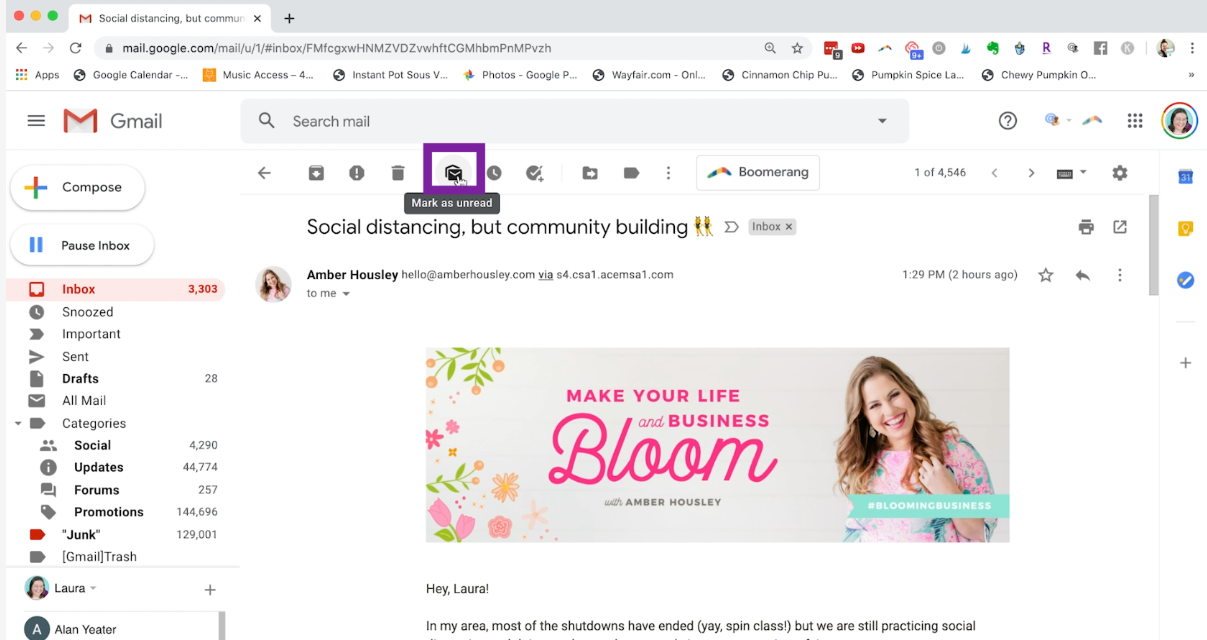
You can always go back and mark an email as unread. Maybe you opened up an email you didn’t have time to completely read or you haven’t responded to it yet. Select the “mark as unread” icon, which is the little closed envelope icon next to the delete button.
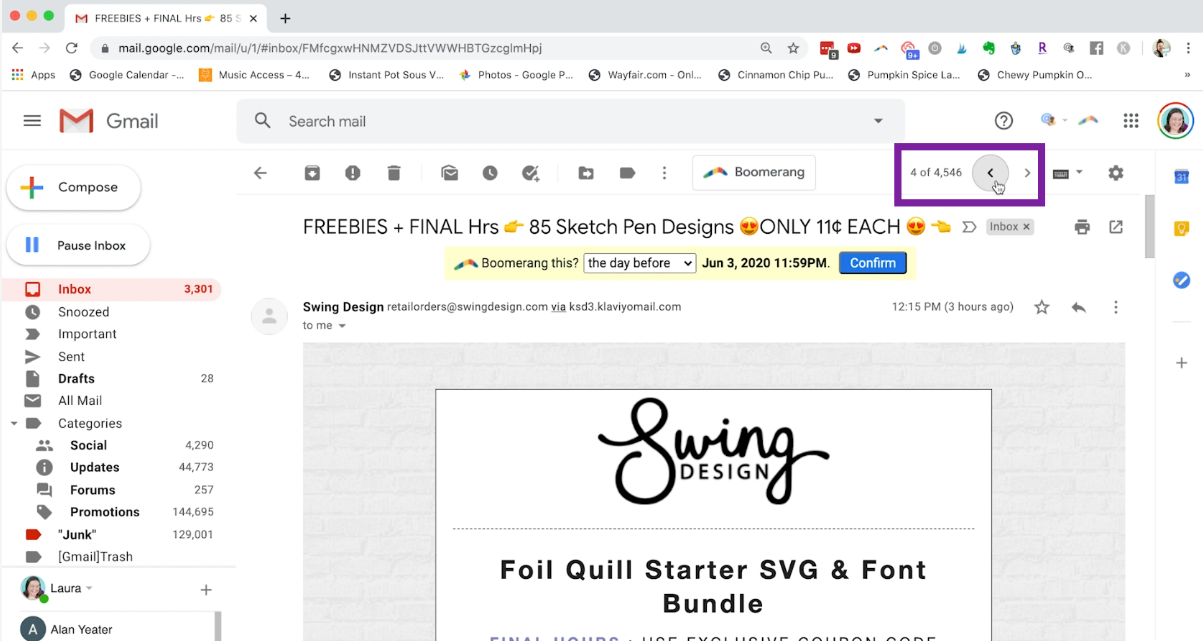
If you ever want to move from one email to the next, you don’t have to go back to your main view every time. A feature often overlooked are the two arrow keys at the top right. This allows you to scroll through your emails in order, simply by clicking the next or previous buttons.
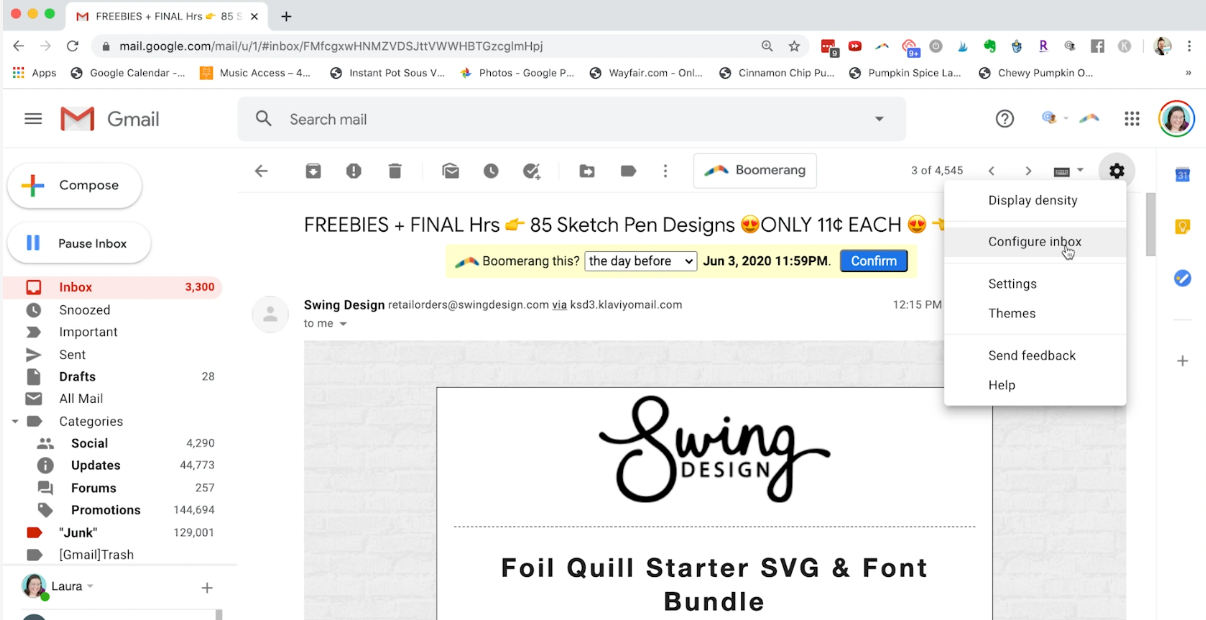
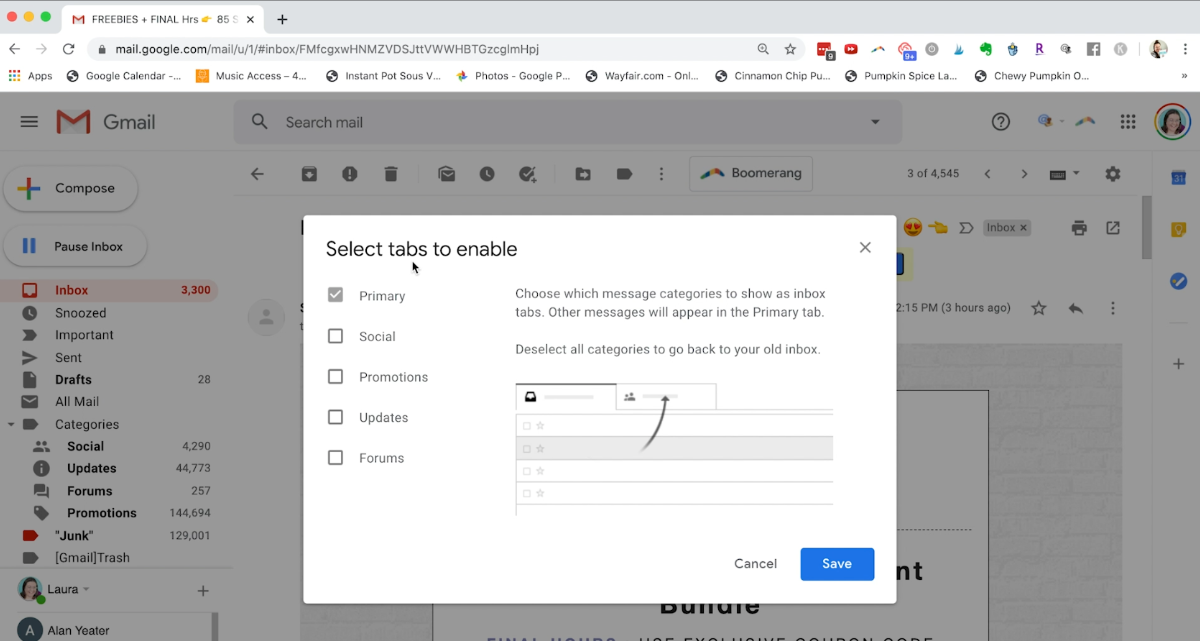
You may see, at the top of your inbox, little tabs that say “primary”, “social”, “promotions”, “updates”, and “forums.” These tabs are different categories that Google tries to automatically sort your emails into. I highly suggest turning these little category tabs off. The reason for this is that Google sometimes makes mistakes and I don’t want to miss out on something because it went to the wrong category. And, I just like having complete control over where my emails are sorted. To turn these off, go to settings > configure inbox. Then, in the next pop up window, simply uncheck all the boxes except for “primary”.
Whew. I know, that was a lot of information to take in. But I think that these tips and tricks will really help you navigate your email with ease and clarity. So, keep at it, refer back to this post when you need it, and keep learning! You can do this! Email management is just like any other habit – so keep working and you’ll be meeting your goals in no time!






 Copyright 2025, Get Organized HQ.
Audrey Berry Says
These are great tips–thanks for sharing! I didn’t realize that I could put multiple labels on things (or remove them) from the top tab. Also, thanks for explaining the All Mail thing. It helps me understand where my email is really located vs. what labels it has. I think I will be able to use the labels more effectively now, especially knowing I can add and subtract labels without deleting the email.
Tammy Says
Any tips on managing emails when primarily using a mobile device?
Nicole Says
Two things…
1 – thank you for doing the blog post in addition to the video. I don’t watch videos, usually, because my computer doesn’t open YouTube and I rarely go back to watch on my phone.
2 – This was the most helpful information and explanation on gmail I have ever seen!