Creating Back to School Routines with My Cricut Maker
It’s back to school time and what better way to get your kiddos back into their routine than with a little Cricut Maker project?
I know with the current state of things, “back to school” can be a loaded statement. Maybe you’re sending your kids back to school, maybe your family is tackling virtual learning, or maybe you’re trying out homeschooling. (If one of those statements rings true for you, keep your eyes peeled for my upcoming blog post about Surviving the Schooly Year! ? I’ll link to it here once it’s up!) But no matter what this season looks like for you and your family, one thing is always true – it’s helpful to get into a routine as quickly as possible!
Establishing a routine is helpful for you and your children. It’s kind of remarkable just how much I tend to fall back on my routine when life gets a little unpredictable, and I think it’s safe to say the same applies to you! So, as we head into this time of transition, it’s going to be a major win for you and your family to have those routine moments of certainty to hang onto.
As for my family, I’ve got two little ones and with the school year starting, I have been trying to establish our new daily routine. My youngest is 4 and still needs quite a bit of help in this department, so I knew I wanted to help Timothy shift to a school schedule by making a Cricut Maker project. Luckily, I’ve got my handy Cricut Maker to help me out with just that!
This post does contain affiliate links, which means that at no additional cost to you, I earn a commission. I only recommend products I use and love and would recommend to my best friend!
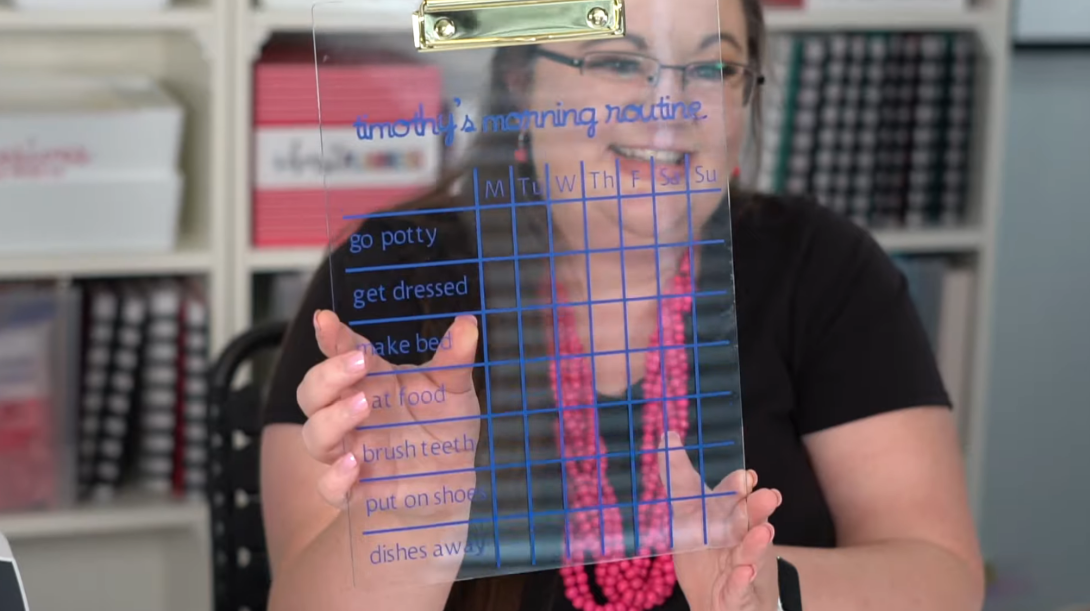
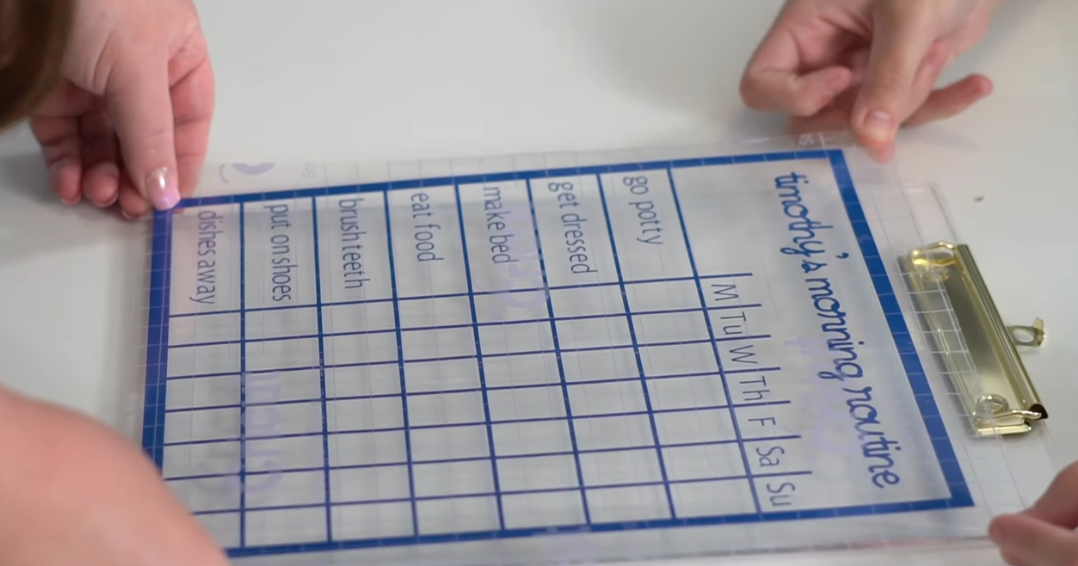
I knew I wanted to make Timothy a morning checklist he could interact with – who doesn't love checking off a to-do list? That interactive component is a really big motivator for kids, so I decided to use clear acrylic clipboards and Cricut’s Premium Vinyl to make this little chart so that he can check off every part of his morning routine every day of the week. And I discovered that you can use dry erase markers on these clipboards. That is such a cool feature that I absolutely love, and so does my son!
I’m so excited about this project that I had to share my whole creative process with you. If you’re interested in making this project yourself, I’ve got step-by-step instructions to get you creating a routine in no time – just check out the video below! And if you want to get a little jump start, you can download my design right into your Cricut Design Space.
The best way to get the full experience for this Cricut Created project is through watching the video above. But if you’re like me, research is a big part of any project! If you’re just getting started with your own Cricut Maker, I’ve compiled a couple of tips so you can have a jump start before diving into the video.
Cricut Maker Project Tip #1: Give Yourself a Weeding Box
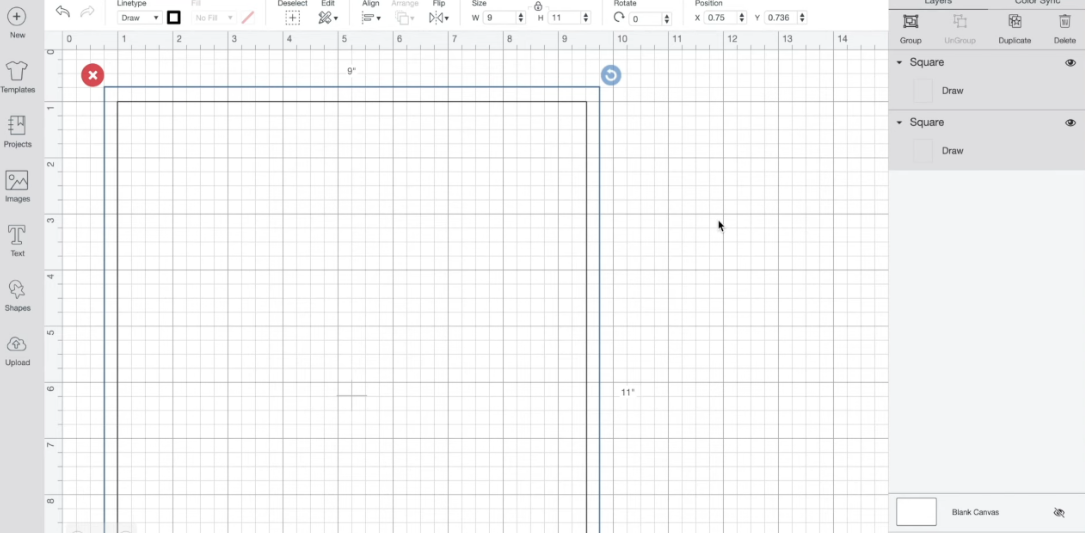
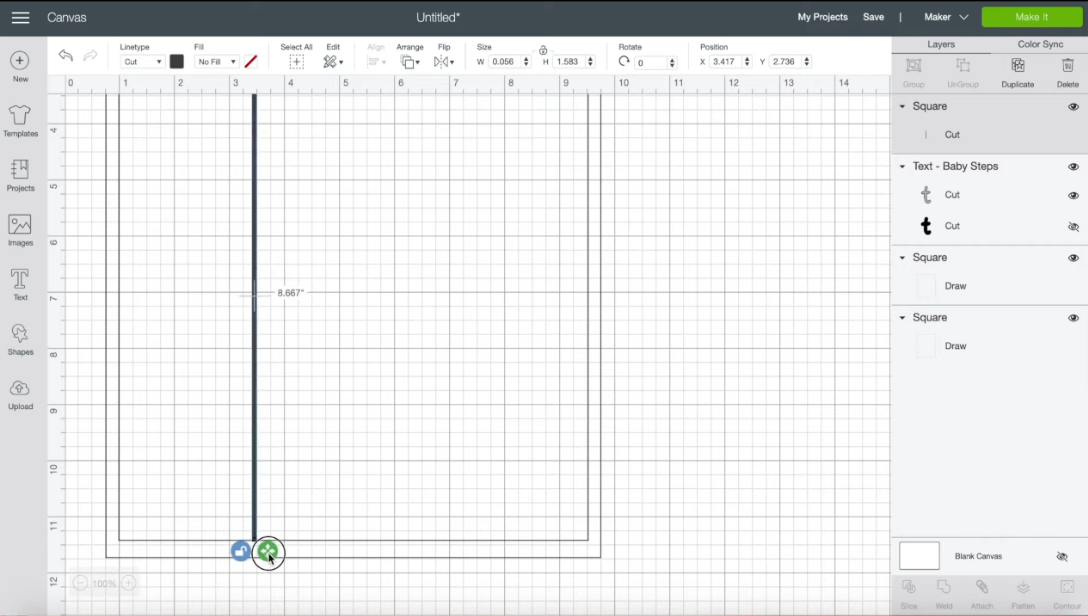
A little hack I’ve found while making my own Cricut Maker project is that it’s always helpful to make a weeding box. Basically, I create a box around my entire project that I take off at the very end of the process. This helps with the weeding process AND can be used as a guide when you’re working with your cut vinyl.
You can see in the picture below, I had my box created before any other part of my design. As an added bonus, it is a clear guide for the rest of my project, which will fit within that box.
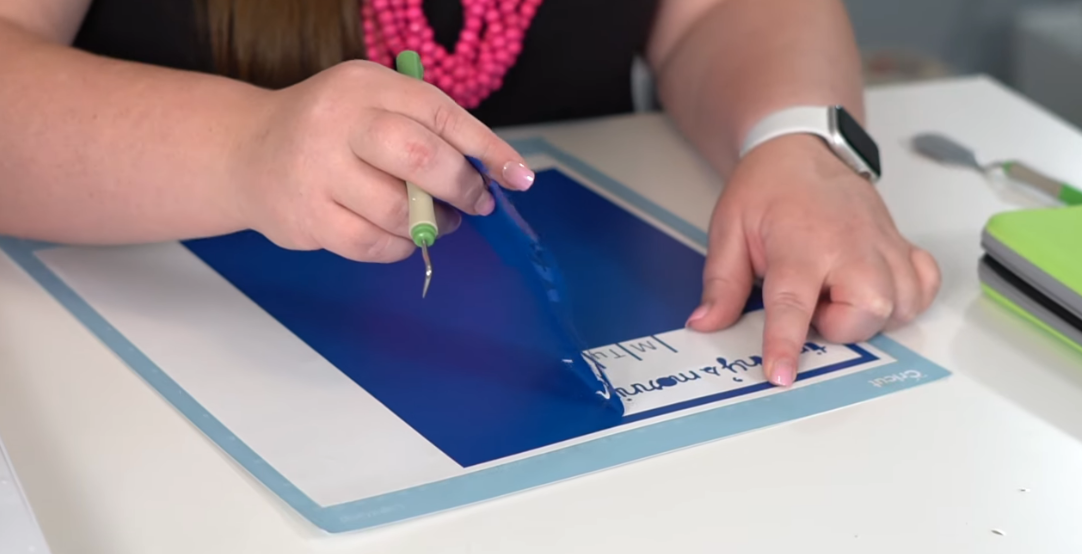
And, in this photo, you can see the box really helped with the wedding process, especially since this Cricut Maker project had a lot of thinner pieces and delicate font to work with.
Cricut Maker Project Tip #2: Get Creative with Shapes
Shapes are the basic building blocks in several different mediums, and your Cricut Maker project is no exception! Shapes may seem simple, but with your imagination, the sky is truly the limit. Overlap shapes to make images, use them as accents, or change them to create something new!
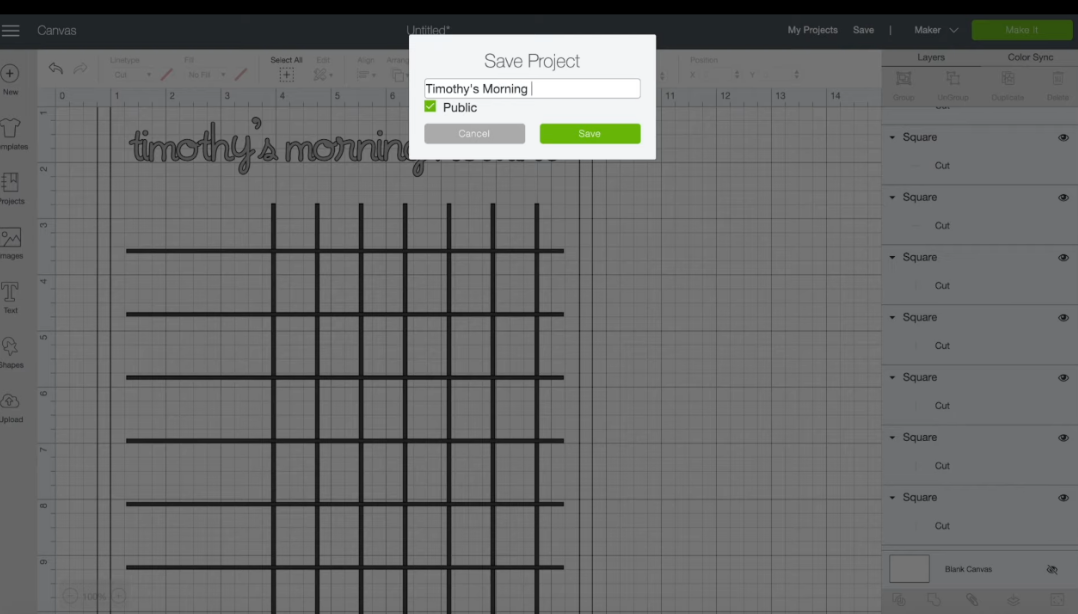
In my project, I took squares and turned them into thick lines. It may seem a little simple, but you can do so much more with shapes than you may have thought! You can see in the photo below how I created the lines of my chart by making long, thin rectangles, which ultimately gave me a lot of flexibility and control over how my finished product looked.
Cricut Maker Project Tip #3: Duplicate for Perfection
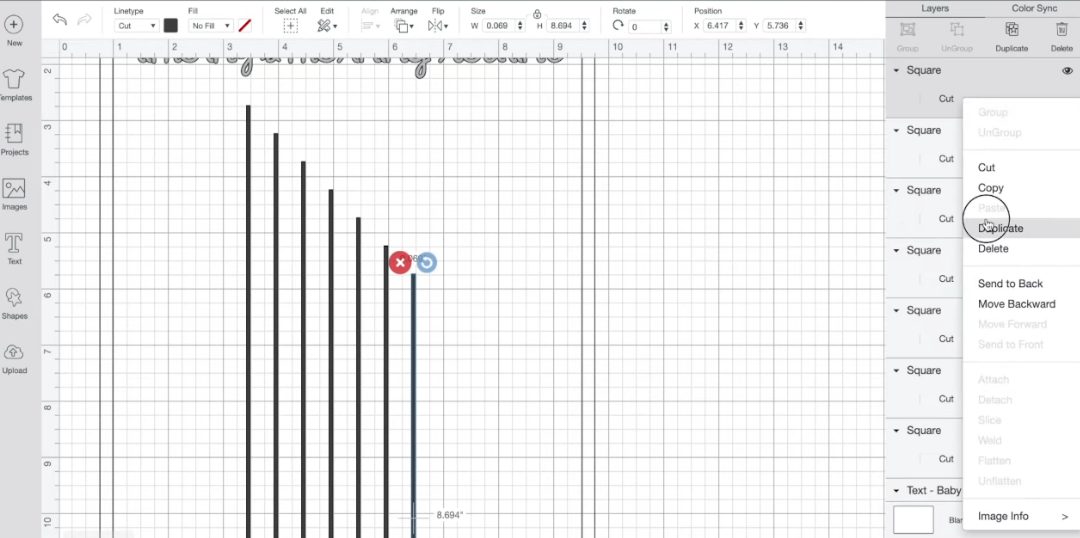
In the Cricut Design Space, there are a lot of bells and whistles at your disposal. Sometimes the best tool is the simplest. You can right click on any shape and select “Duplicate” to create a copy of that shape. This little tip is great for creating multiple of the same shape or confirming certain shapes are the same length. I even use this little trick to see how a shape looks in a different spot before moving the original.
In my latest project, I needed to create lines that were all the same length and thickness – the Duplicate option was just what I needed!
Cricut Maker Project Tip #4: Use What Cricut Gave Ya!
Remember what I said about all the bells and whistles? Well, Cricut gives you a LOT to play with in their Design Space. From templates to rulers to movement, the Design Space seems to do it all. I encourage you to play in the space for yourself! But I’ll clue you in to a couple little tips that saved me a bunch of time on my last Cricut Maker project.
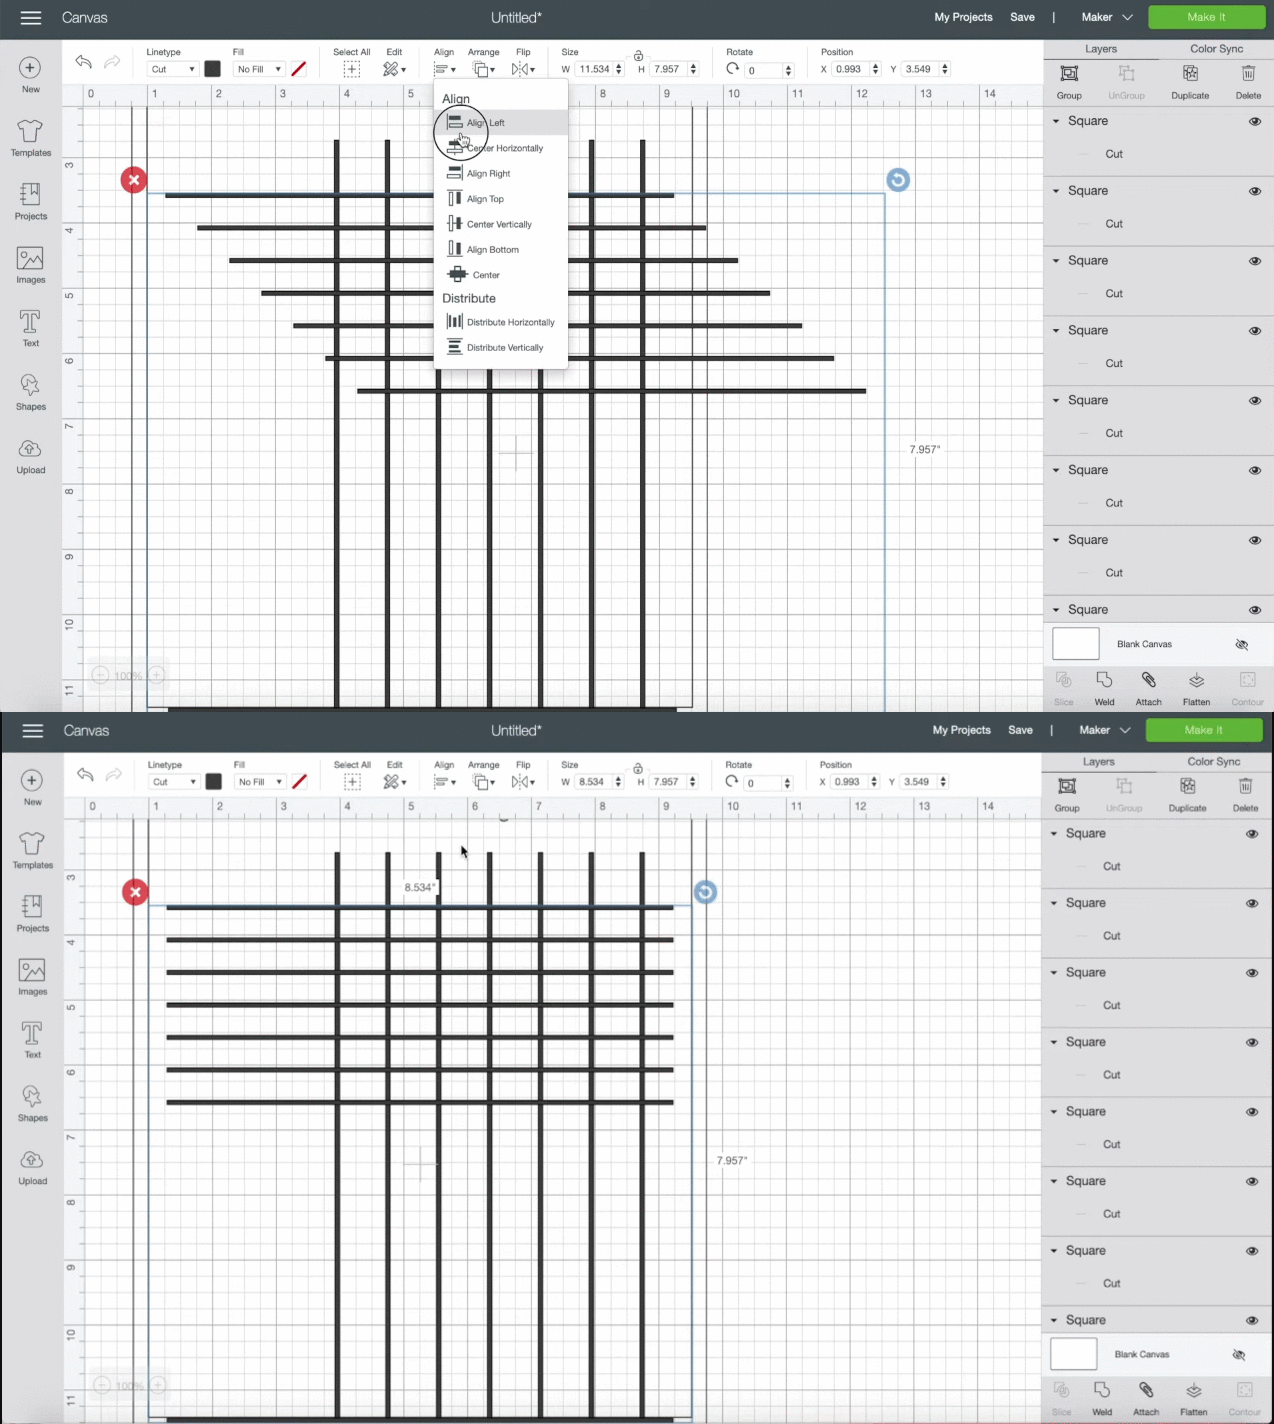
First was the ability to align all your selected shapes to one side or to the center. I had previously created seven different lines. I selected all my lines, clicked on align to the left, and bam! All my lines were in a nice, straight little row.
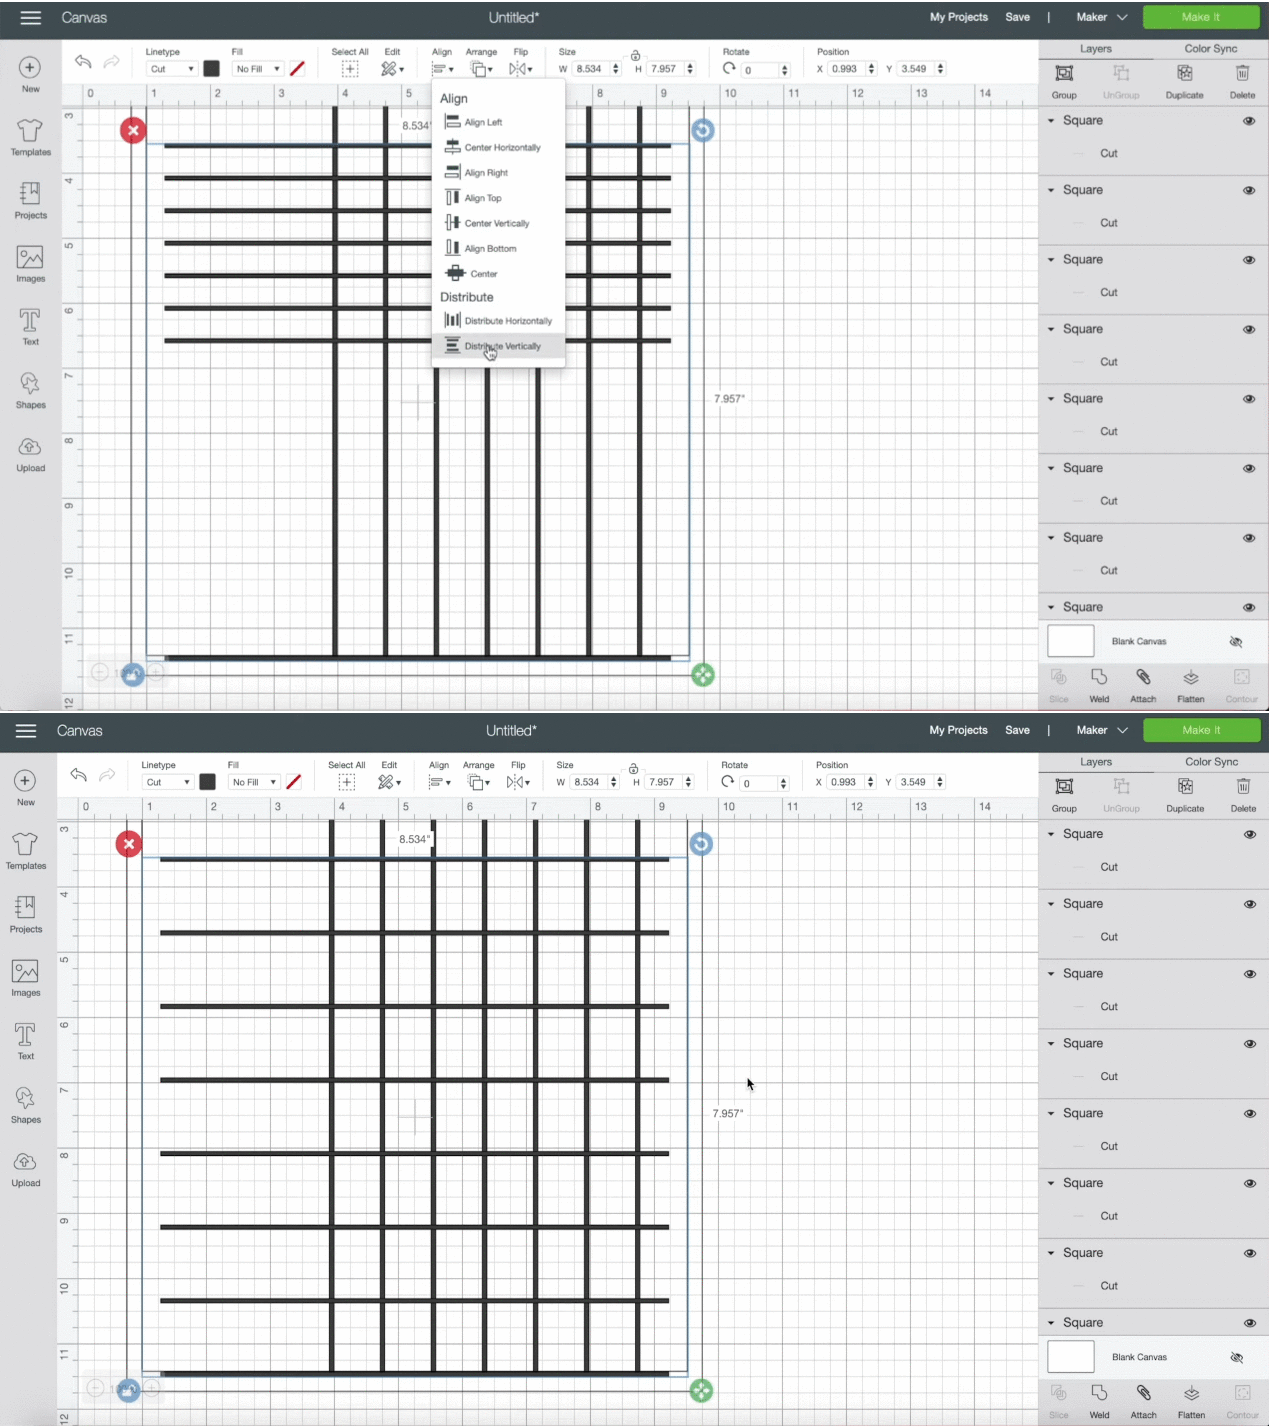
Next, is the distribute option. When I was making my chart, I created an extra little line and put it at the very bottom of my chart. I then selected the top line and every line in between. Once I hit “Vertical Distribution”, all my lines were evenly spaced across my chart – and I didn’t even have to lift a finger!
Cricut Maker Project Tip #5: Save Often!
This tip is pretty self explanatory, but it’s a life saver! Save your work and save often! There’s nothing more frustrating than losing work and having to redo your whole project.
Cricut Maker Project Tip #6: Grab a Buddy
If you watch the video above, you’ll see that I was able to apply my Cricut StrongGrip Transfer Tape much easier when I had a friend to help me out. It’s not impossible to do this on your own, but everything is easier with a second pair of hands. Not to mention, it’s more fun that way! For instance, my daughter has a knack for weeding and loved helping me with my Cricut Maker project!
Those are my best starting tips for the Cricut Maker! You’re ready to start your own project. Once again, don’t forget to check out the video that will take you step by step through how to make the chart I made for my son. Or, create your own project from scratch. I can’t wait to see what you create!






 Copyright 2026, Get Organized HQ.